Halloween 2022: How I Made Costumes for Monty Python & the Quest for the Holy Grail
It’s that time of year again! Spooky season. Every October I sit down and decide what costume I want to make for Halloween this year. Sometimes I just make a costume for myself (like when I dressed up as Daenerys Targaryen) and sometimes I make a group costume for my friends and I (like when we all went as the Loki variants). This year it was the latter, we always talked about dressing as characters from Monty Python & the Quest for the Holy Grail, and this year we finally decided to put this plan into action.

Halloween 2017: Daenerys Targaryen

Halloween 2021 L to R: TVA Loki, Sylvie, President Loki, & Alligator Loki
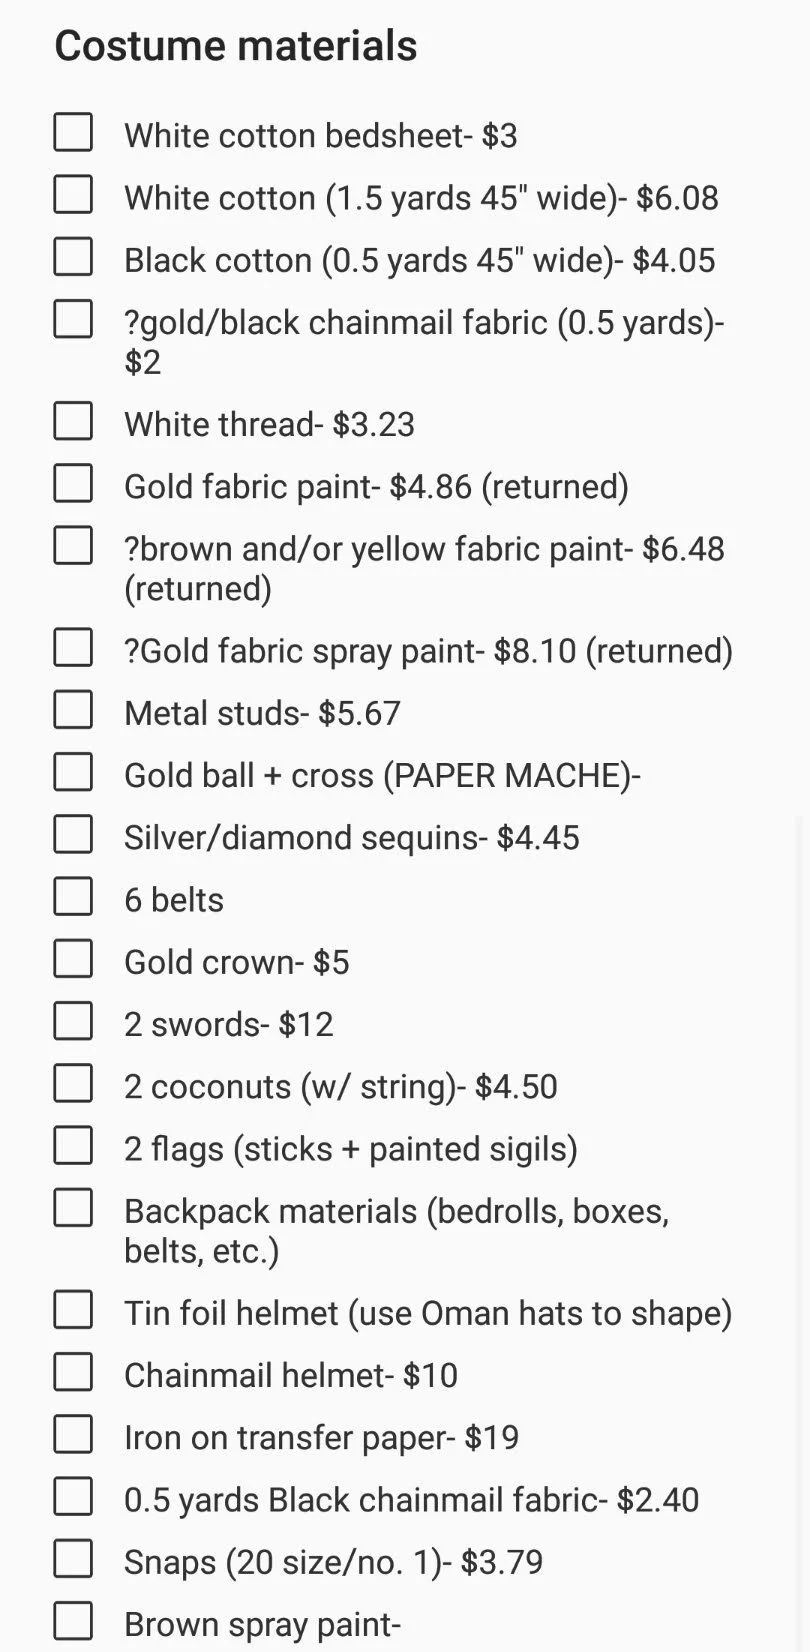
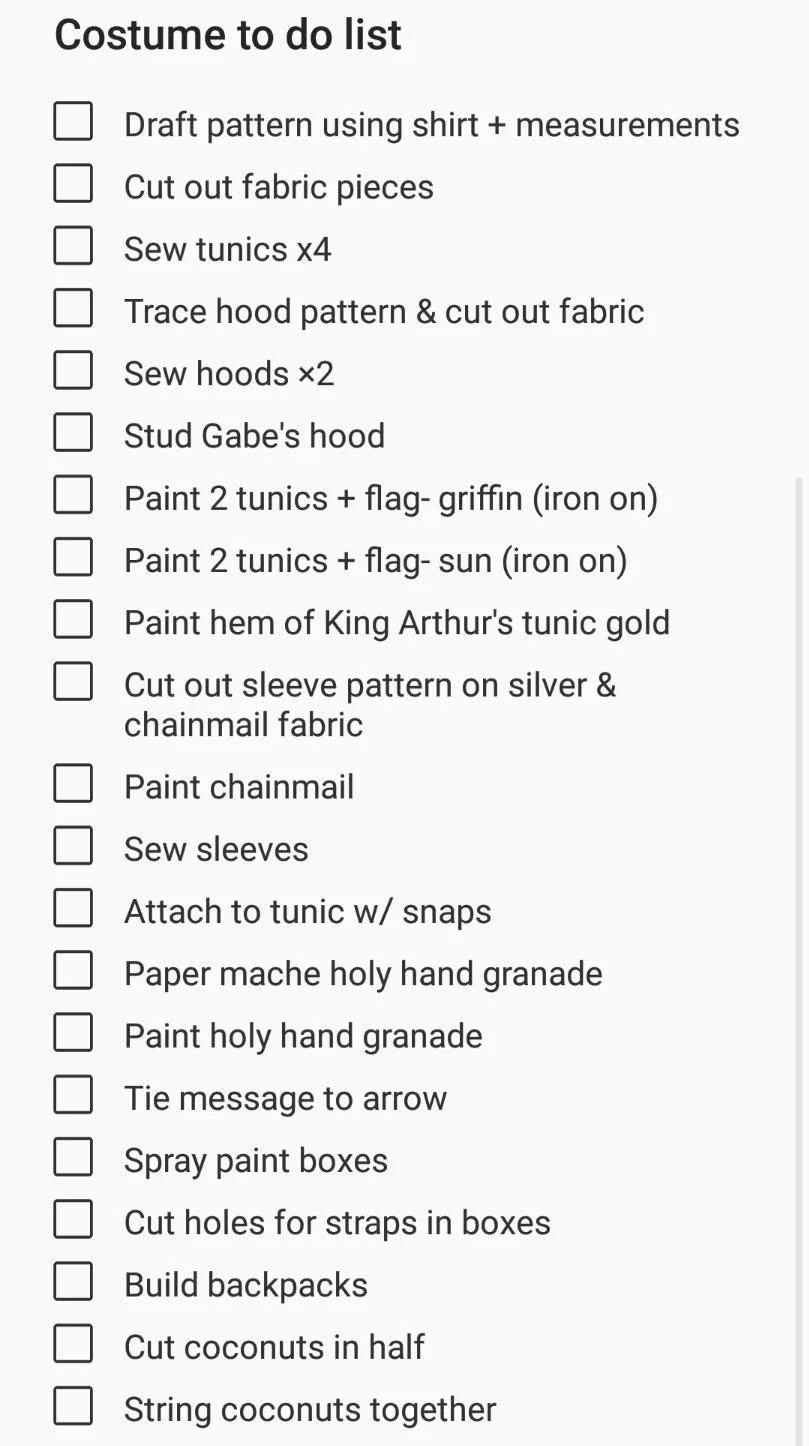
I absolutely love cosplay and sewing so had few qualms about taking on the daunting task of making 4 costumes over the course of about 2 weeks. After deciding who would be which character (in the end we went with Krista=King Arthur, Meghan=Patsy, Myself=Sir Lancelot, & my brother=Concorde), and estimating a budget that everyone would contribute to, the next step was to watch the film and take lots of pictures of the costumes for reference. Then I made a list of supplies I would need to make them. Almost all my materials came from either my own costuming stash, Goodwill, and Joann Fabrics (with the exception of the plastic swords & crown which I bought at Party City). Once I had everything I needed, I sat down at my sewing machine and began.
The first step was making 4 tunics, 2 short and 2 long. I needed white fabric for King Arthur, Patsy, and Concorde whereas Lancelot’s tunic was half black and half white. I found a striped, ivory, 100% cotton bed sheet at Goodwill that gave me enough fabric to make the first 3 tunics. I then bought 0.5 yards of 100% cotton fabric in white and black for Lancelot’s tunic.
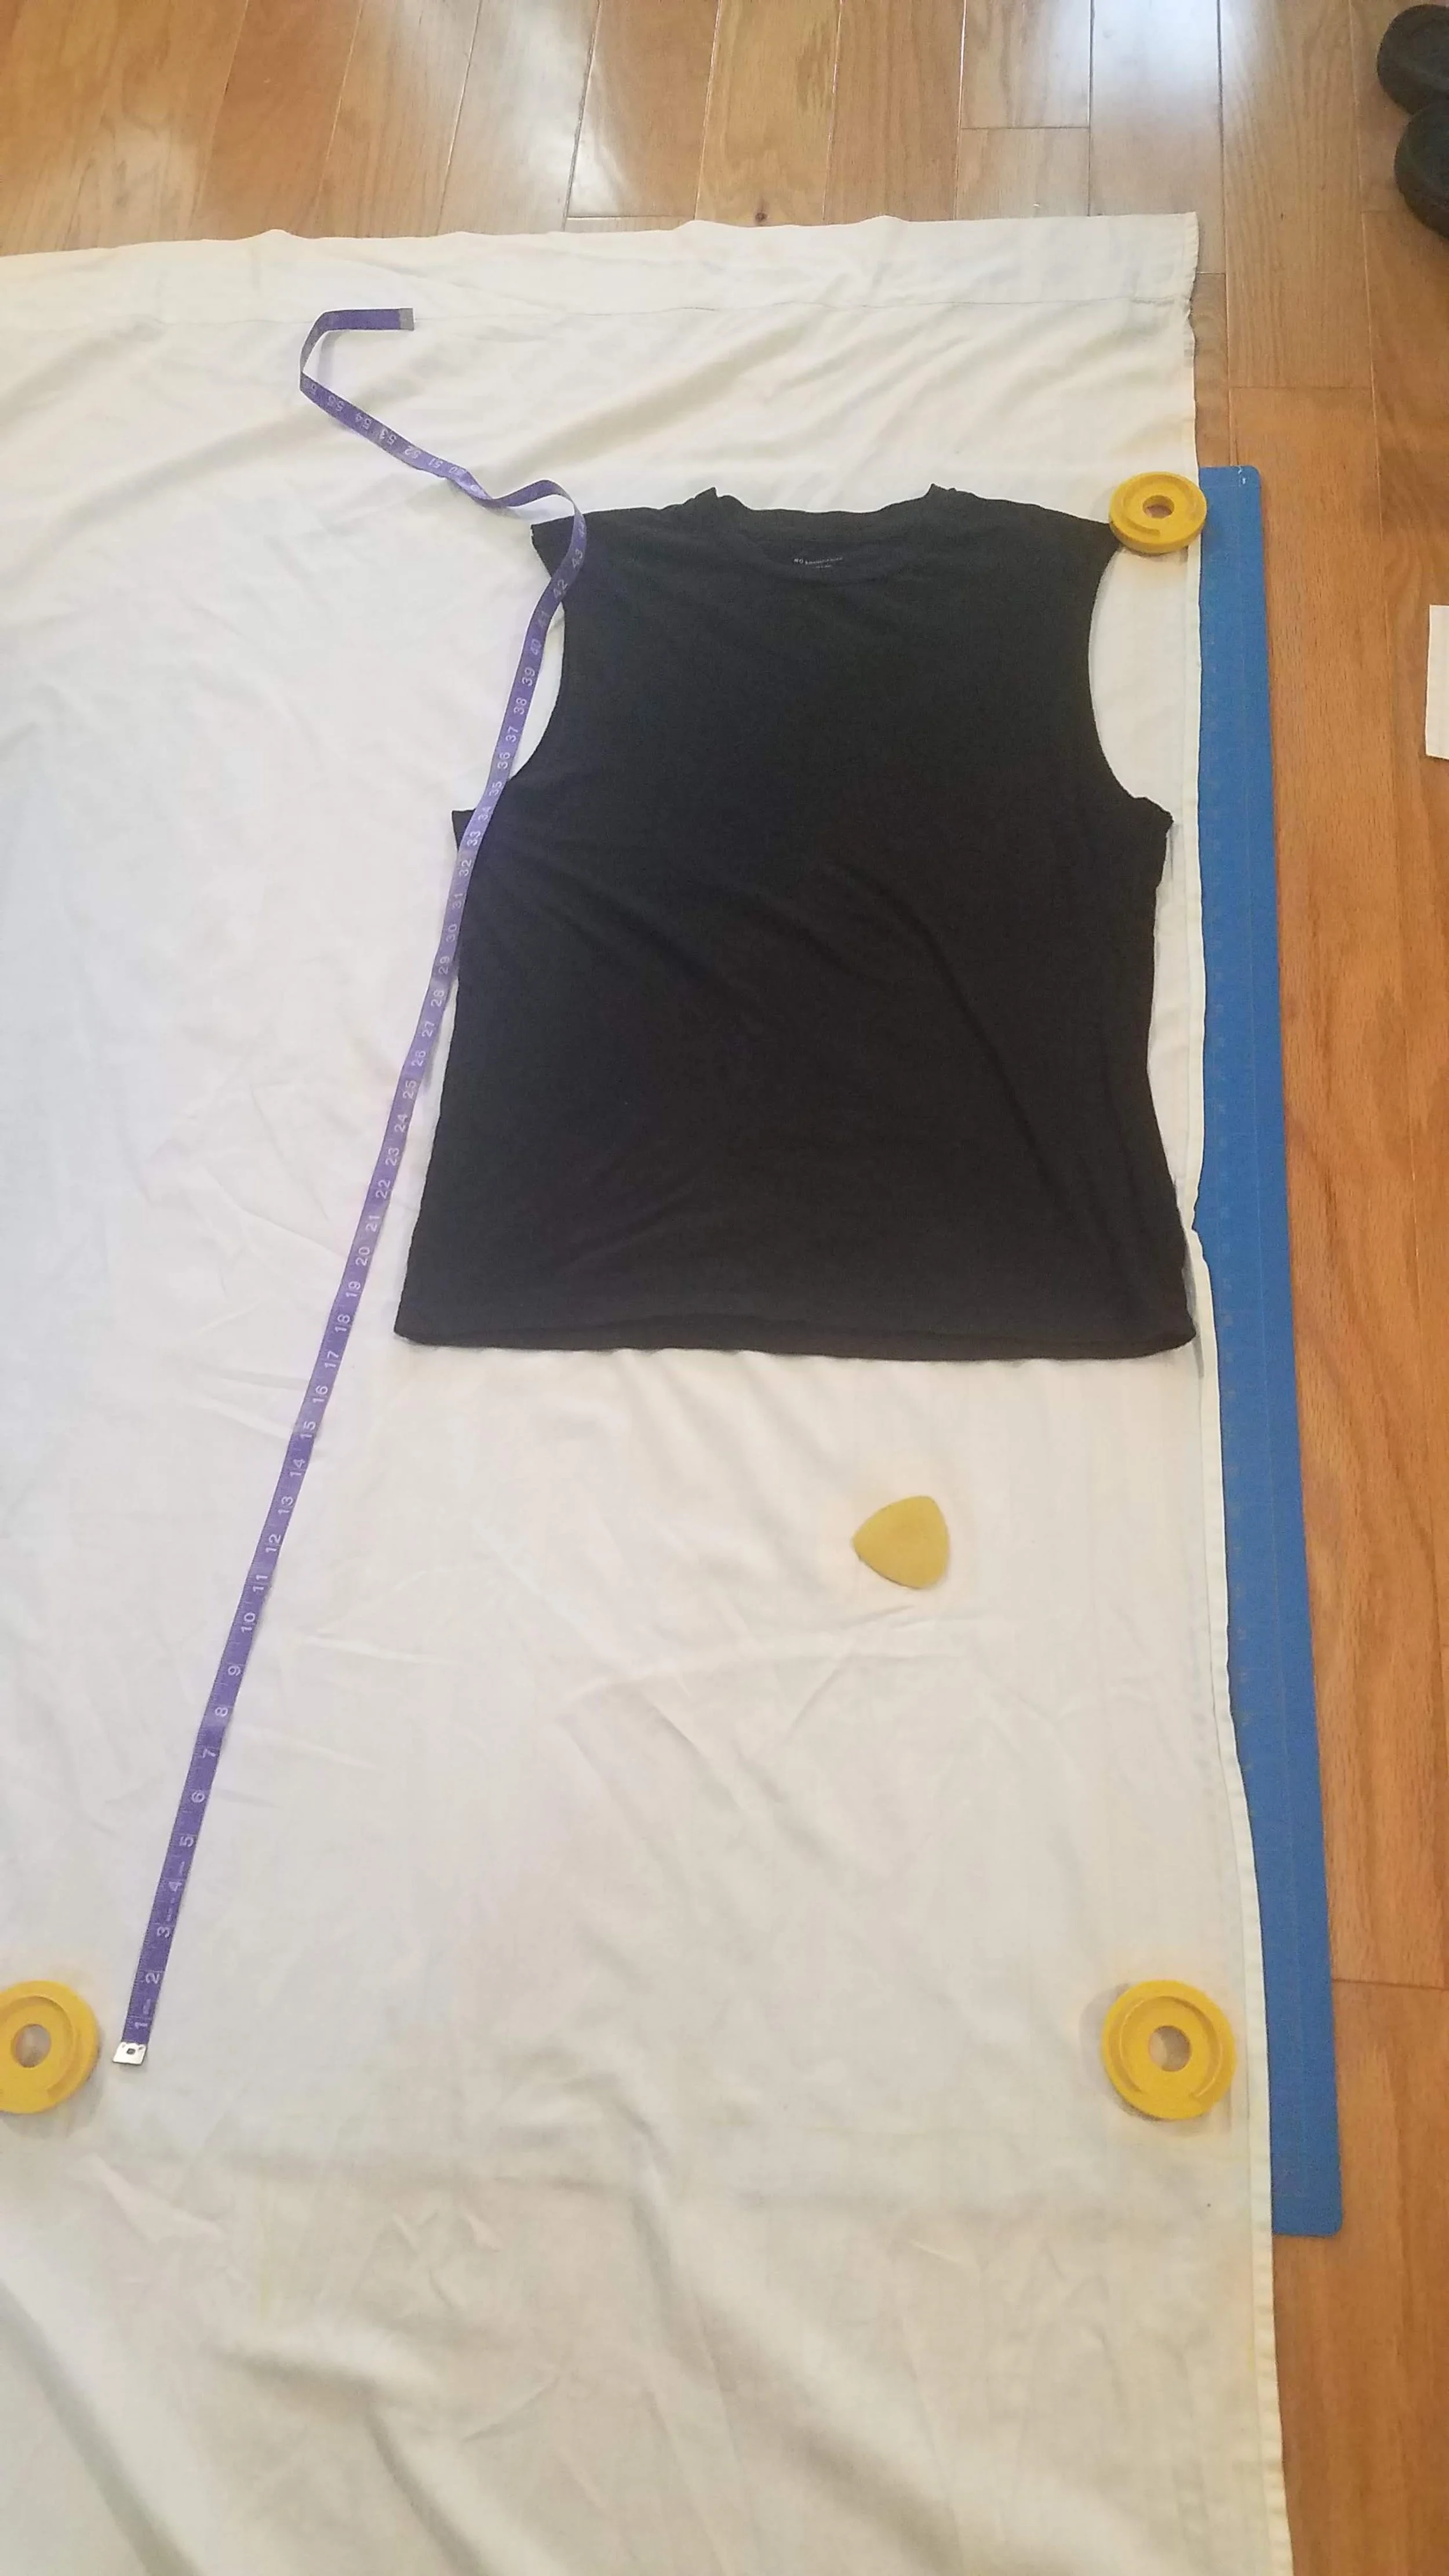
The measurements of my friends and I were similar enough that I used the same pattern for all 4 costumes by tracing my brother’s tank top to get the shape of the shoulders, neckline, and armholes and adding the necessary length in a gentle A-line silhouette. After outlining the front and backs of all 3 tunics in chalk, I cut them out with seam allowance and sewed the shoulder and side seams together. I used myself (Lancelot) and my brother (Concorde) as the model to test the fit and made adjustments as needed.
tracing my brother’s t-shirt on the bed sheet
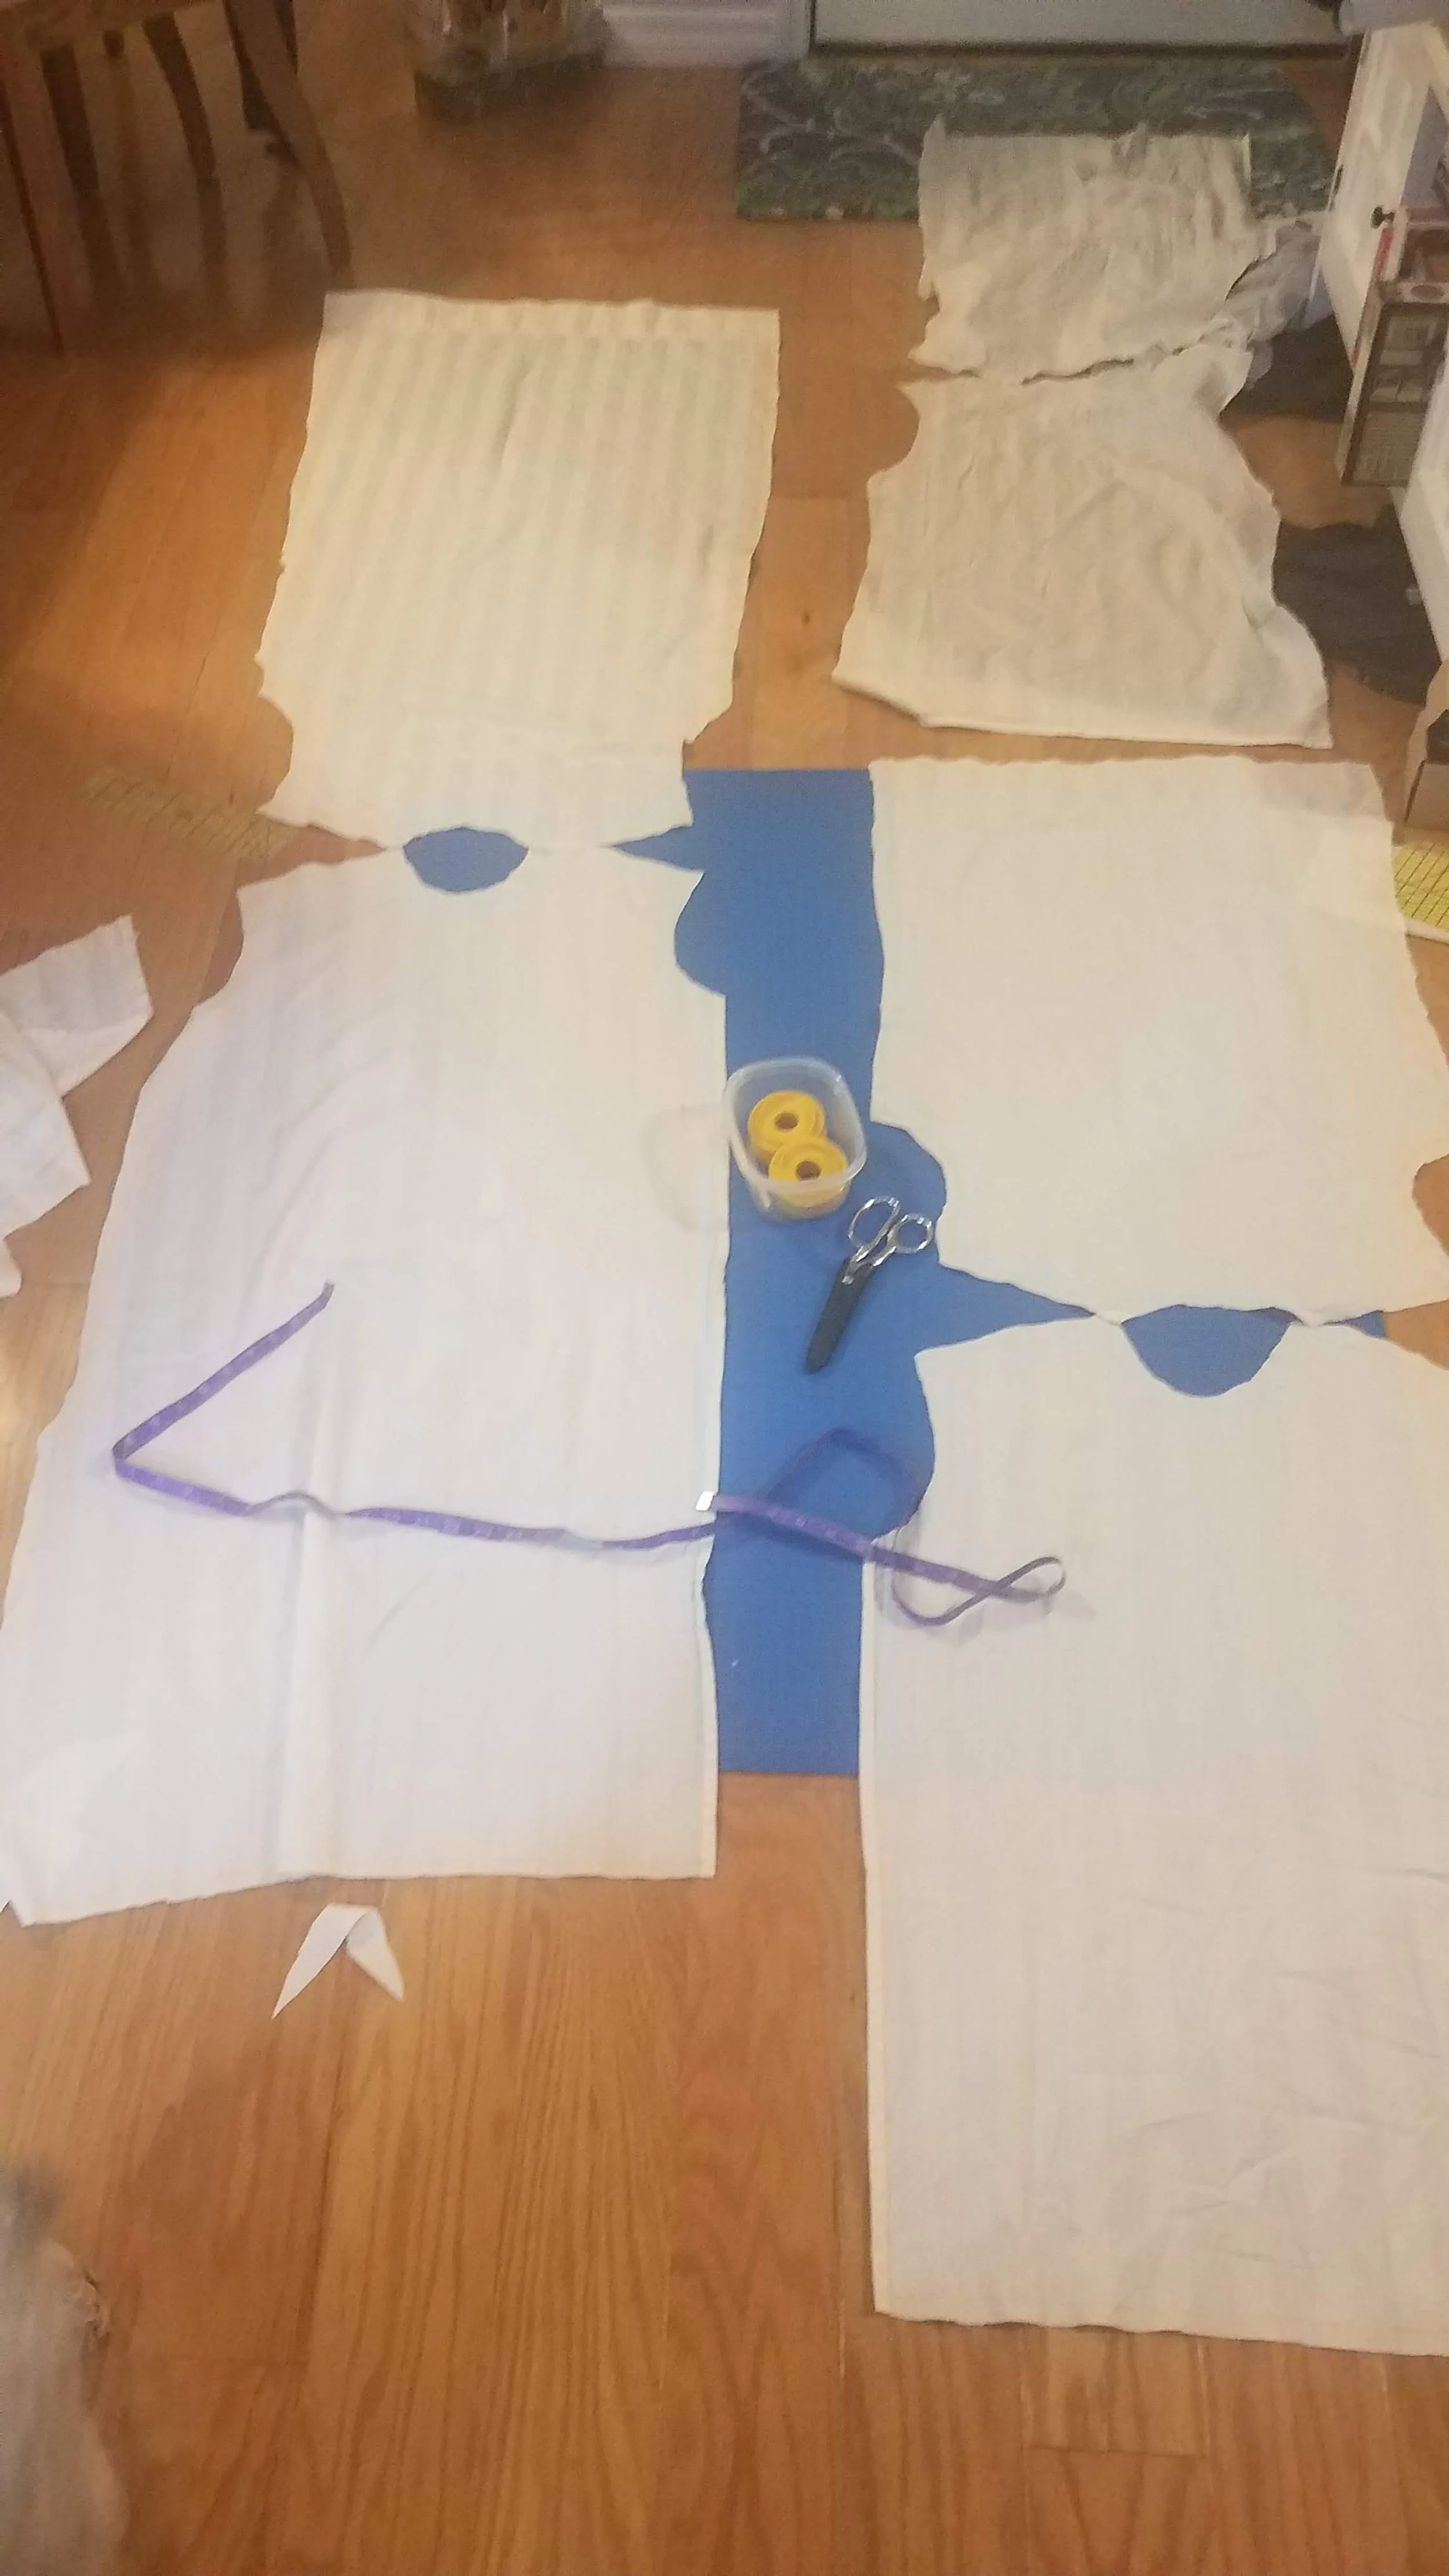
cutting out the pieces
lengthening the tunic
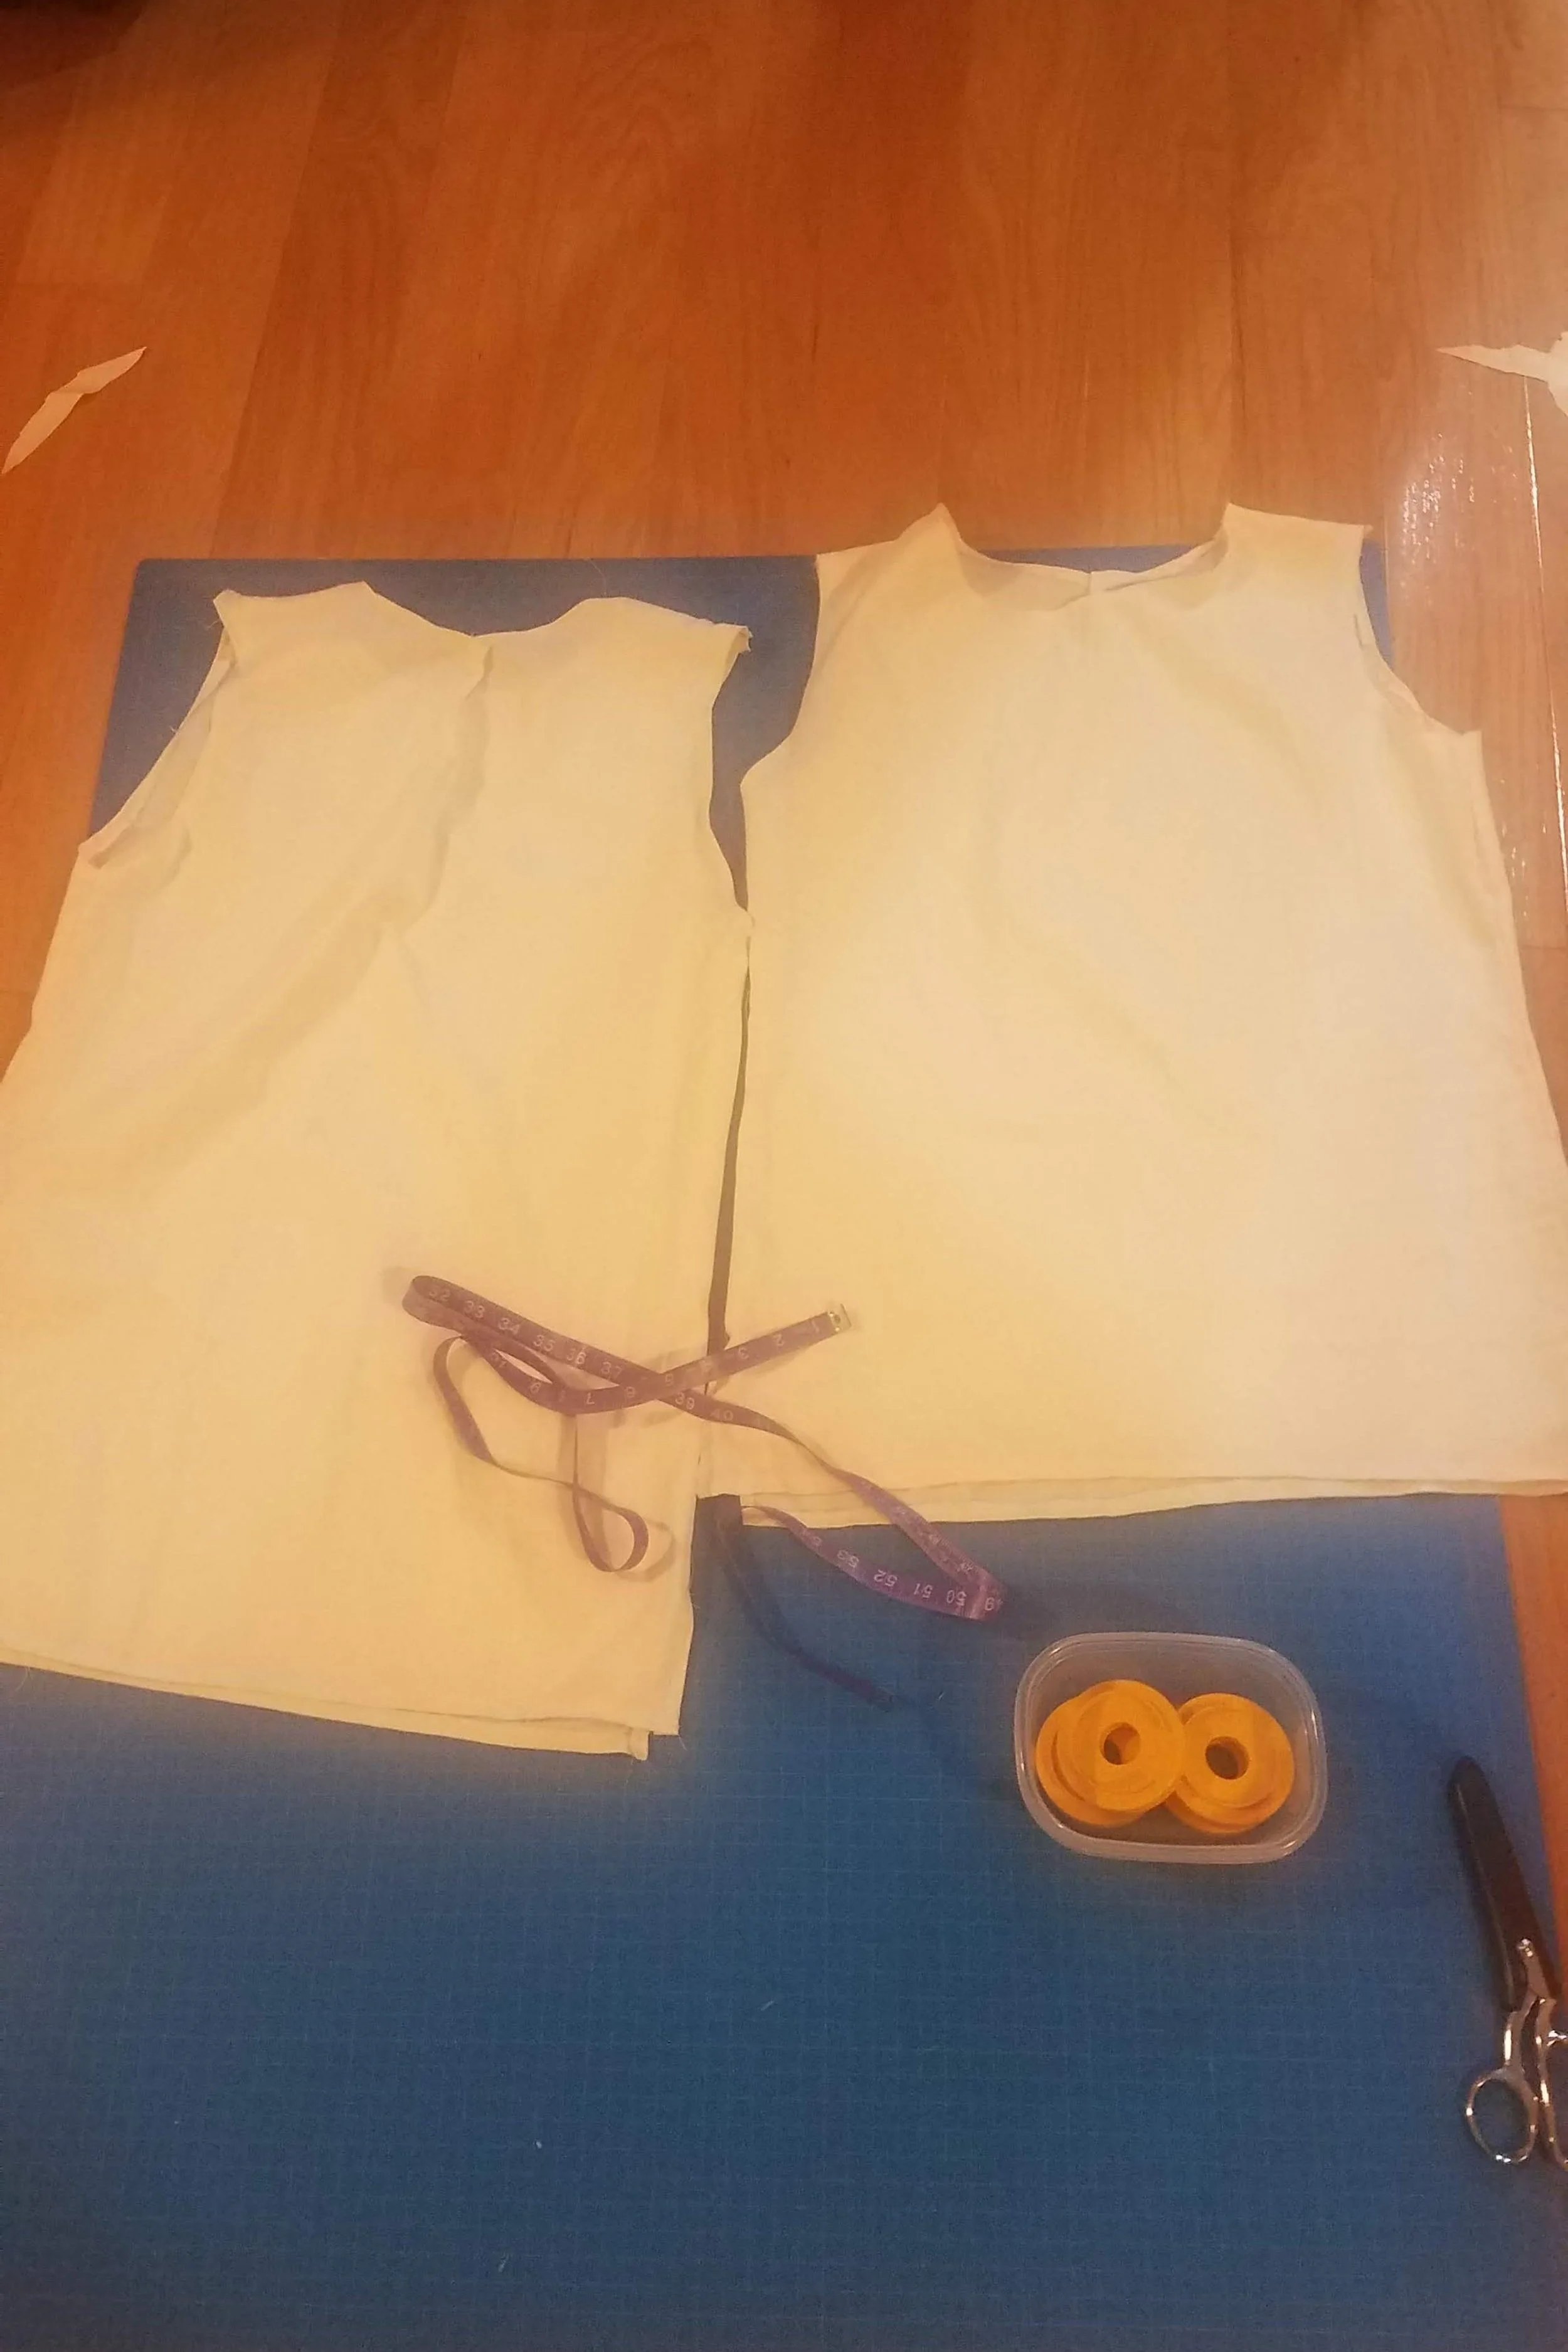
The one downside about using the bed sheet was the lack of any stretch to the fabric, requiring the fit to be perfect. It was a little awkward putting them on but once you got them over your shoulders and chest, the fit was fine. I added a small snap closure to the back to make taking it on and off easier. I also added side slits up to the hips on the 2 short tunics to make it more comfortable to twist and bend. The long tunics already had slits in the costume design.
Once the fit was perfect, I hemmed the neckline, armholes, bottom, and slits on all the tunics. I was careful to cut and iron the rounded edges to make the hemming process easier and clean looking.

trying on for fit
adding hems & snaps
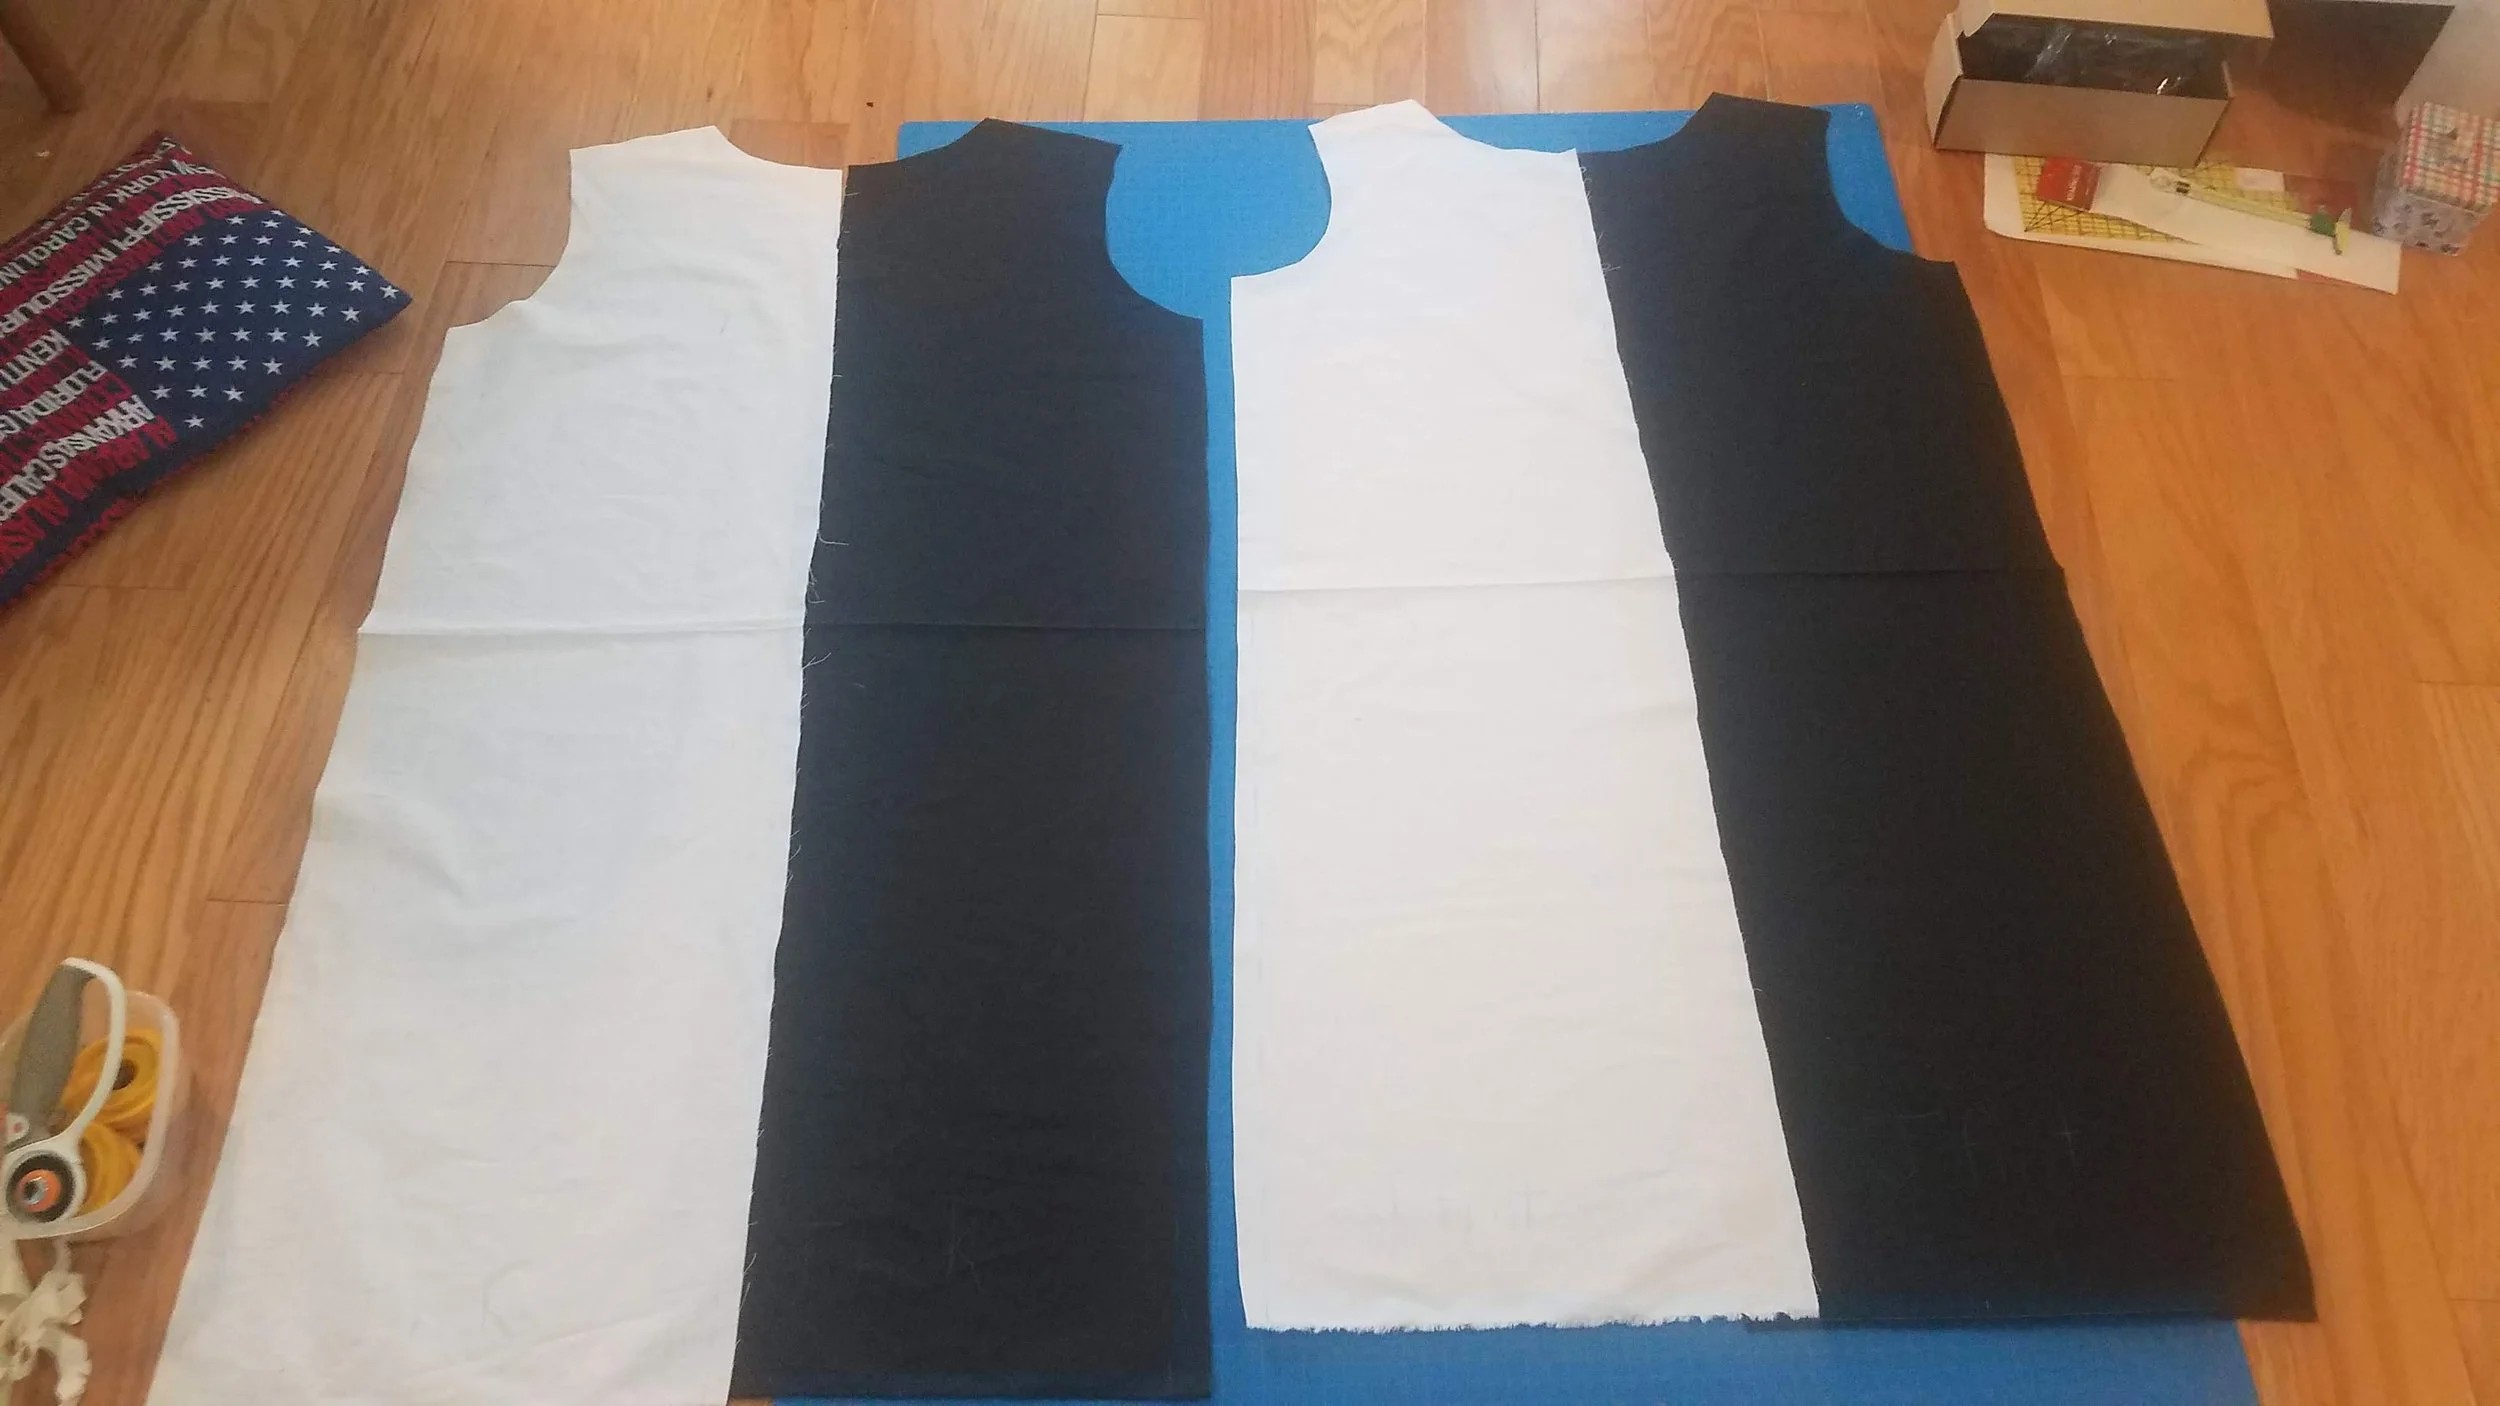
Once I was comfortable with the pattern, I folded it in half to cut out the black and white fabric for Sir Lancelot’s tunic. I needed to sew the white and black in a perfectly straight line down the center front and back before sewing the shoulder and side seams together. I think I accidentally added seam allowance on top of seam allowance because when I put it on it was much too big and I needed to take in the side seams by about 2 inches. Then I hemmed it just like the other tunics.
sewing the black & white tunic

Finished sewing all 4 tunics!
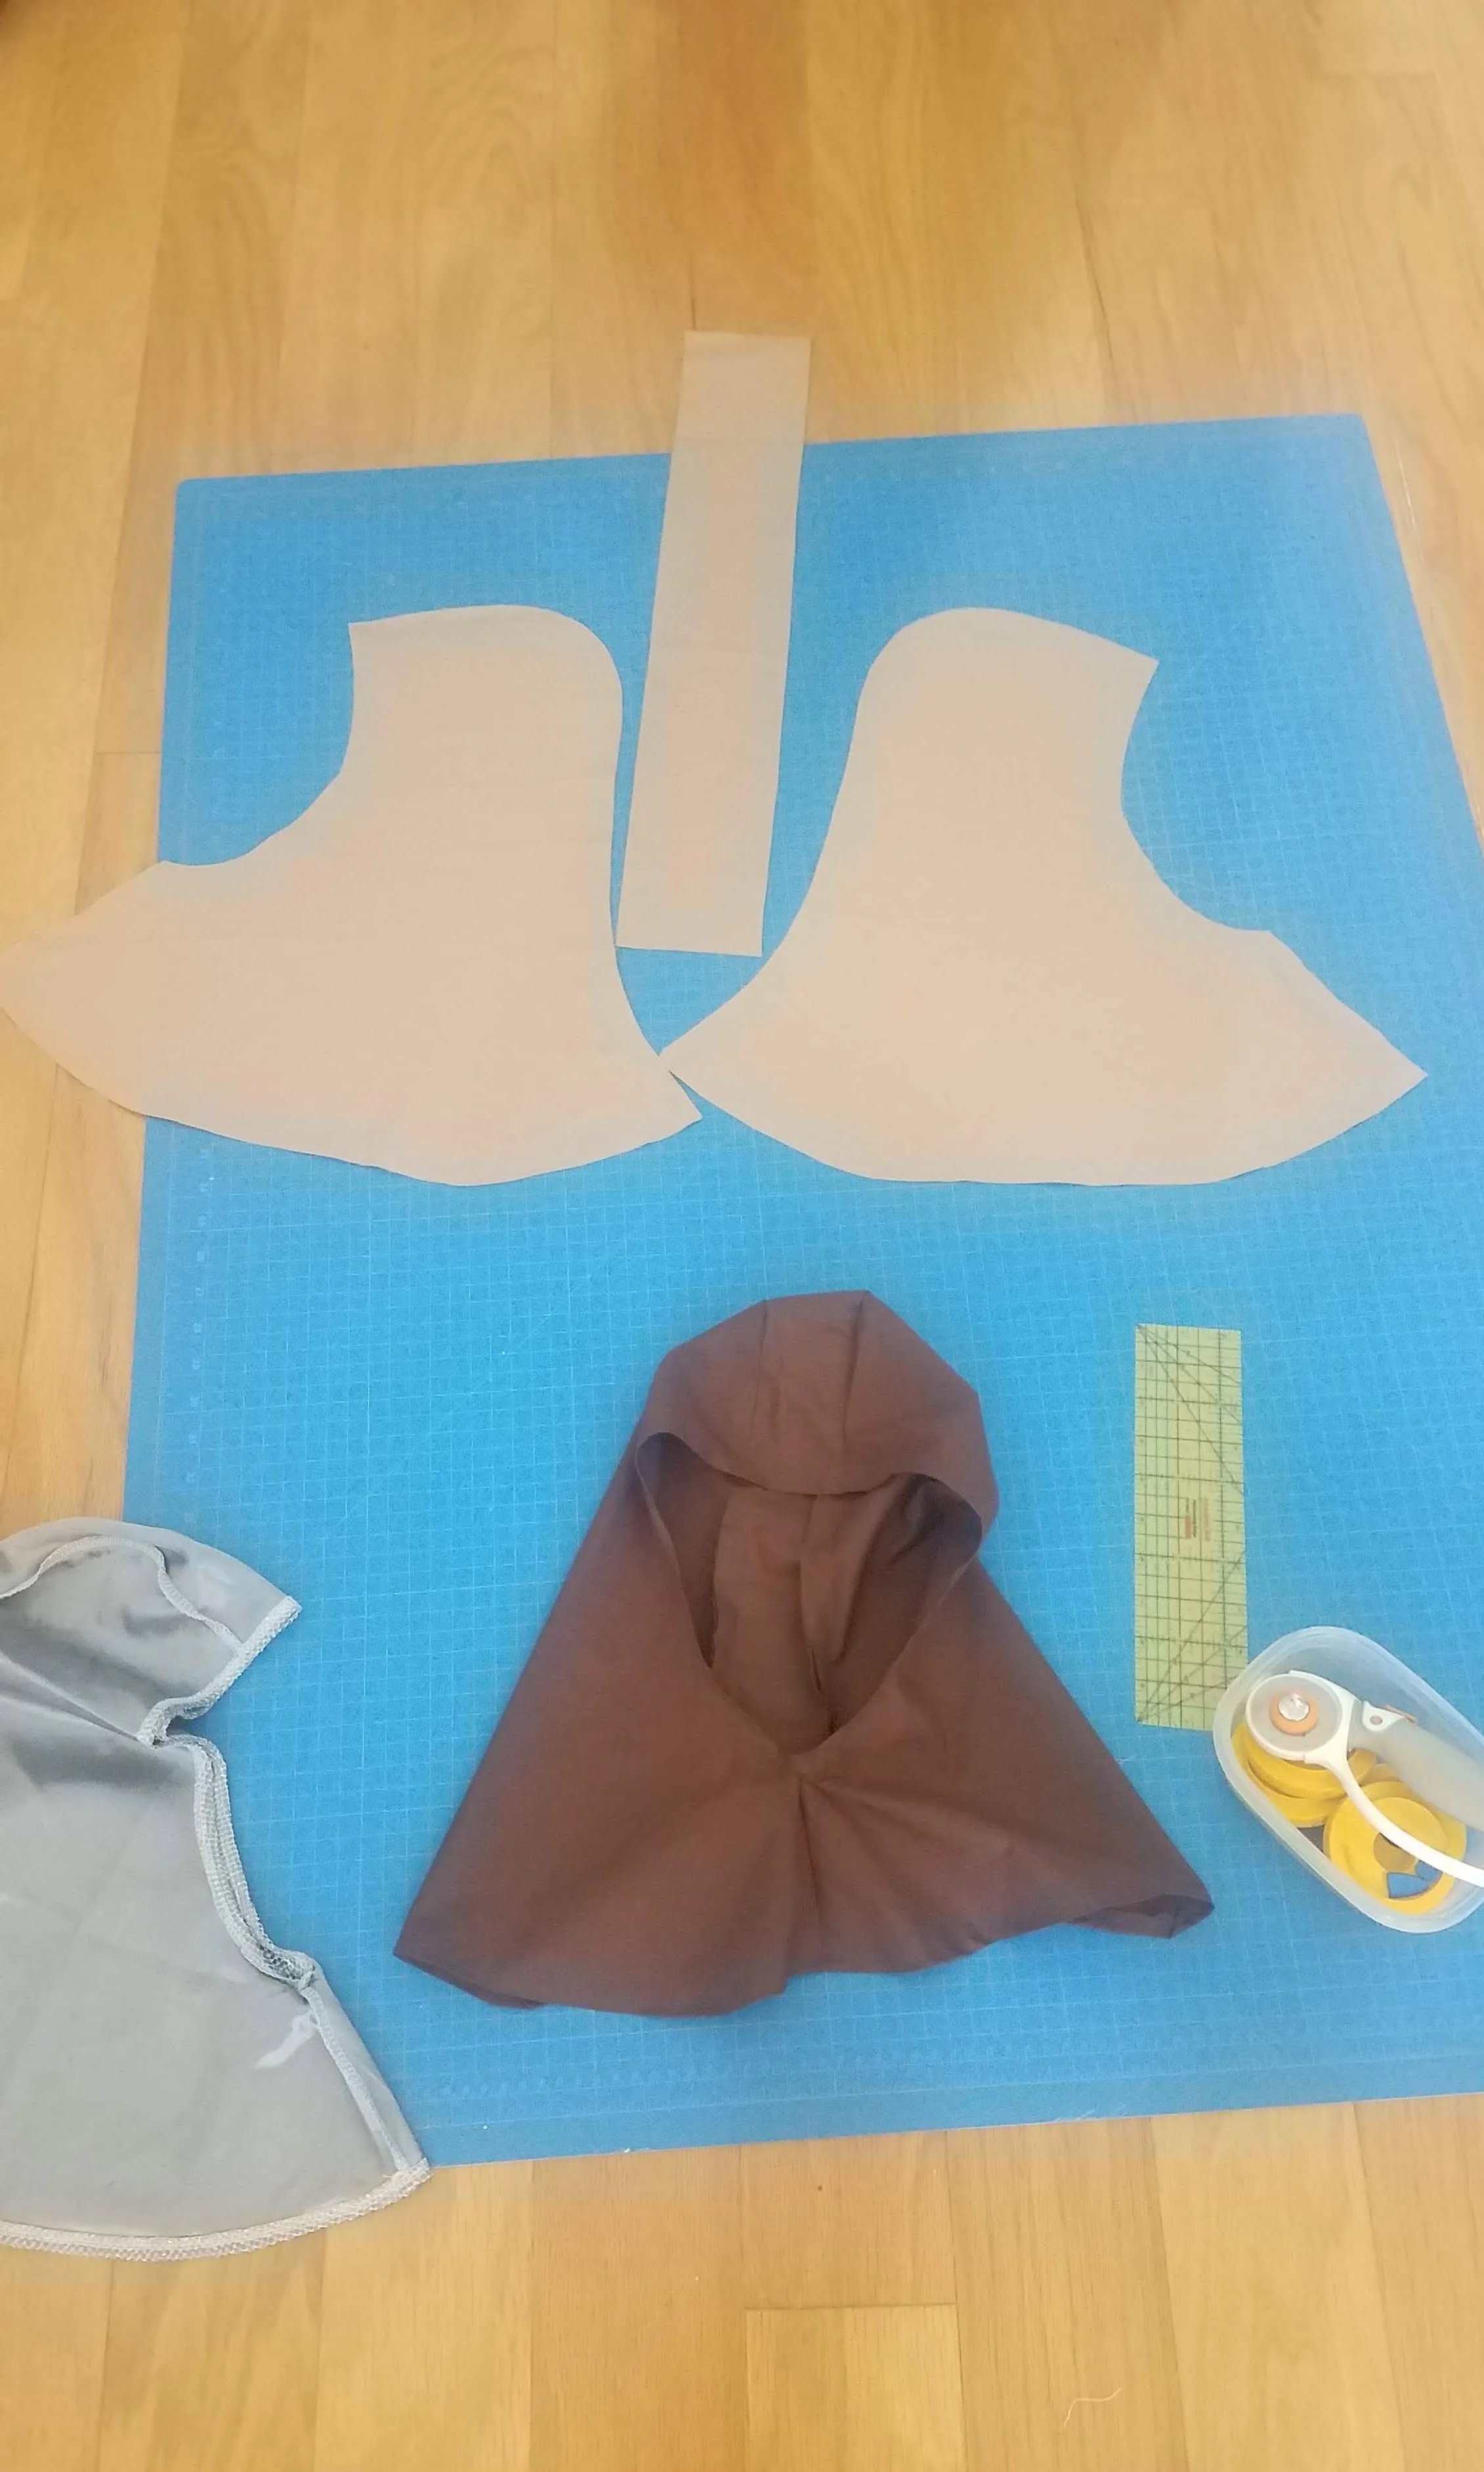
My next challenge was making hoods for Lancelot, Patsy, and Concorde. It was a different shape from the Loki costume I made last year so I couldn’t reuse that pattern. I ended up finding a “chainmail” hood for just $10 at Party City that was perfect for Lancelot so I bought it and used it to trace the other 2 hoods by flipping it inside out and measuring the length and width of the rectangular piece.
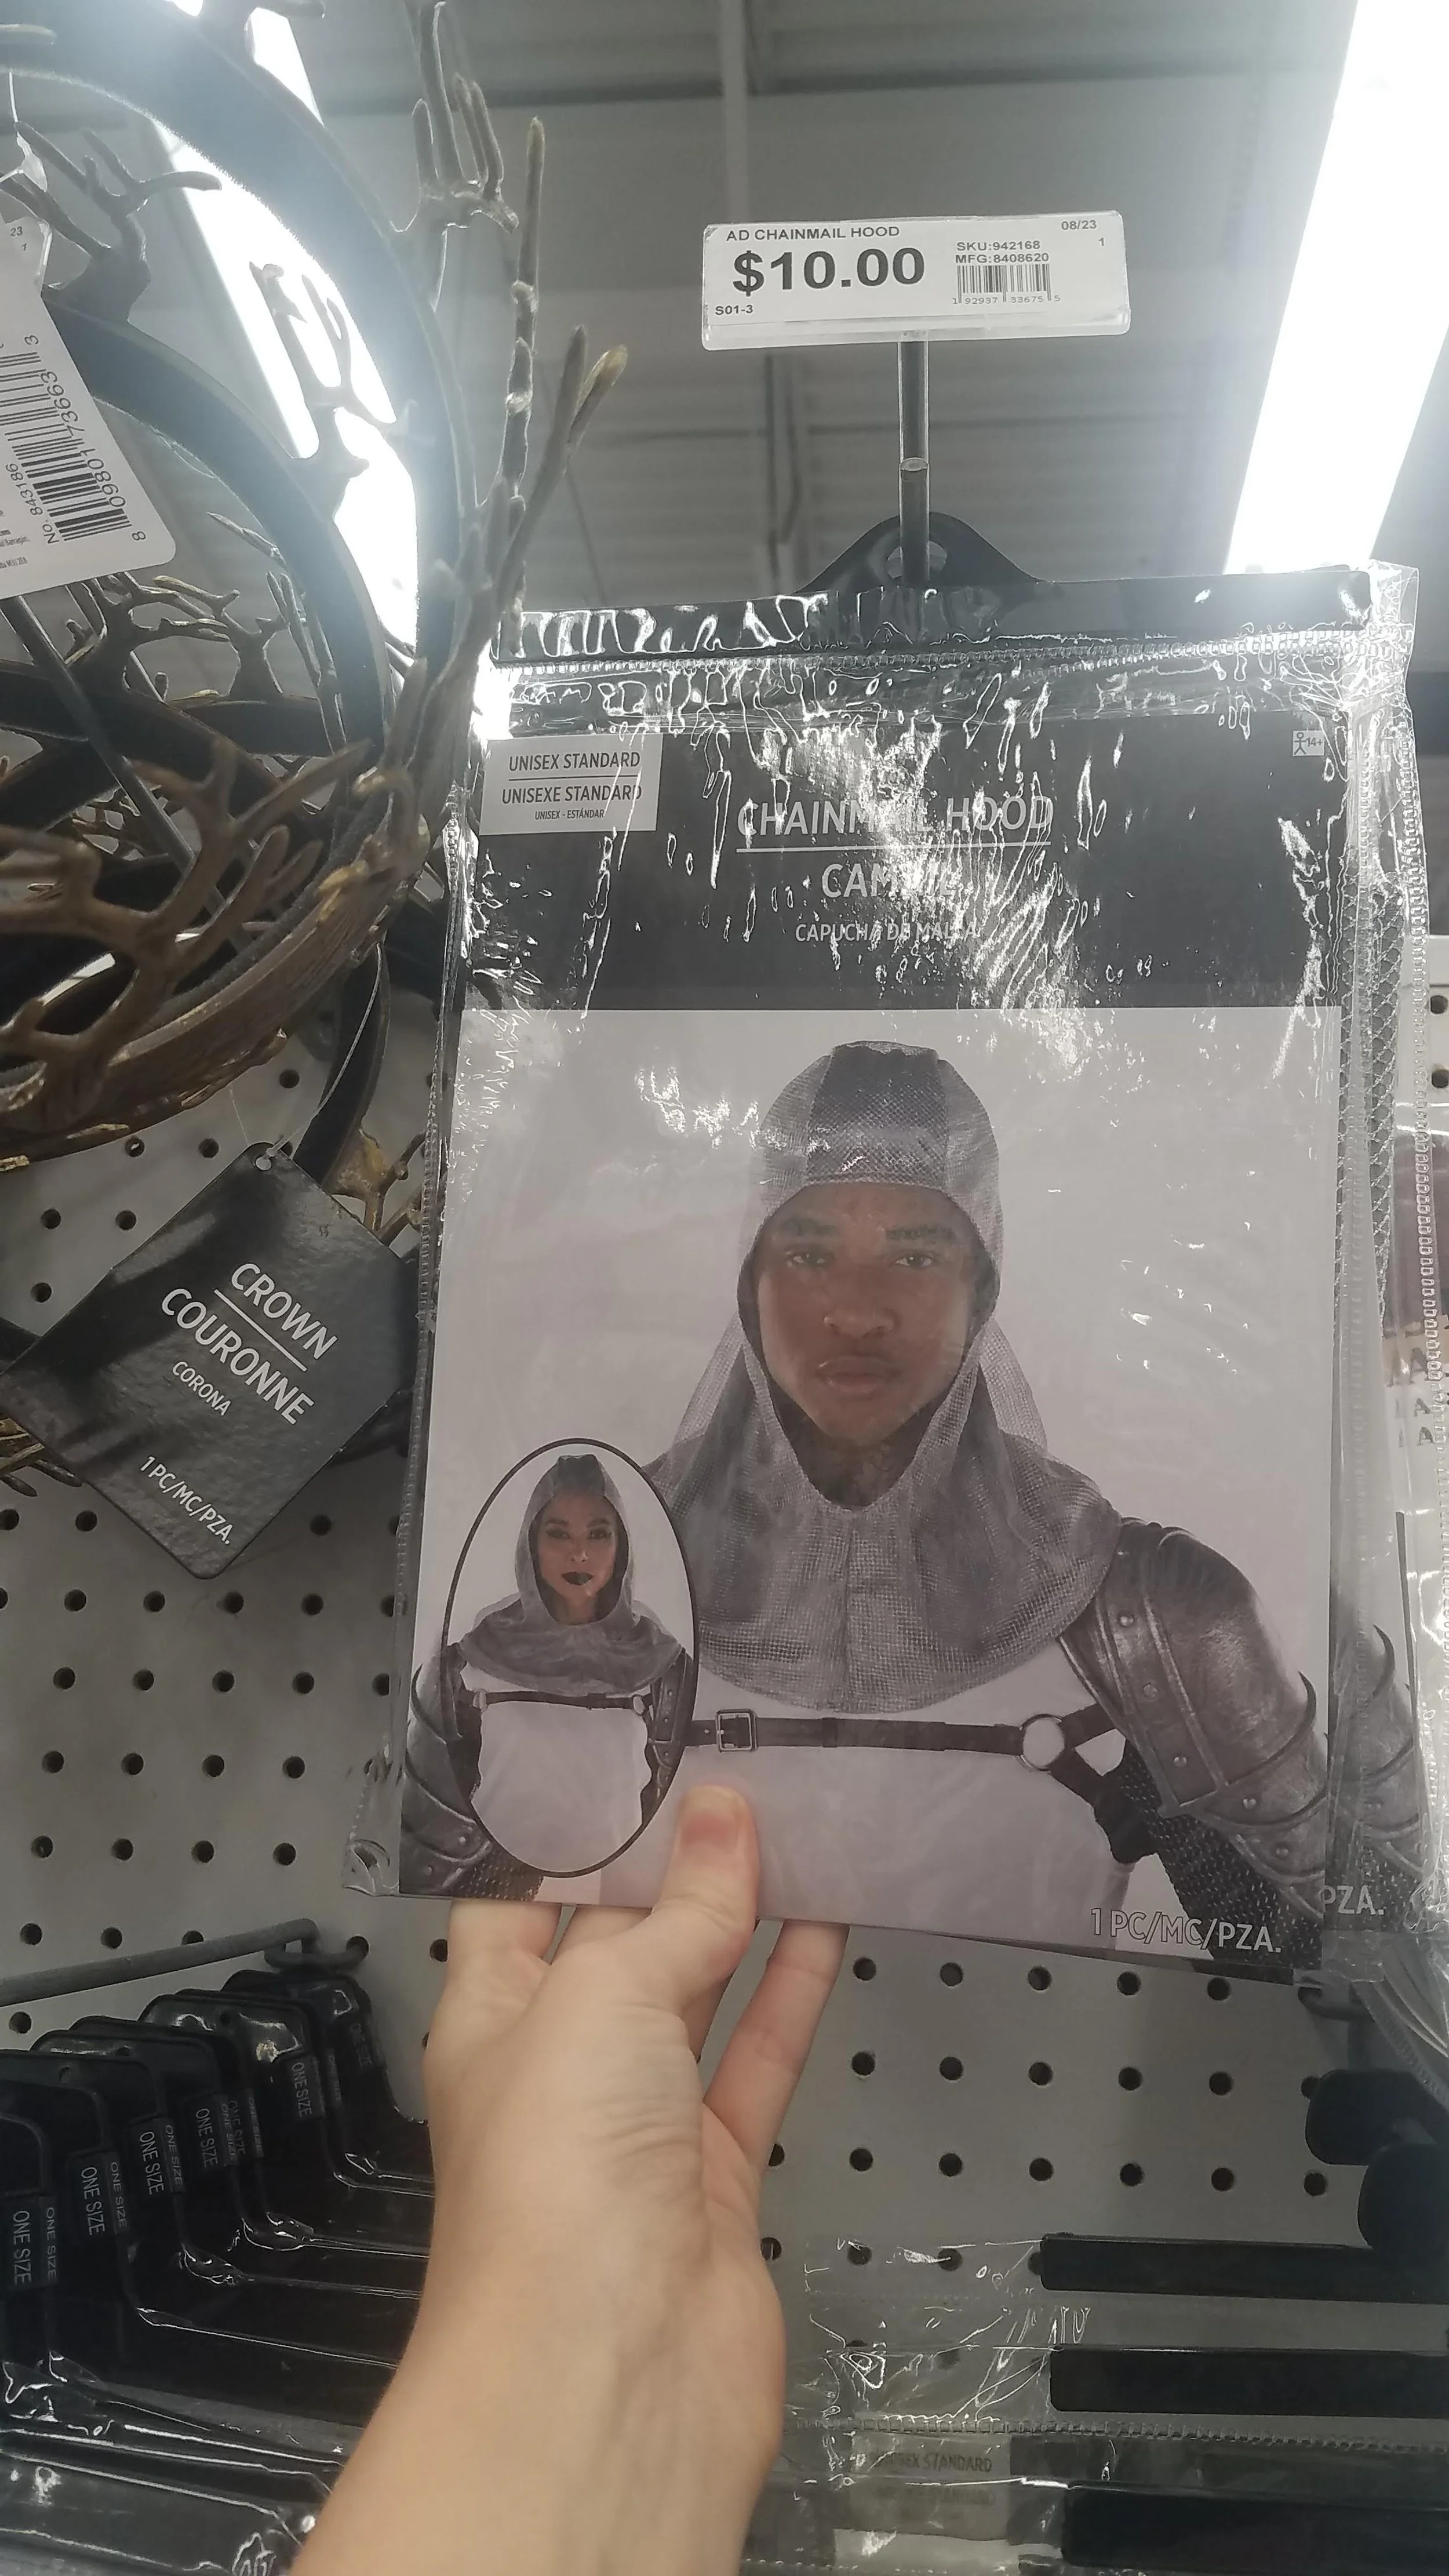
found this hood at Party City

tracing the hood onto brown fabric
Sewing the hoods took a lot of patience since every single seam had a deep curve and I spent a lot of time meticulously pinning and ironing to make everything line up. In the end, I made the rectangular piece too short (I forgot to cut out seam allowance since I didn’t have a lot of brown fabric) which made the bottom hem much shorter in the back than the front. But I was able to round it out in such a way that it was hardly noticeable.
1 hood down, 1 to go
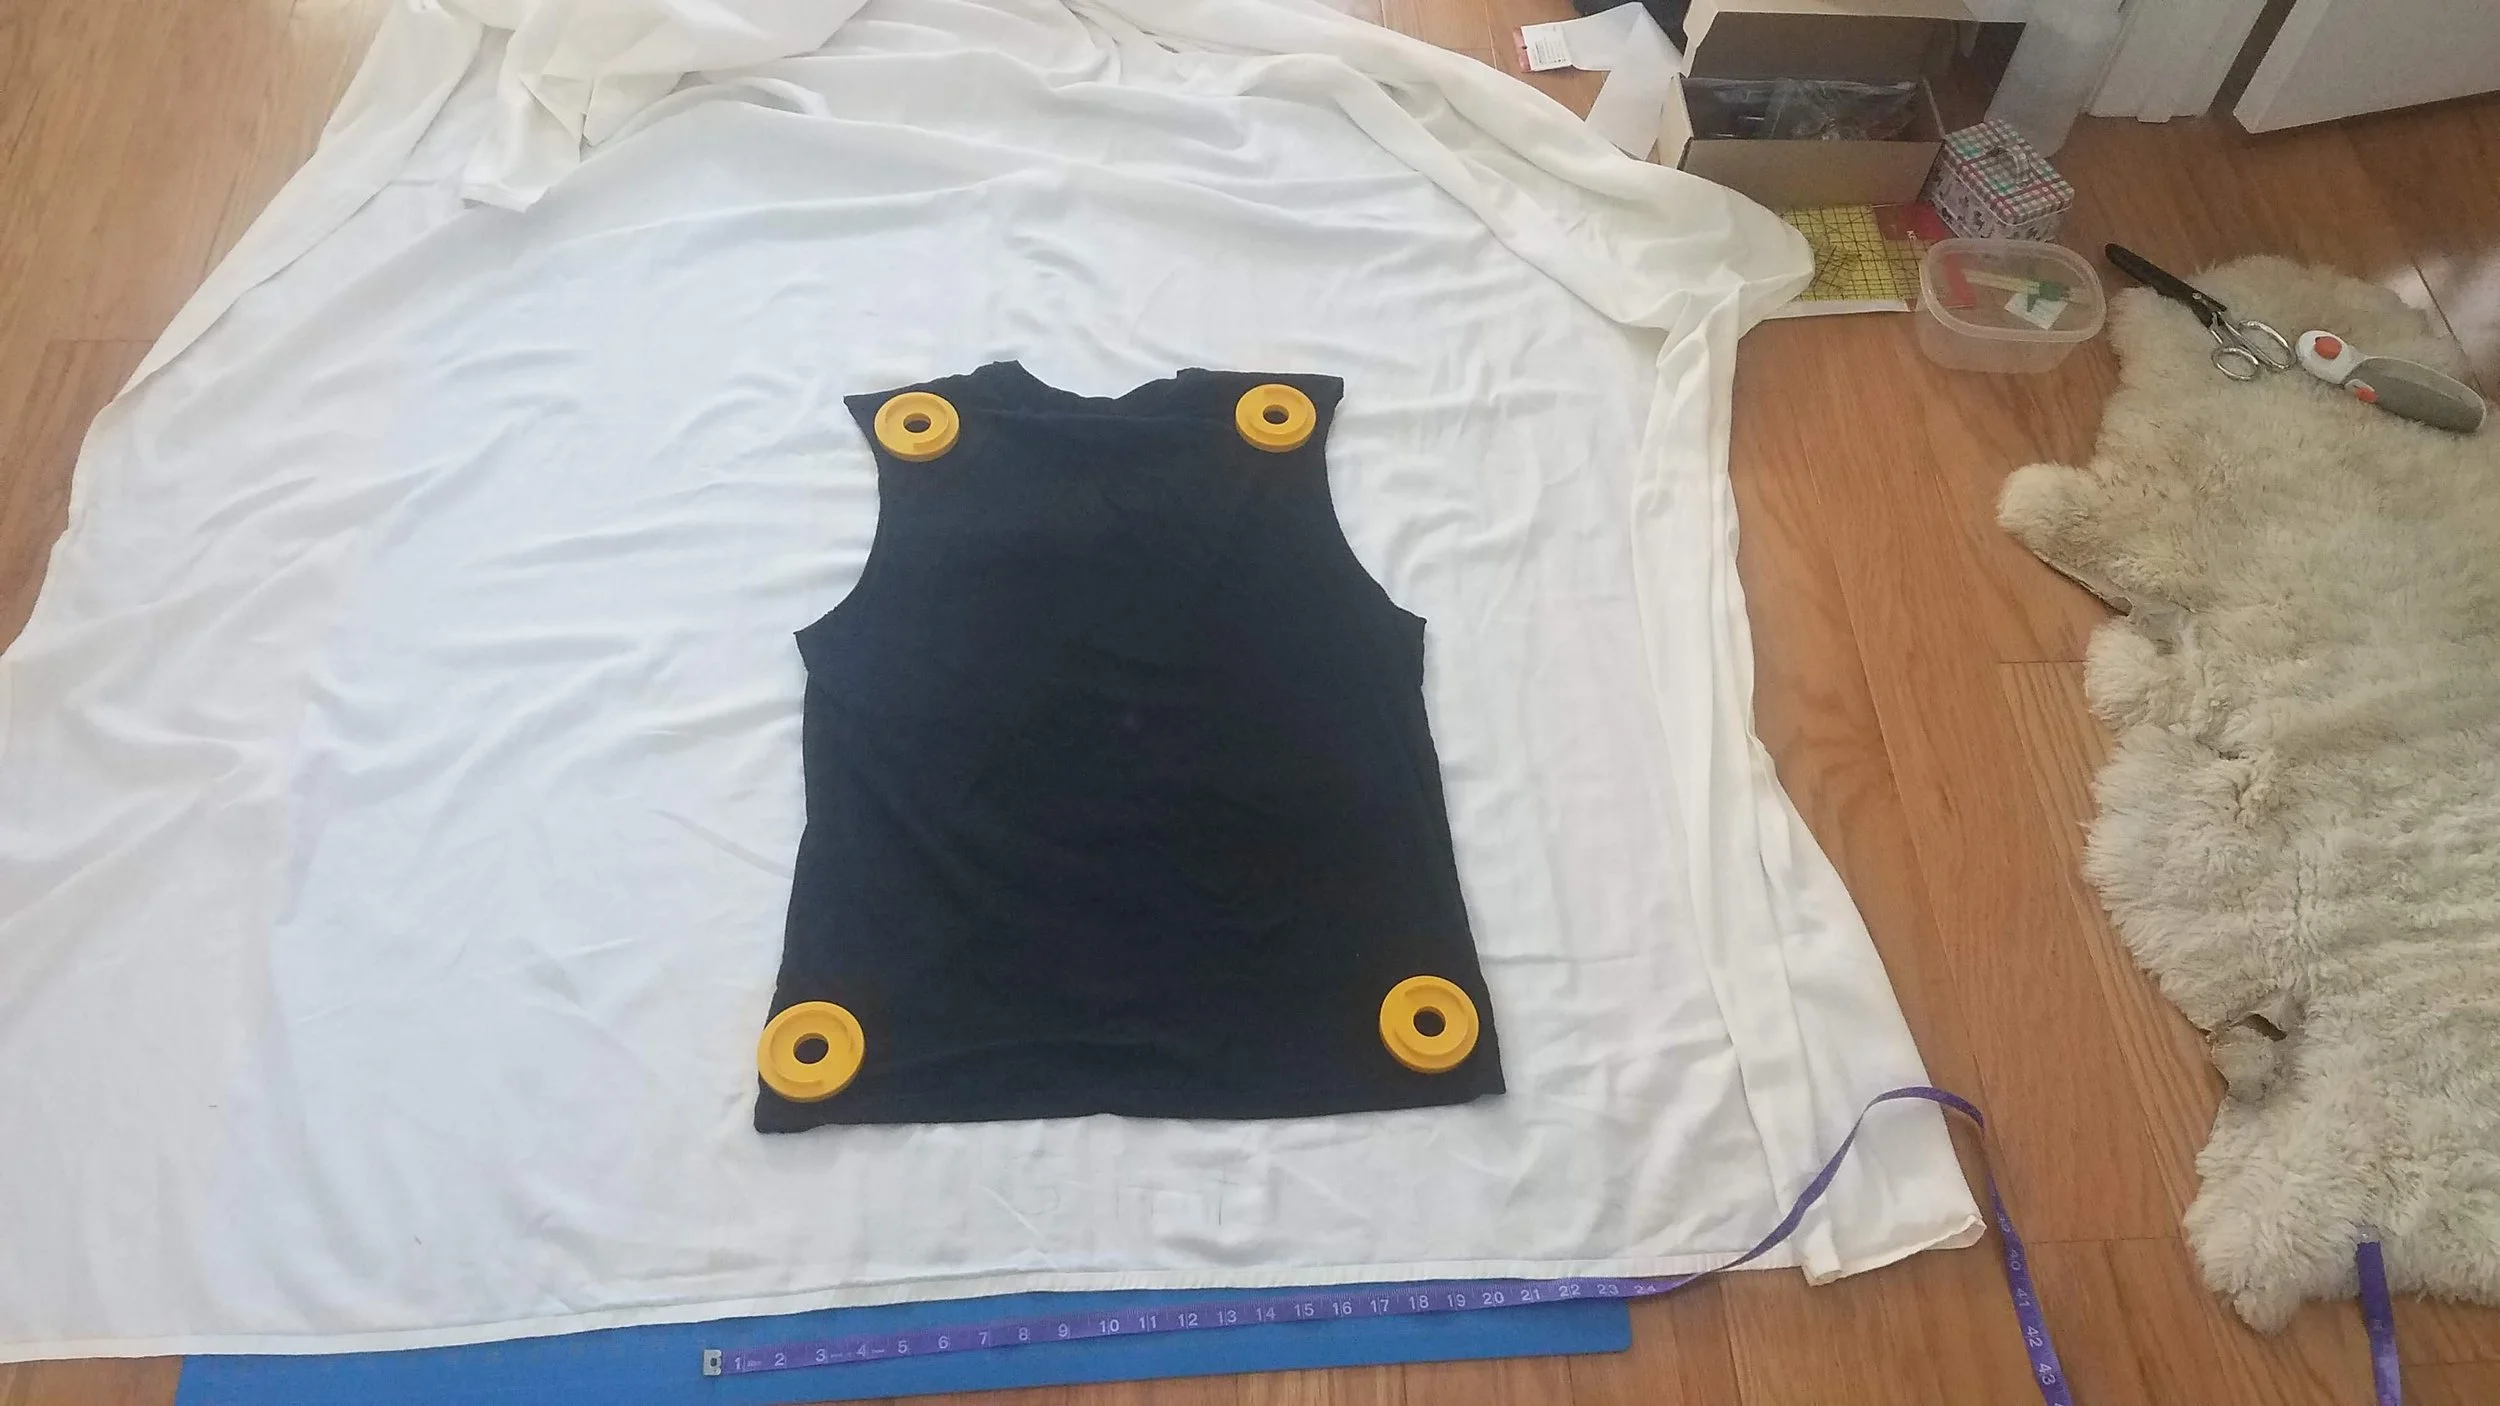
Concorde’s hood needed studs so I counted out the 50 I had bought at Joann’s and placed them where I thought they looked best before attaching them in place. Unfortunately, the fabric is a bit too loose-weave for them to fasten permanently, but I decided glue wouldn’t make enough of a difference so I just hoped for the best and told my brother to be careful wearing it.
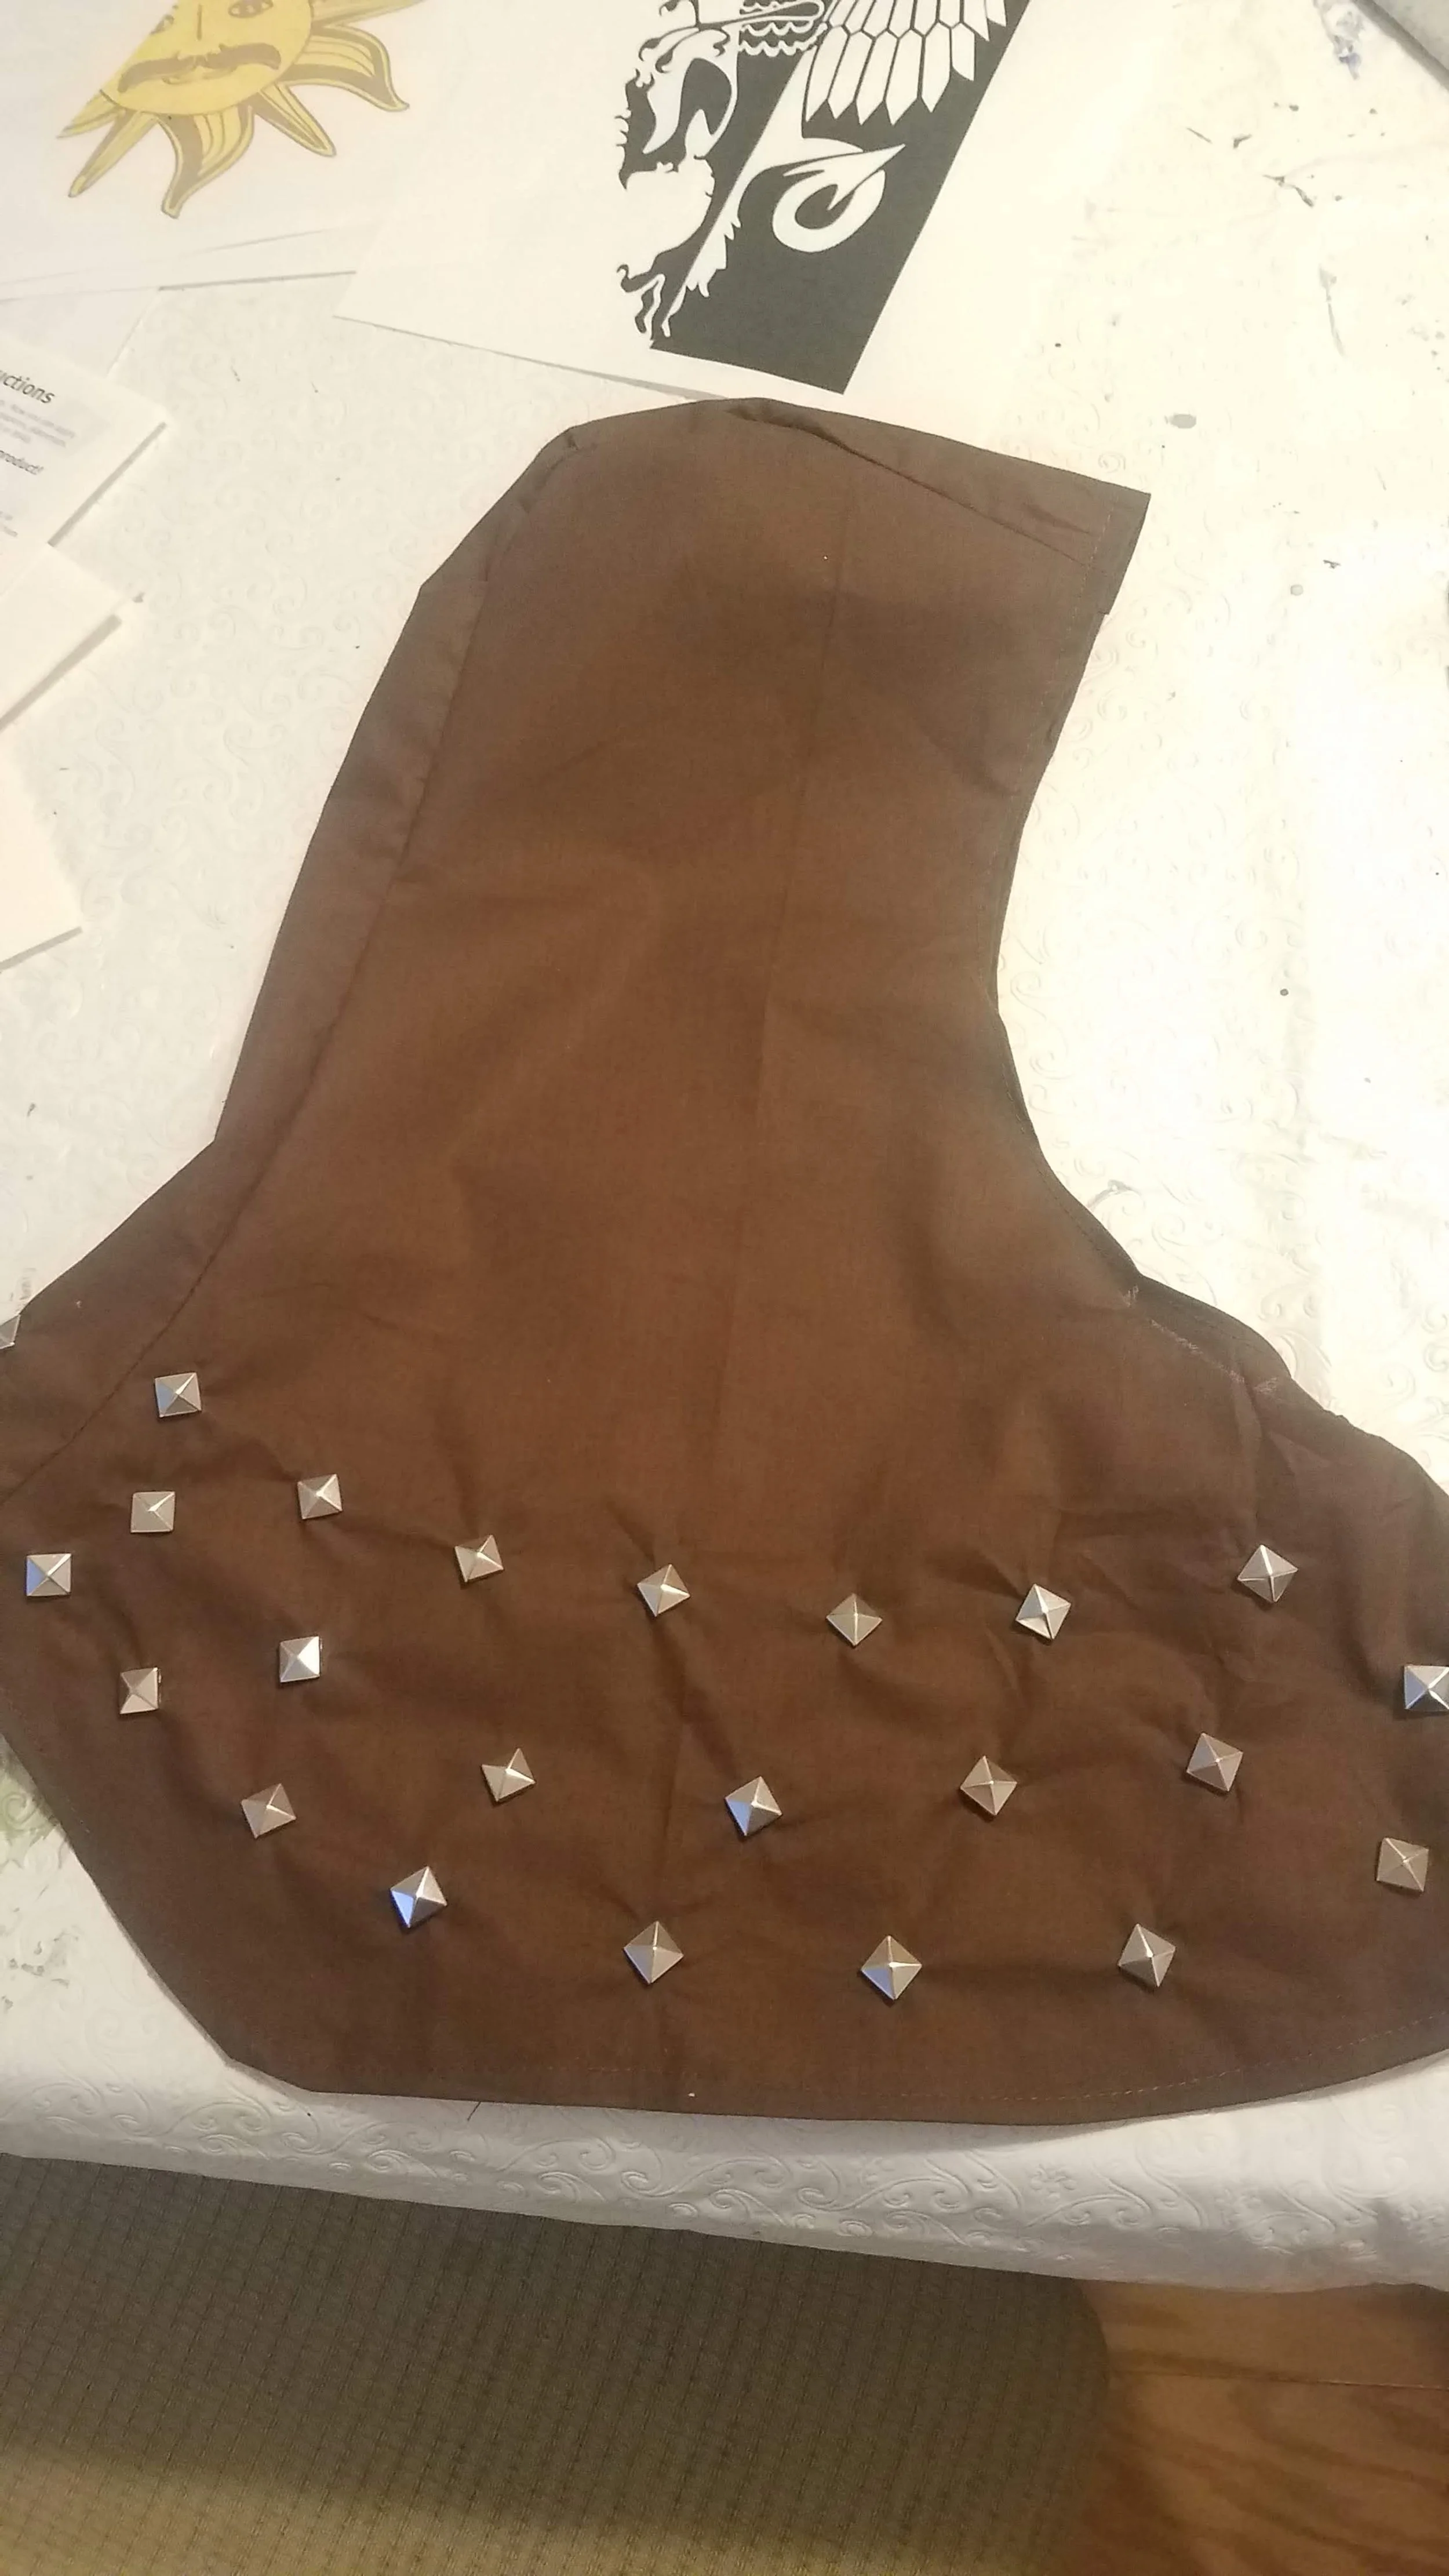
adding the studs
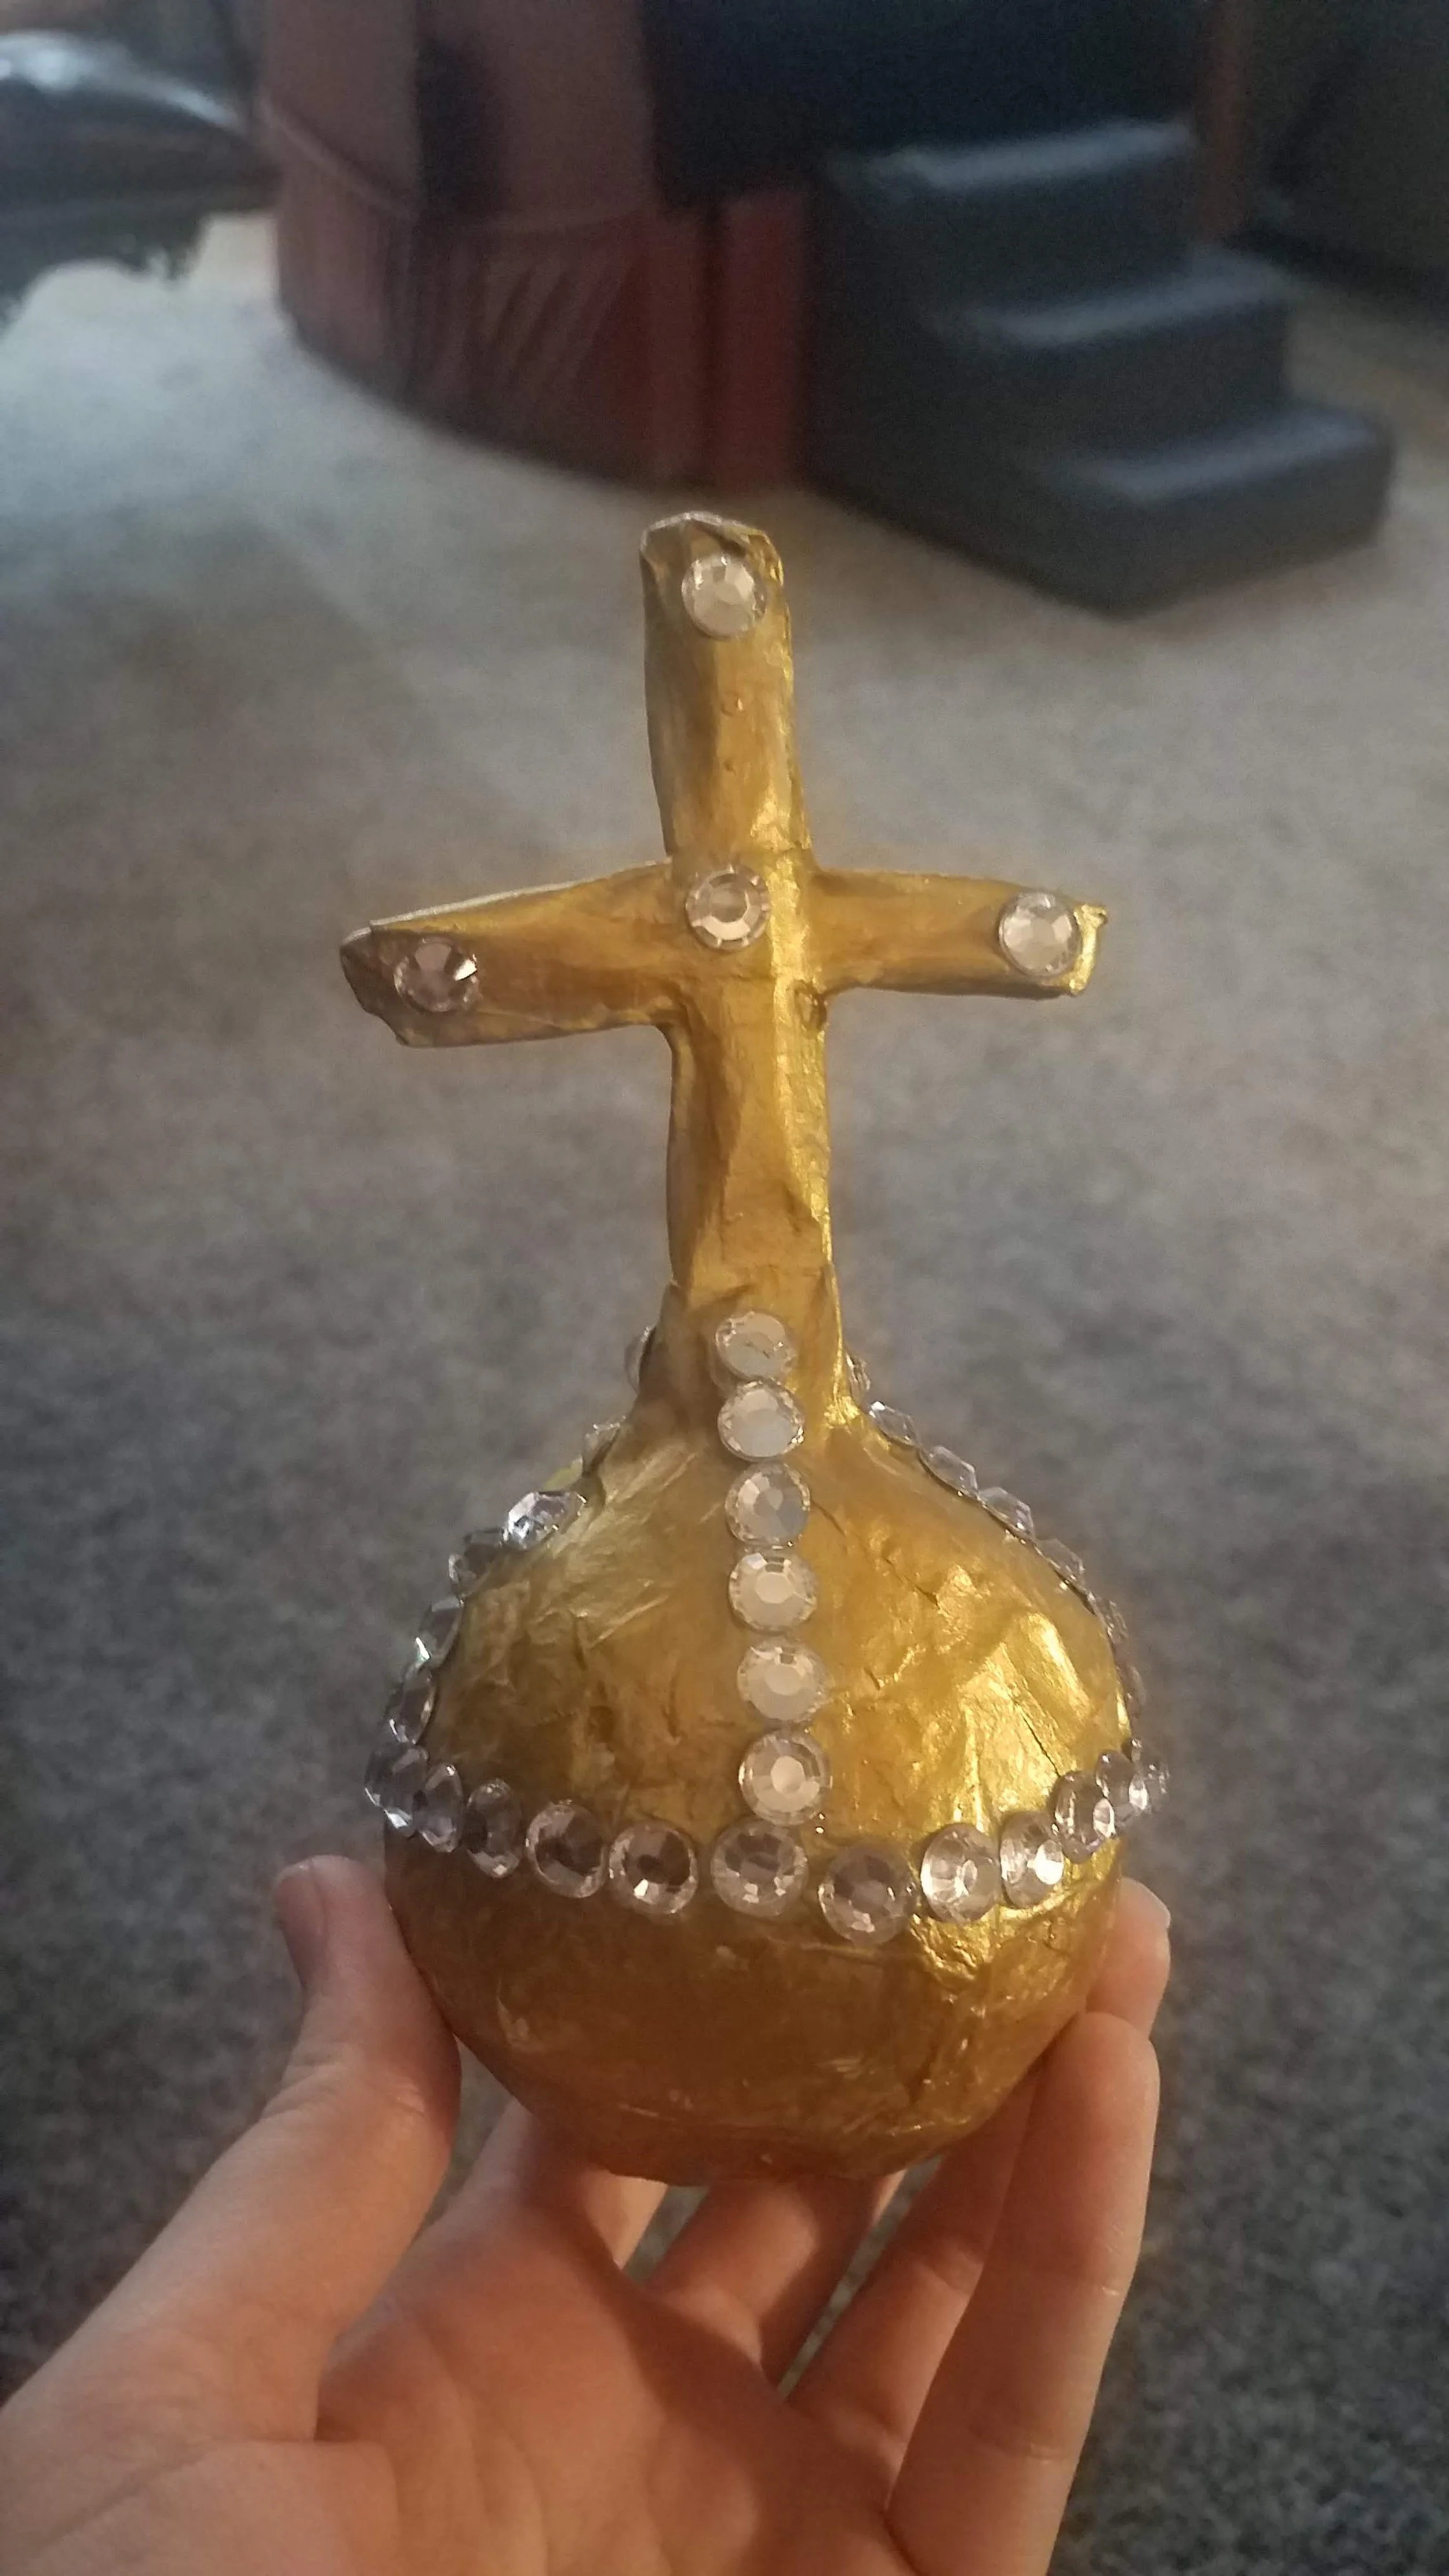
My friend Krista (King Arthur) came over a week before Halloween to see my progress and so I could make sure the costume fit her correctly. Since she wanted to help, we decided to make the Holy Hand Grenade out of Paper Mache. We used a tennis ball as a base covered with a bit of tin foil and a wire cross standing on top. It didn’t look great after the first coat, but once it dried and we added a second coat of Paper Mache it looked much better! Paper Mache takes a long time to dry so I left it overnight under a high fan.
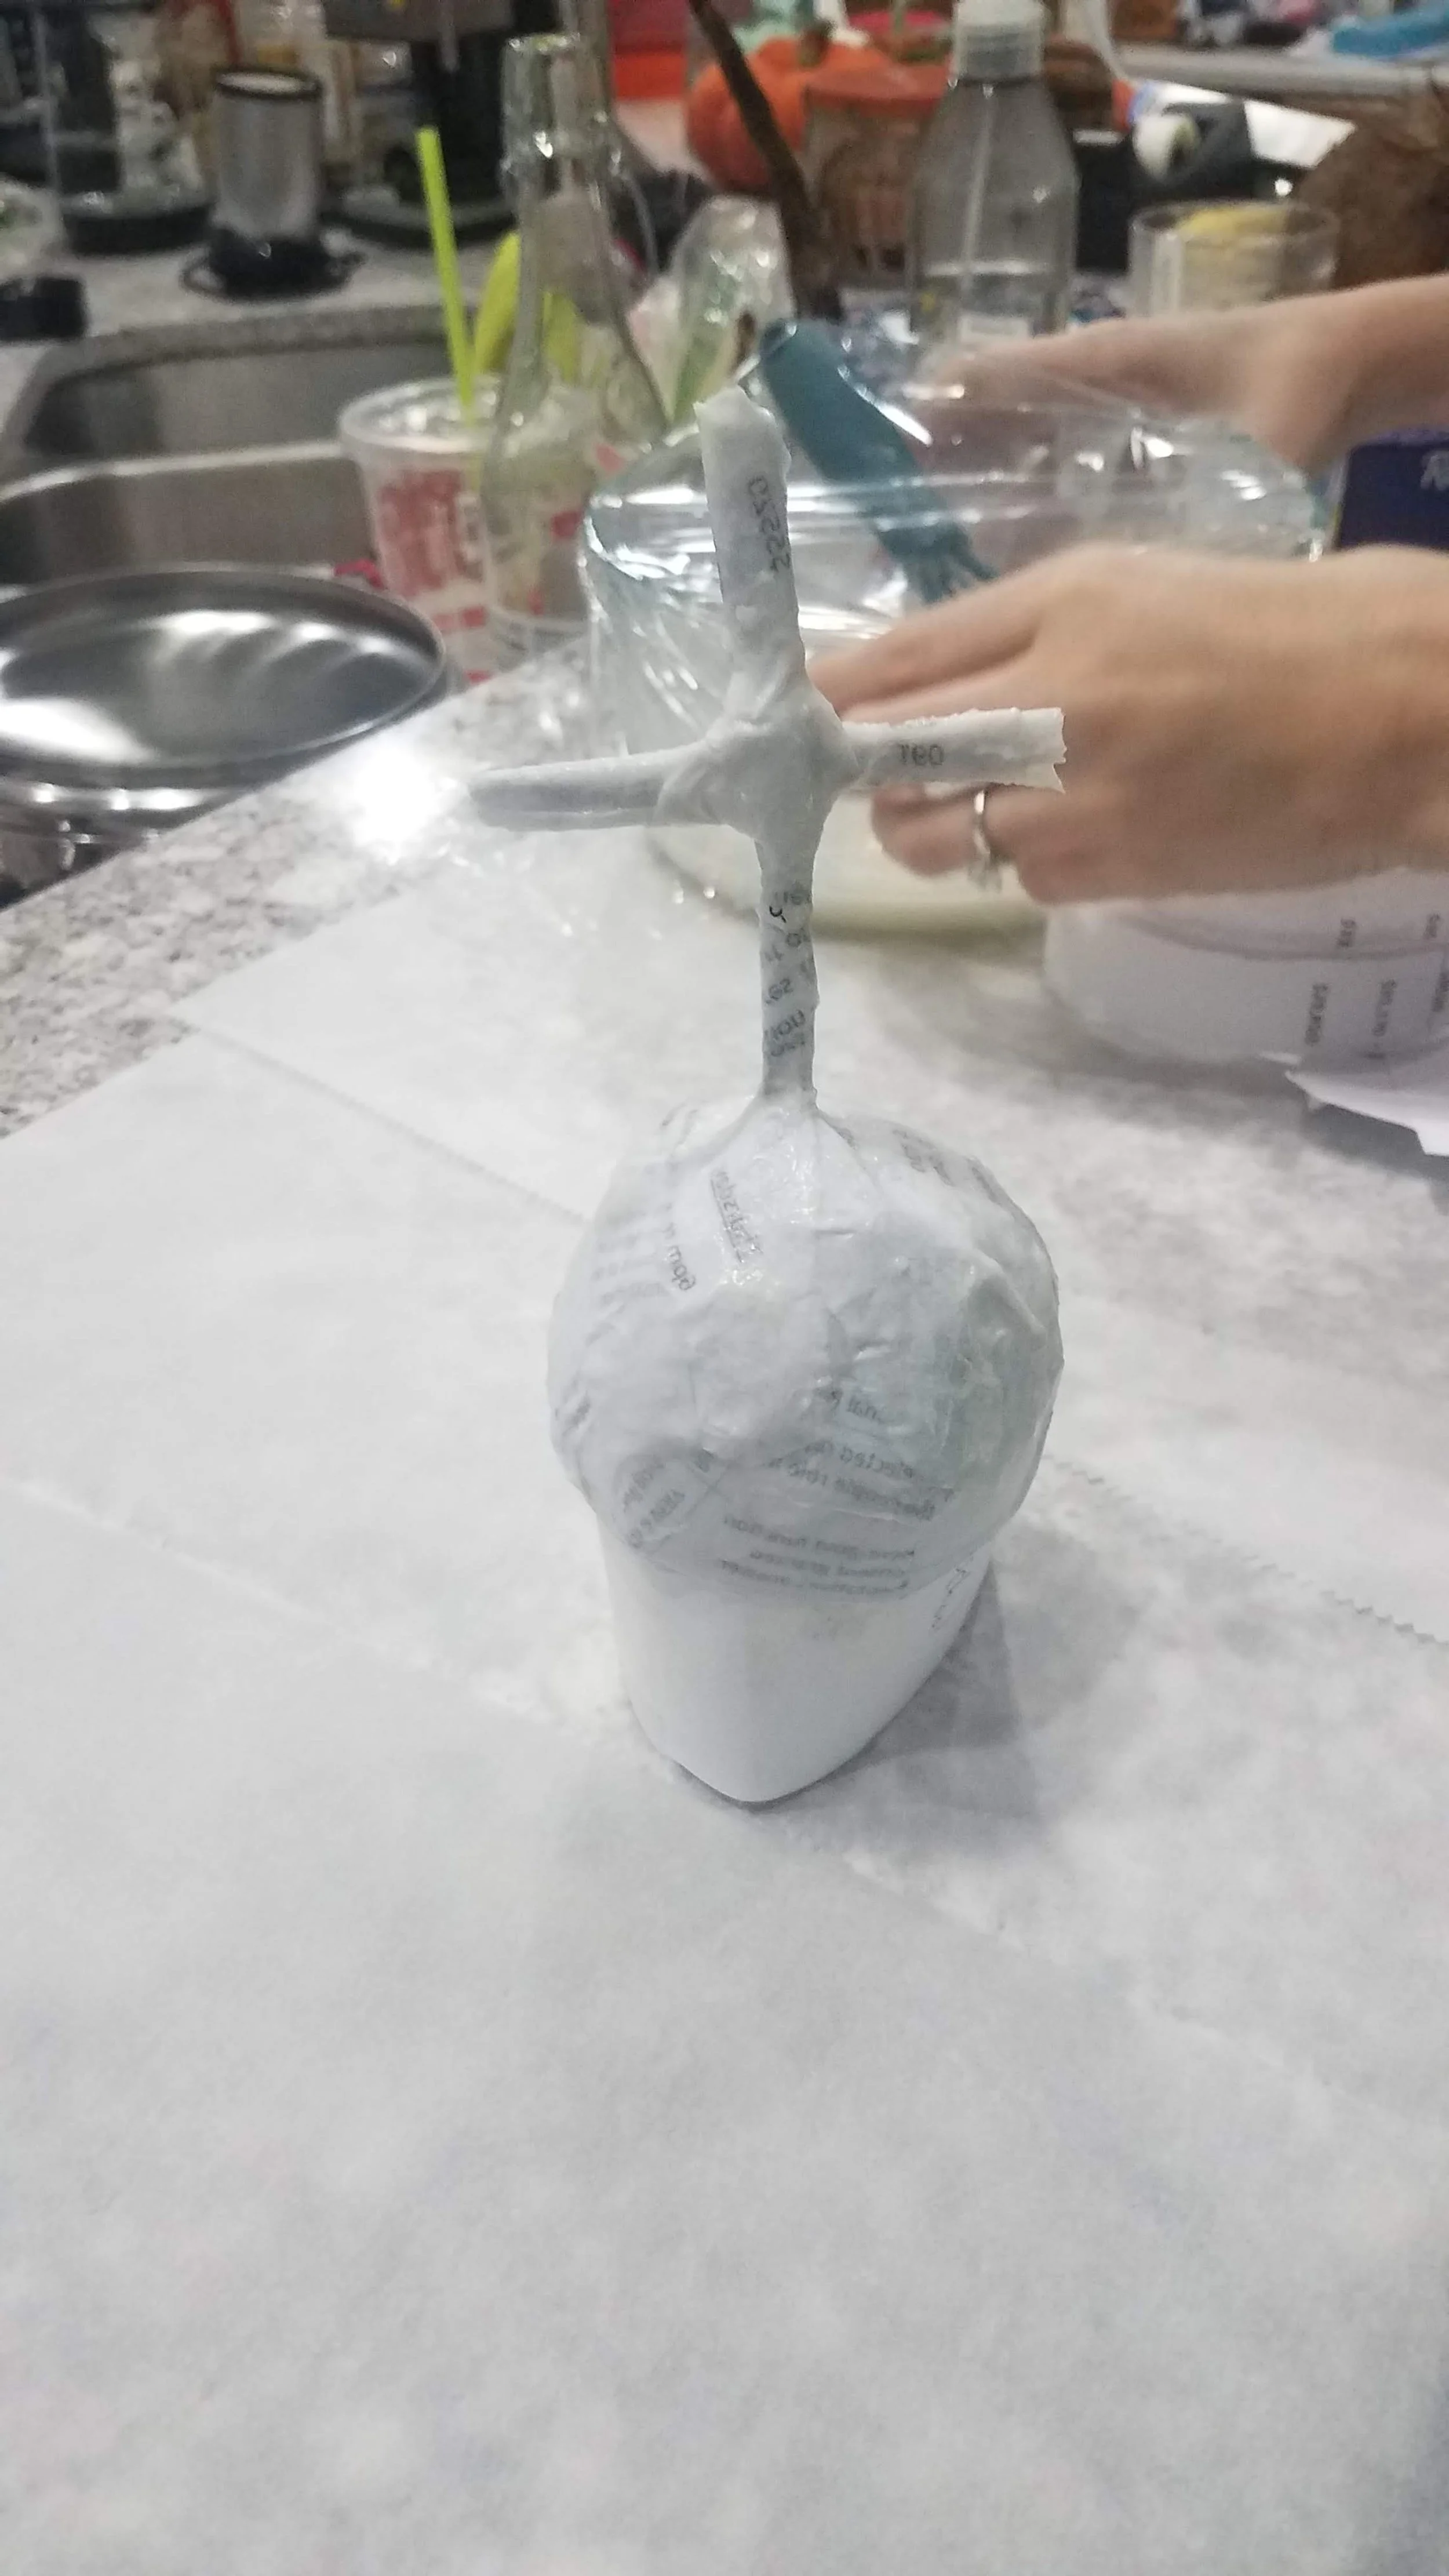
first coat of Paper Mache

second coat of Paper Mache
Krista also brought some cardboard shoe boxes to make the packs and told me she’d look for her brother’s old boy scout backpack and a wooden box to carry our Holy Hand Grenade when she returned home.
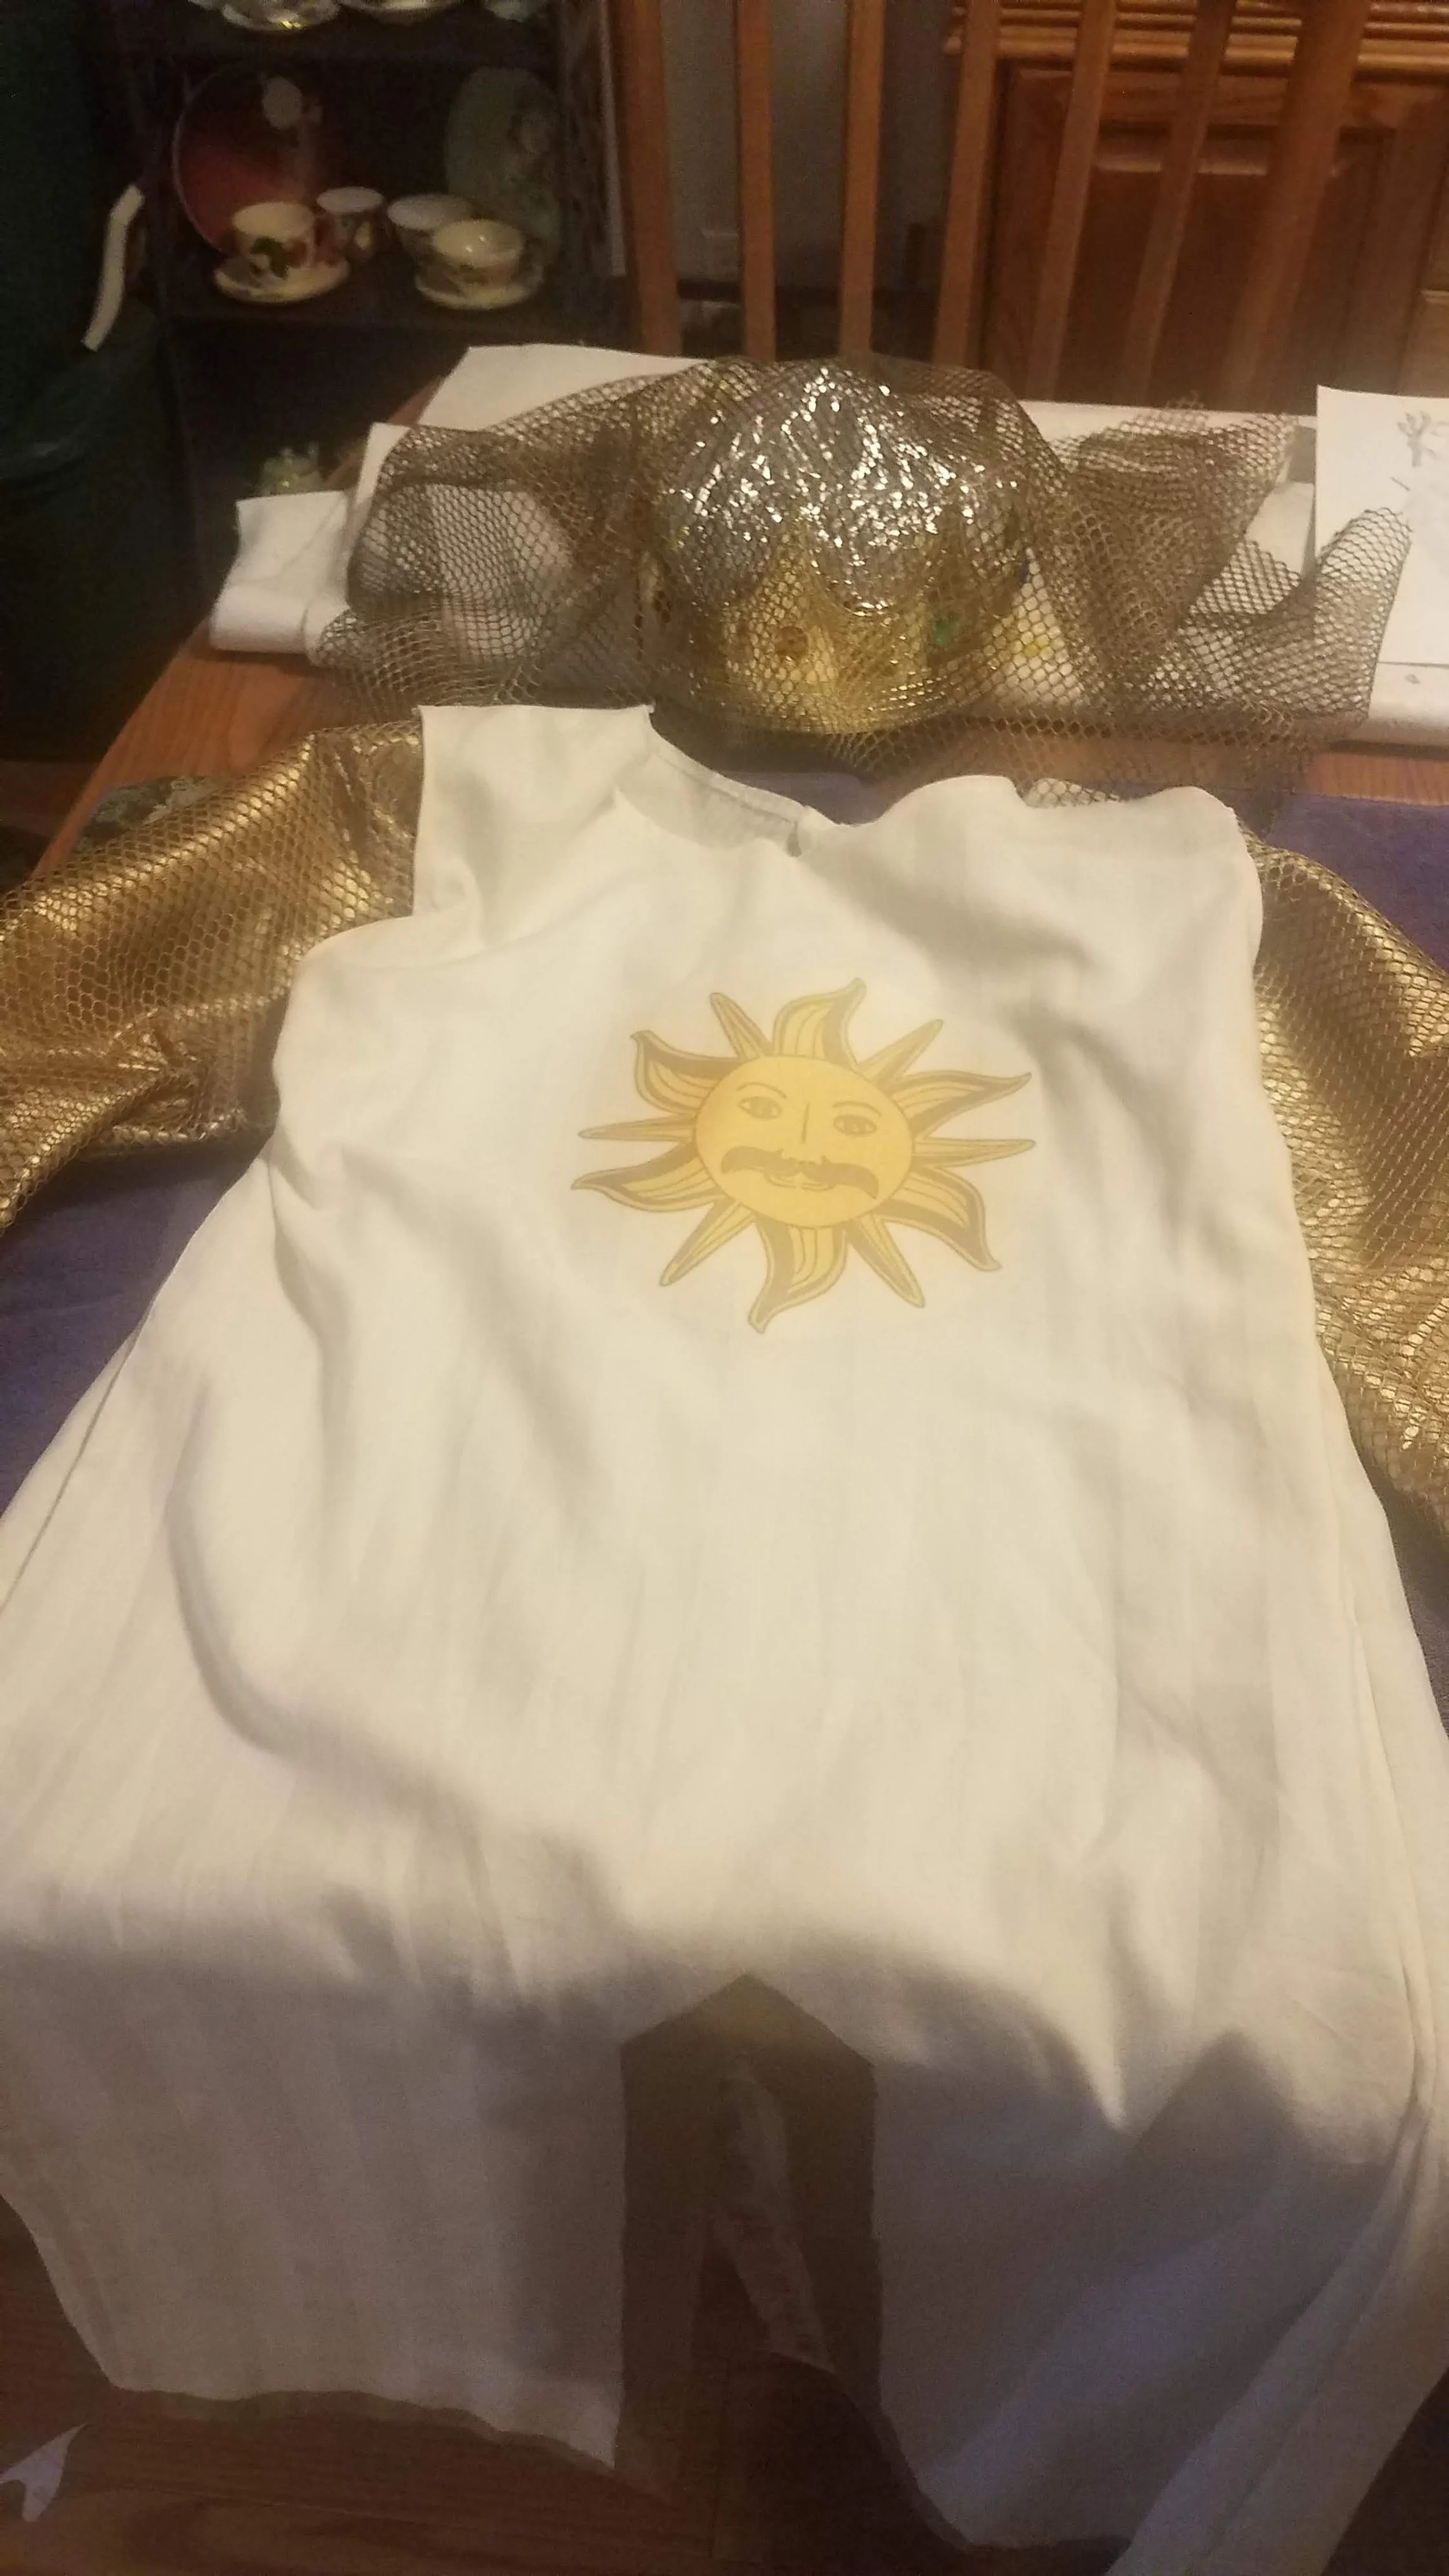
Krista and I also realized our “artistic skills” were not up to the challenge of painting the sigils on our tunics so my mom suggested I use iron-on transfer paper instead. We were able to find some on Amazon that would arrive the next day and even though it was more expensive, I was able to return the fabric paint I bought at Joann’s to offset the cost.
Once it arrived, I followed the instructions carefully so I wouldn’t mess up and printed the designs I found after much searching on Google images. I decided to test the results by making the flags (carried by Patsy & Concorde) first. I used the light fabric transfer paper for the sun and dark fabric transfer paper for the griffin (it leaves the white background instead of turning it transparent). Once I was satisfied with the results, I ironed them on Patsy & Concorde’s tunics. I decided to hold off on King Arthur and Sir Lancelot’s until after I made the “chainmail” sleeves.
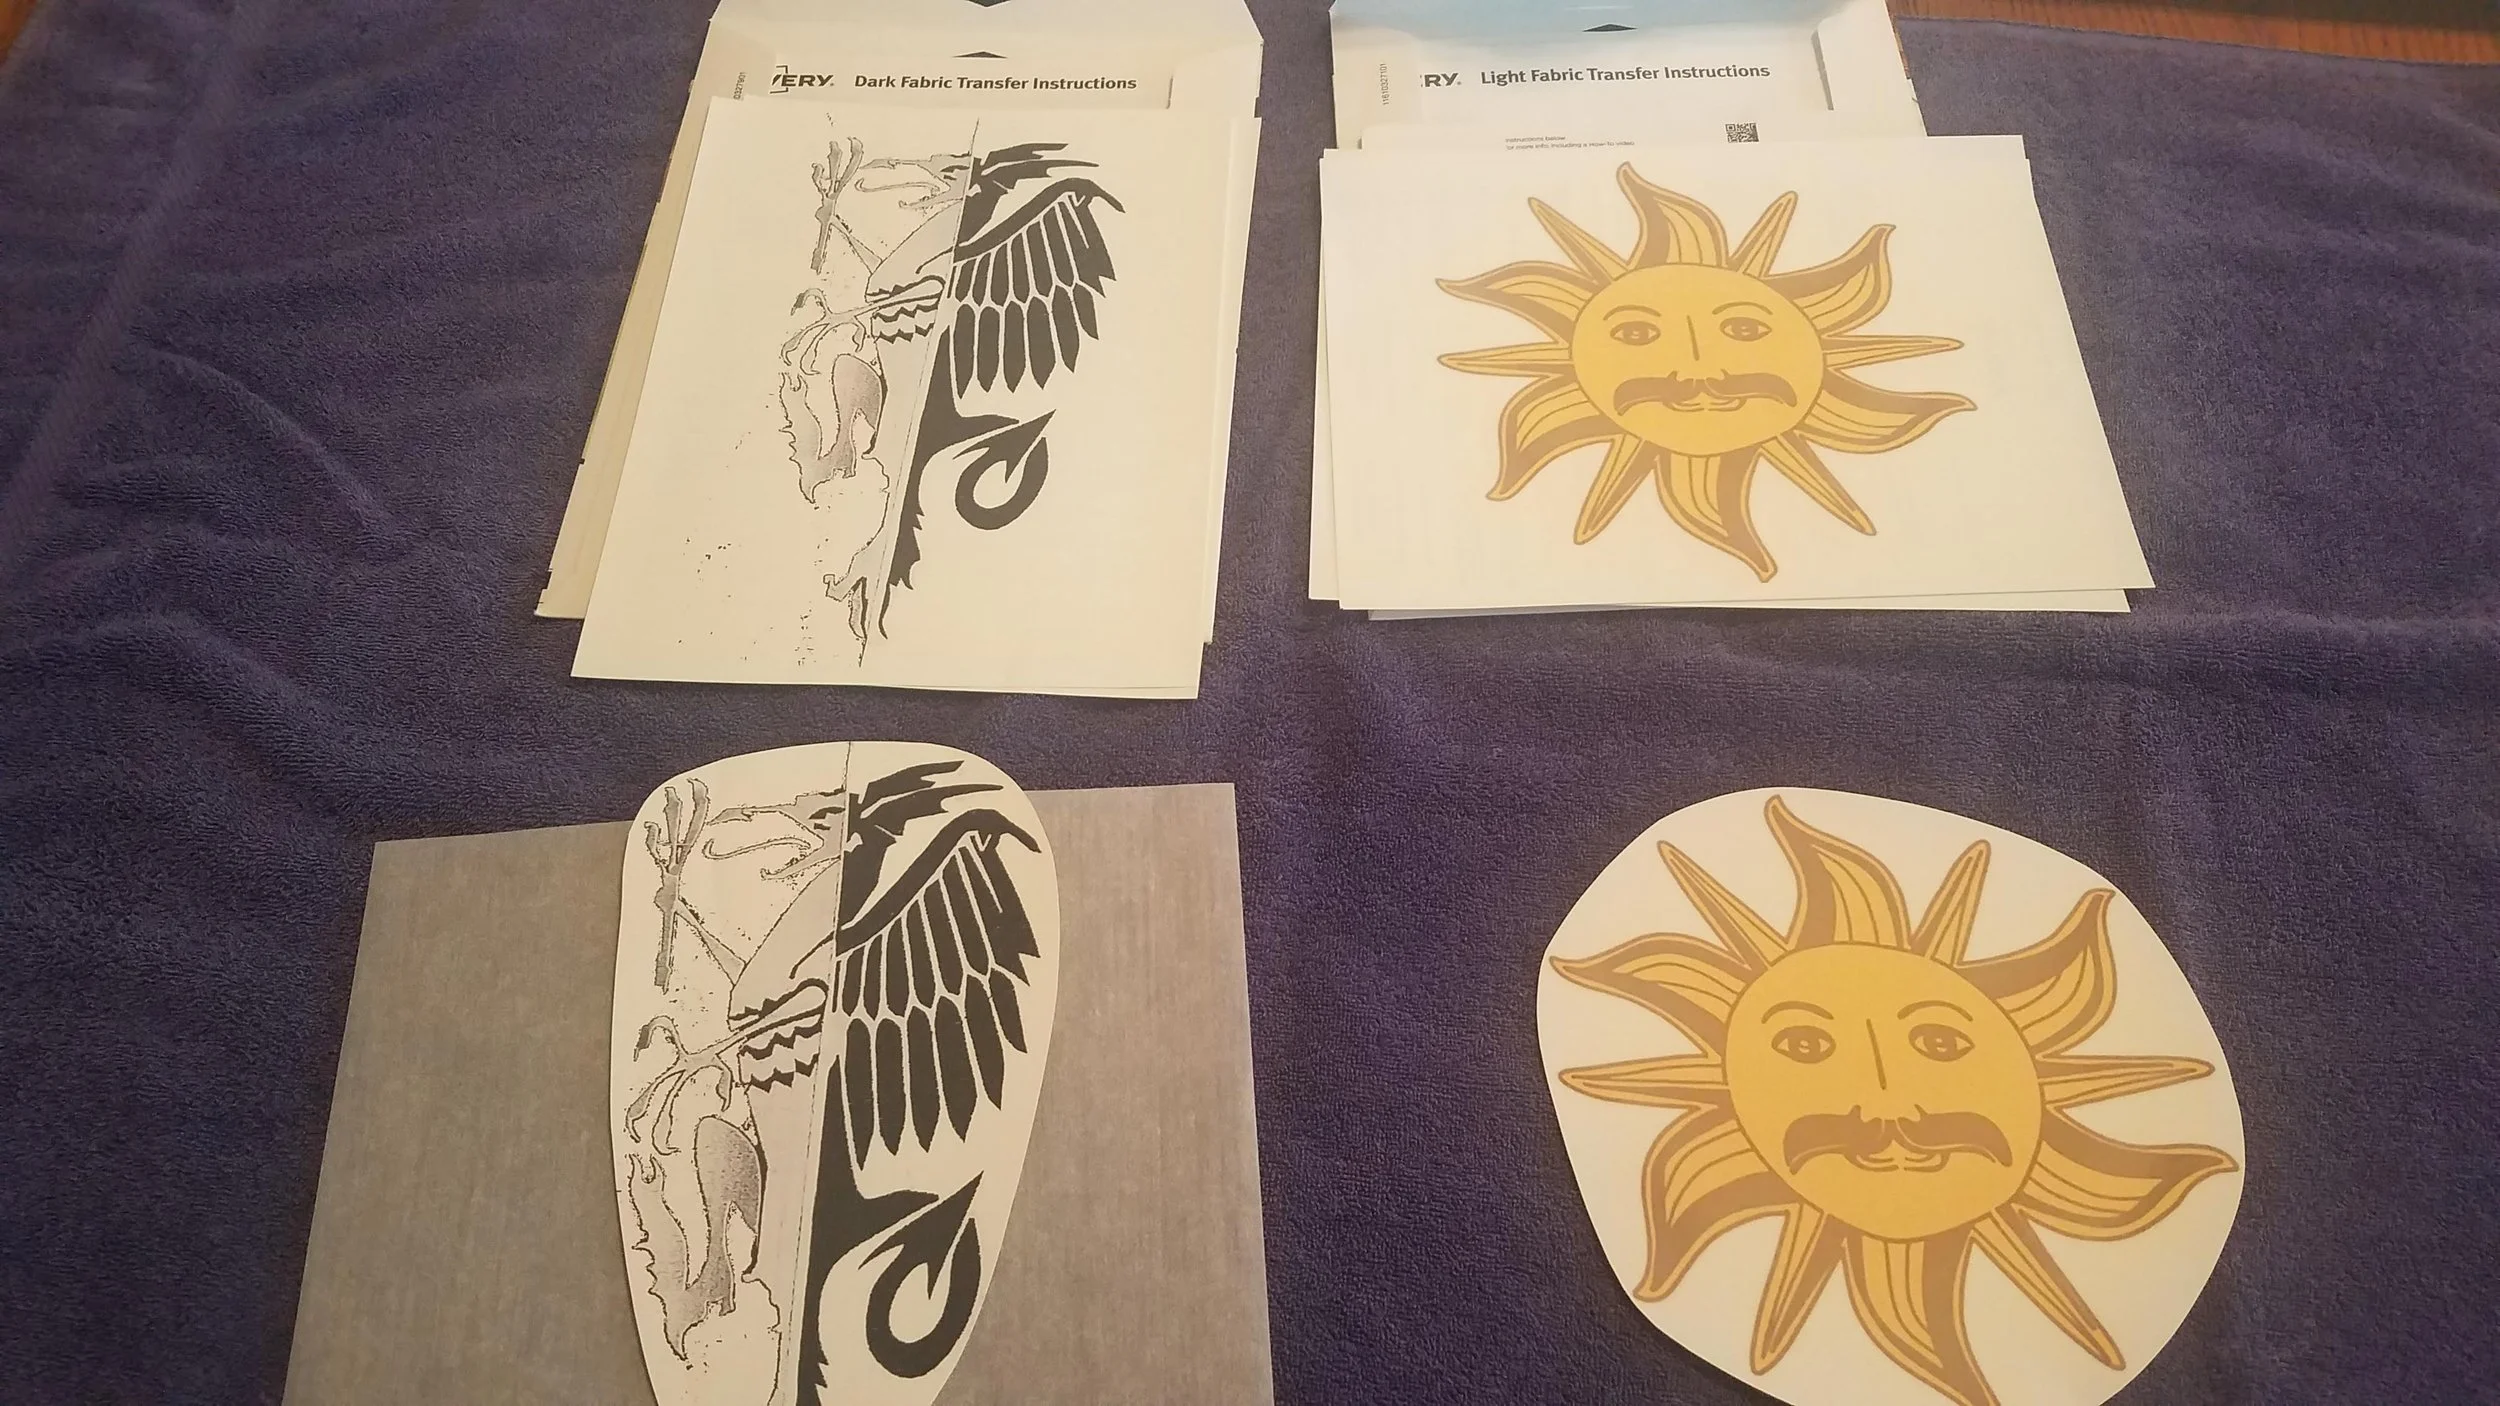
printed out the designs on the transfer paper
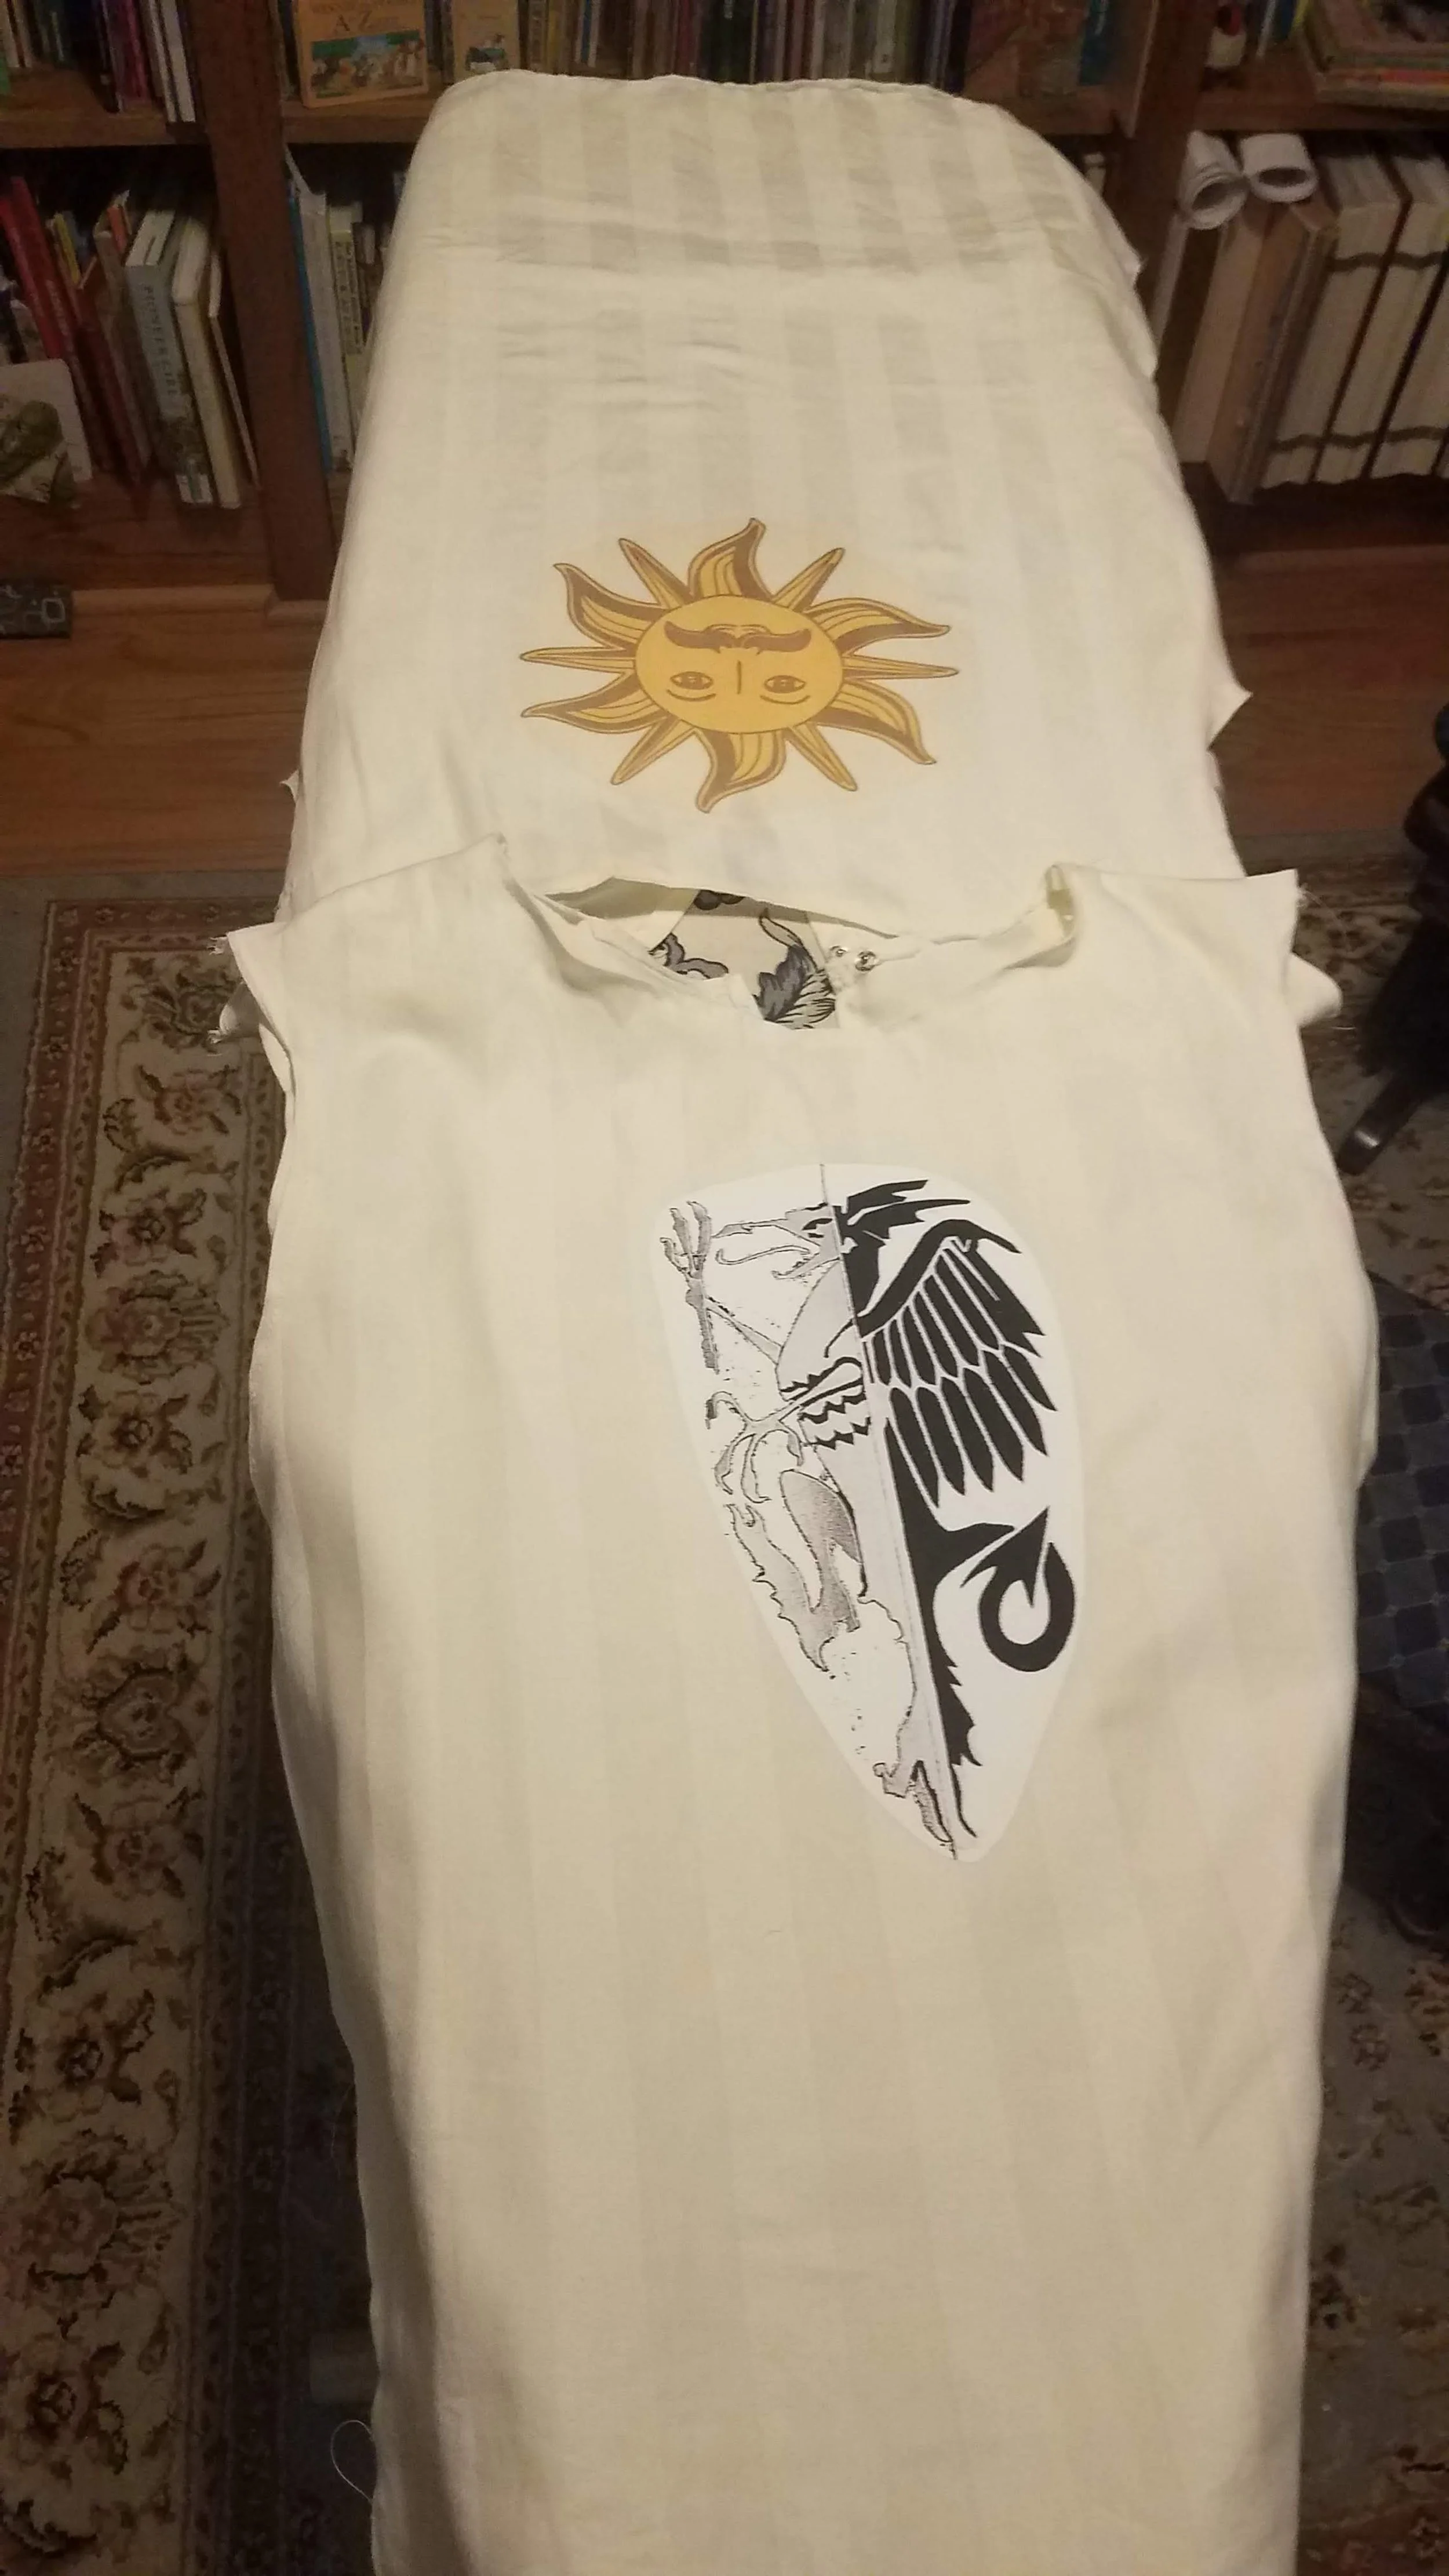
ironing the sigils on Patsy & Concorde’s tunics
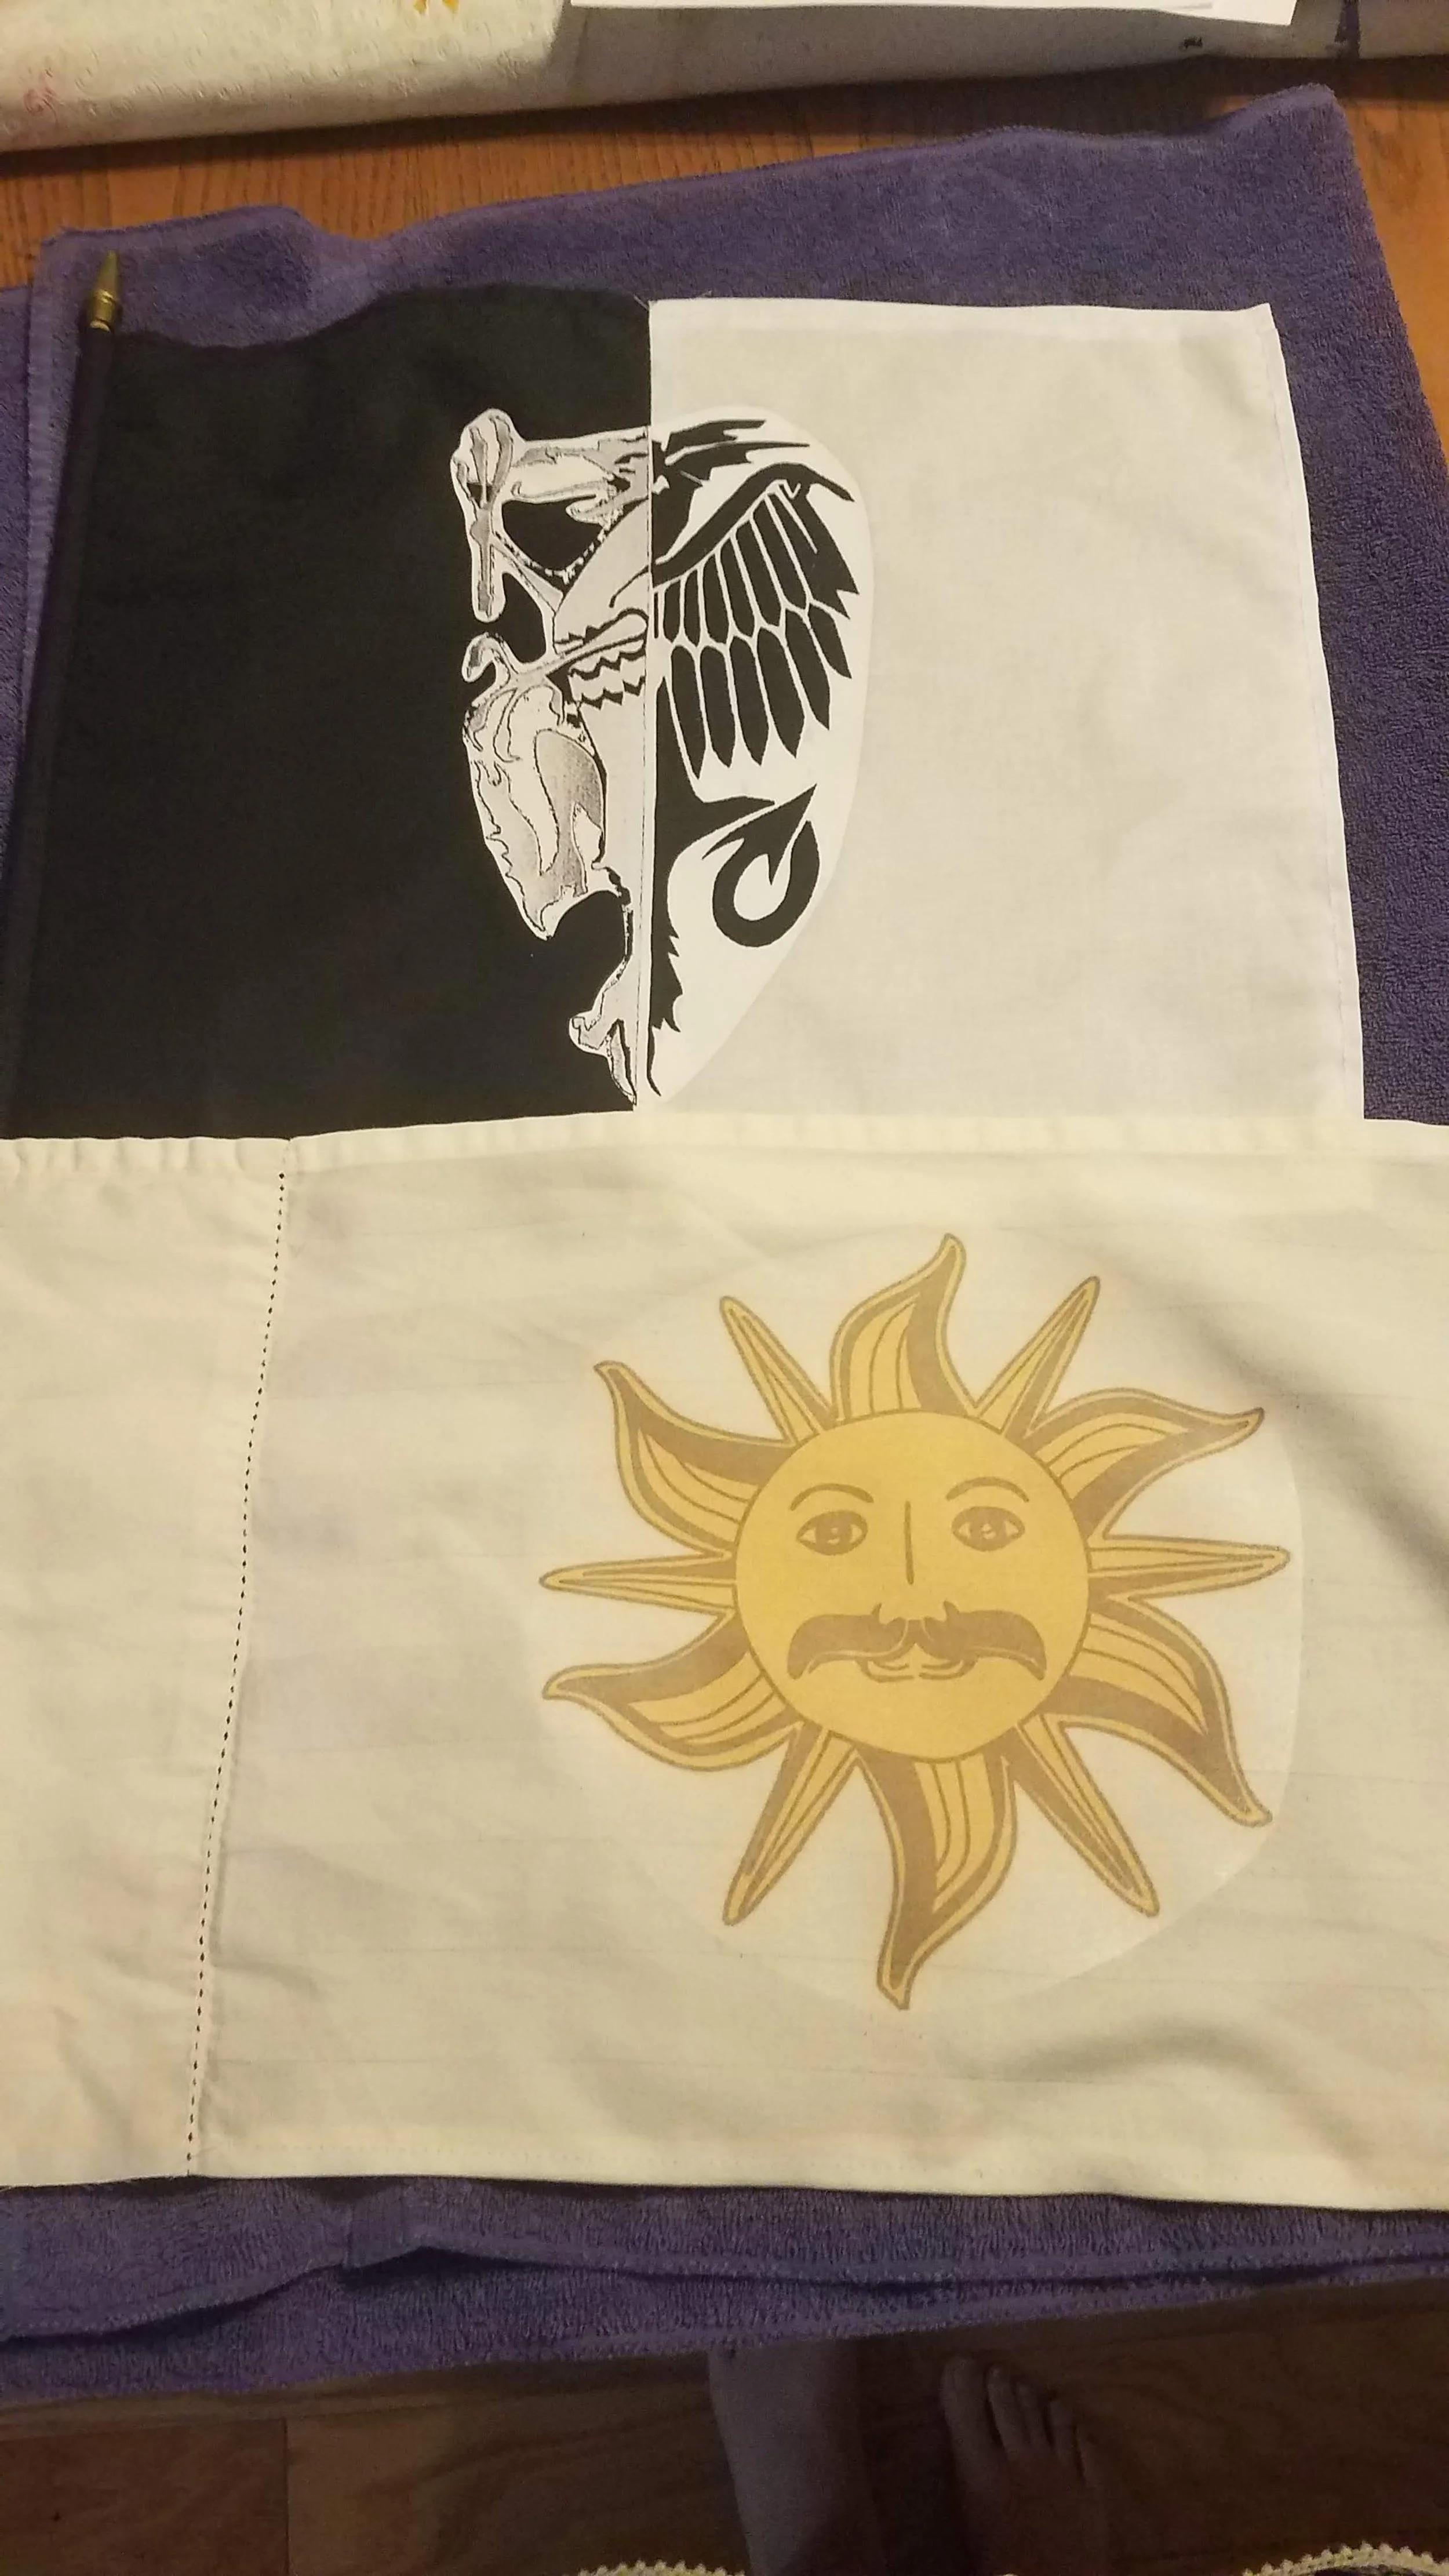
testing on the flags
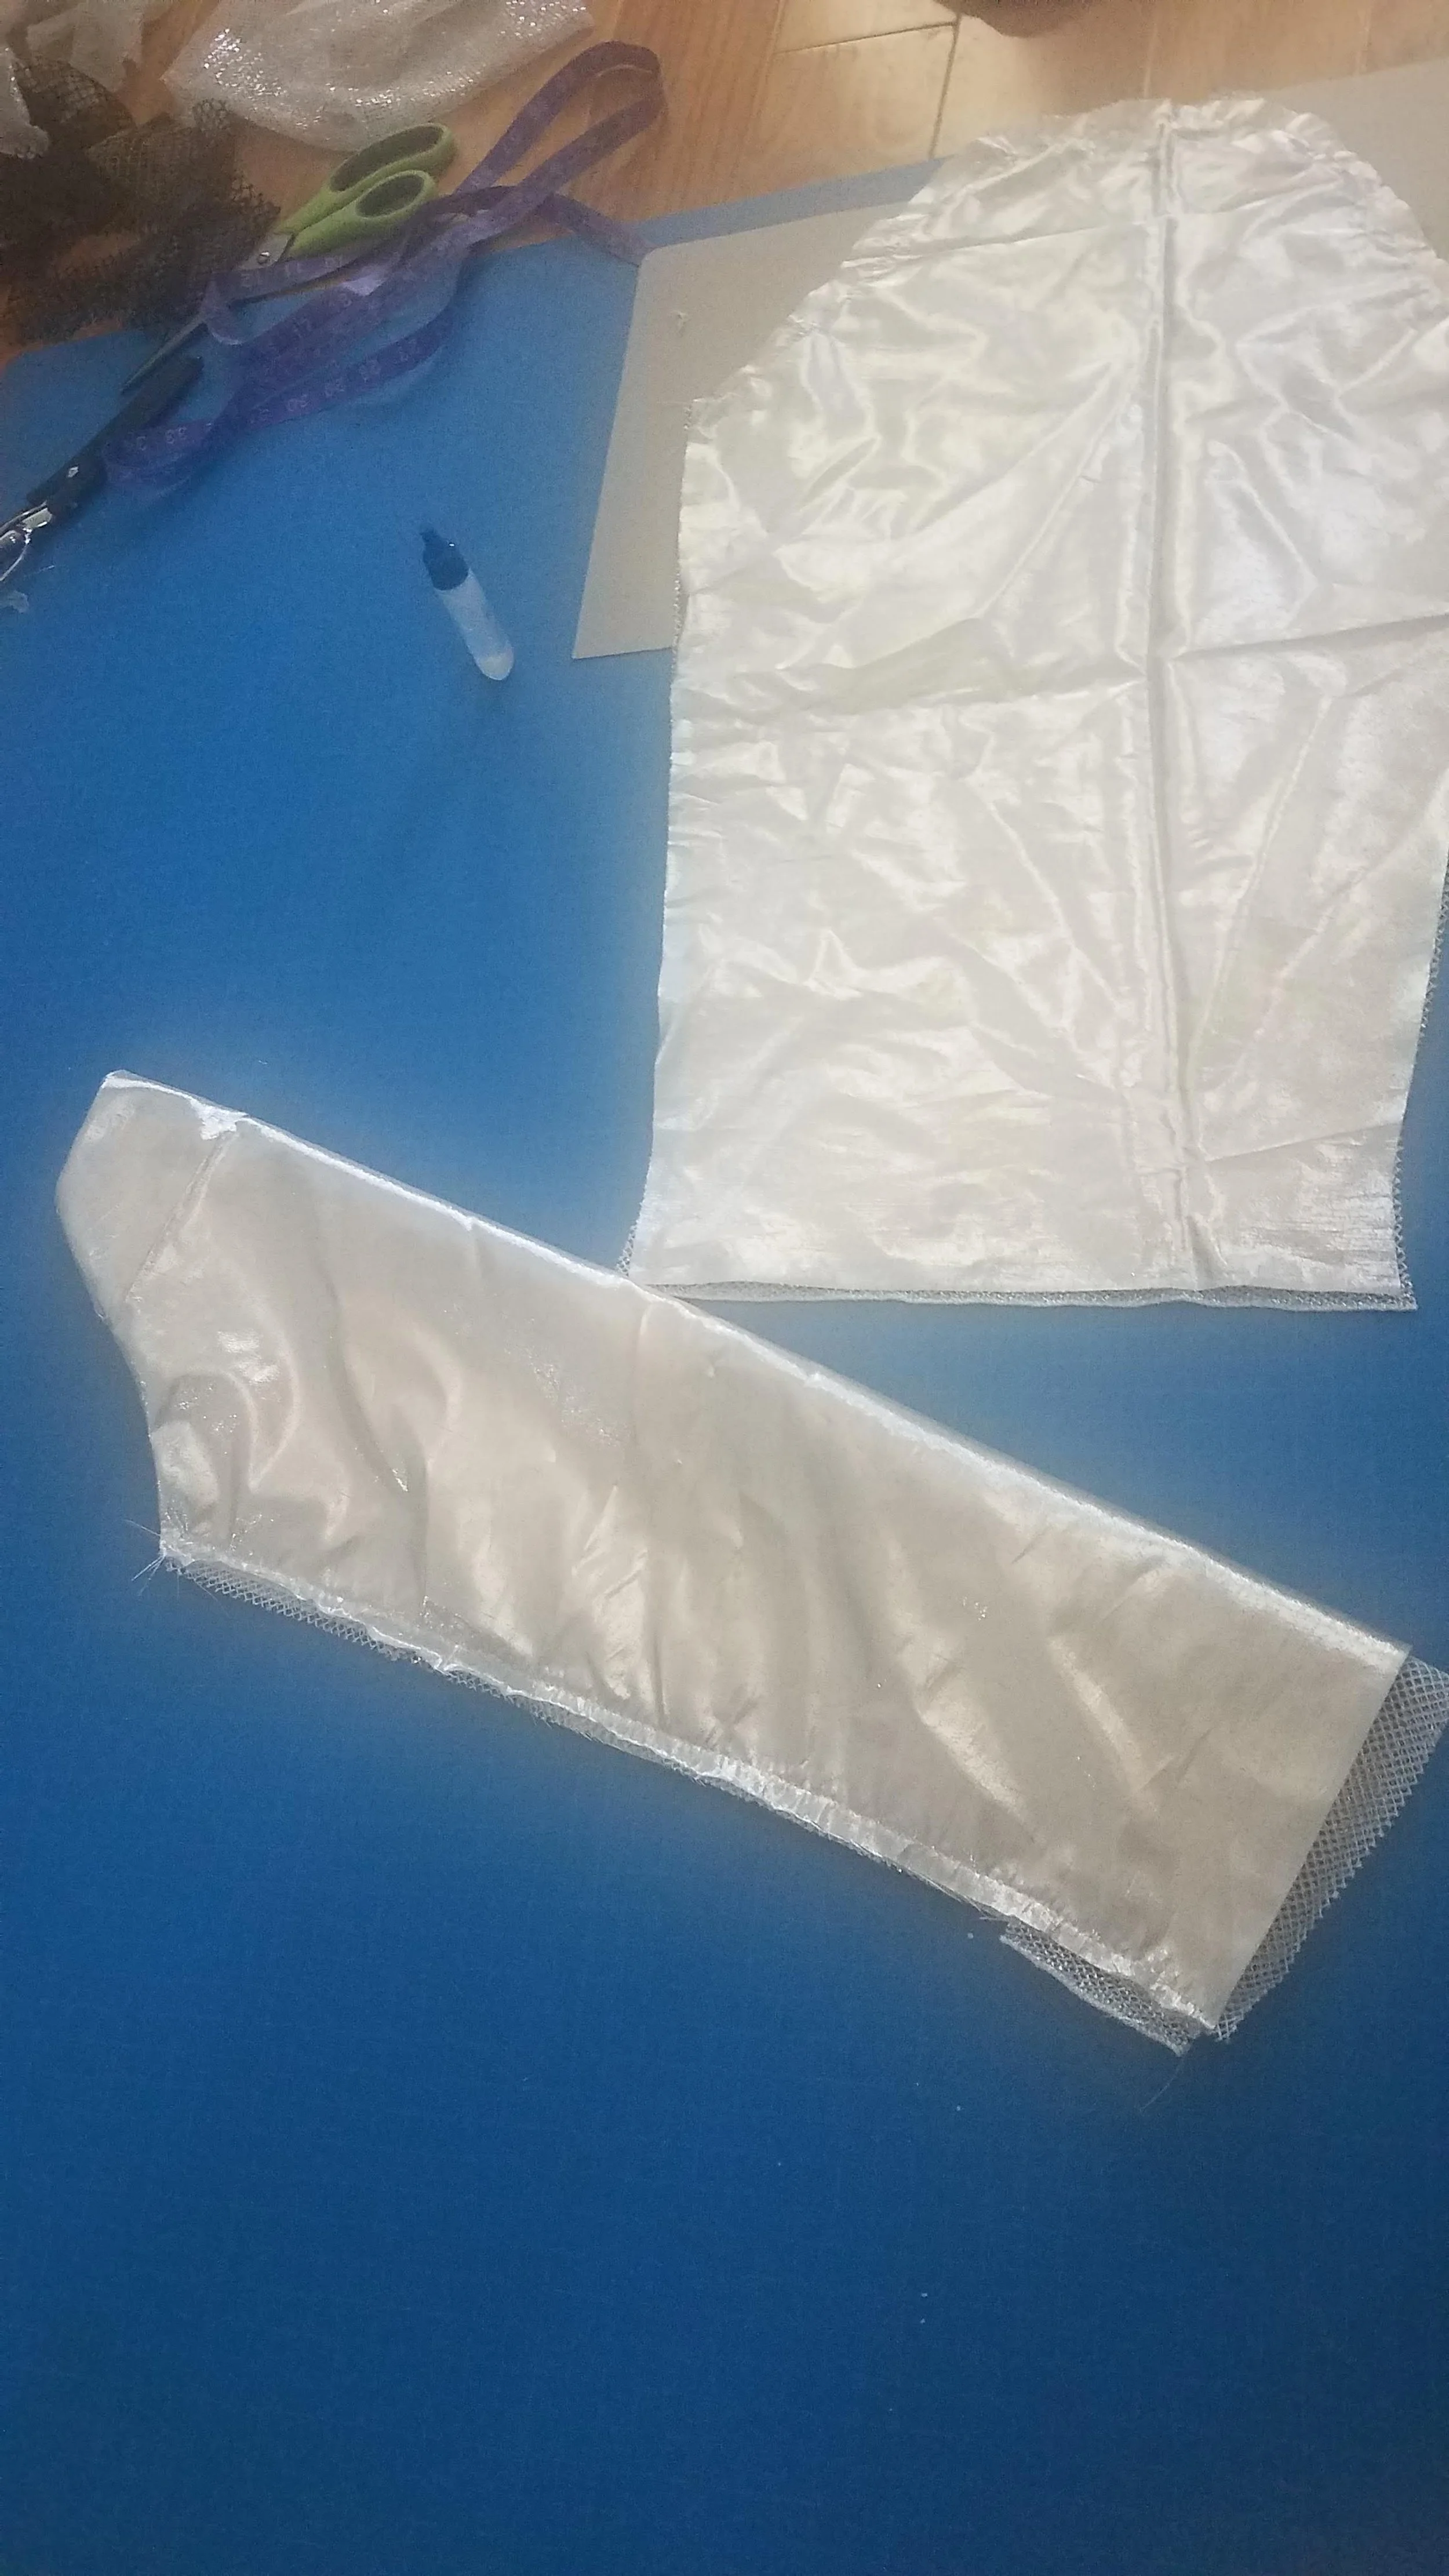
I had put off making the chainmail sleeves because I knew they’d be hard. Sir Lancelot needed silver chainmail and King Arthur needed gold chainmail. Luckily for me in the attic I found some shiny silver fabric and shiny silver “chainmail” fabric scraps (used to make a costume for my middle school’s medieval feast, that’s insane!) that would perfectly suit Sir Lancelot. Unfortunately, when I brought the fabric scrap to Joann’s to ask if they still sold it (more than a decade later) the closest I could find was a black “utility netting” and some gold glitter fabric spray paint.
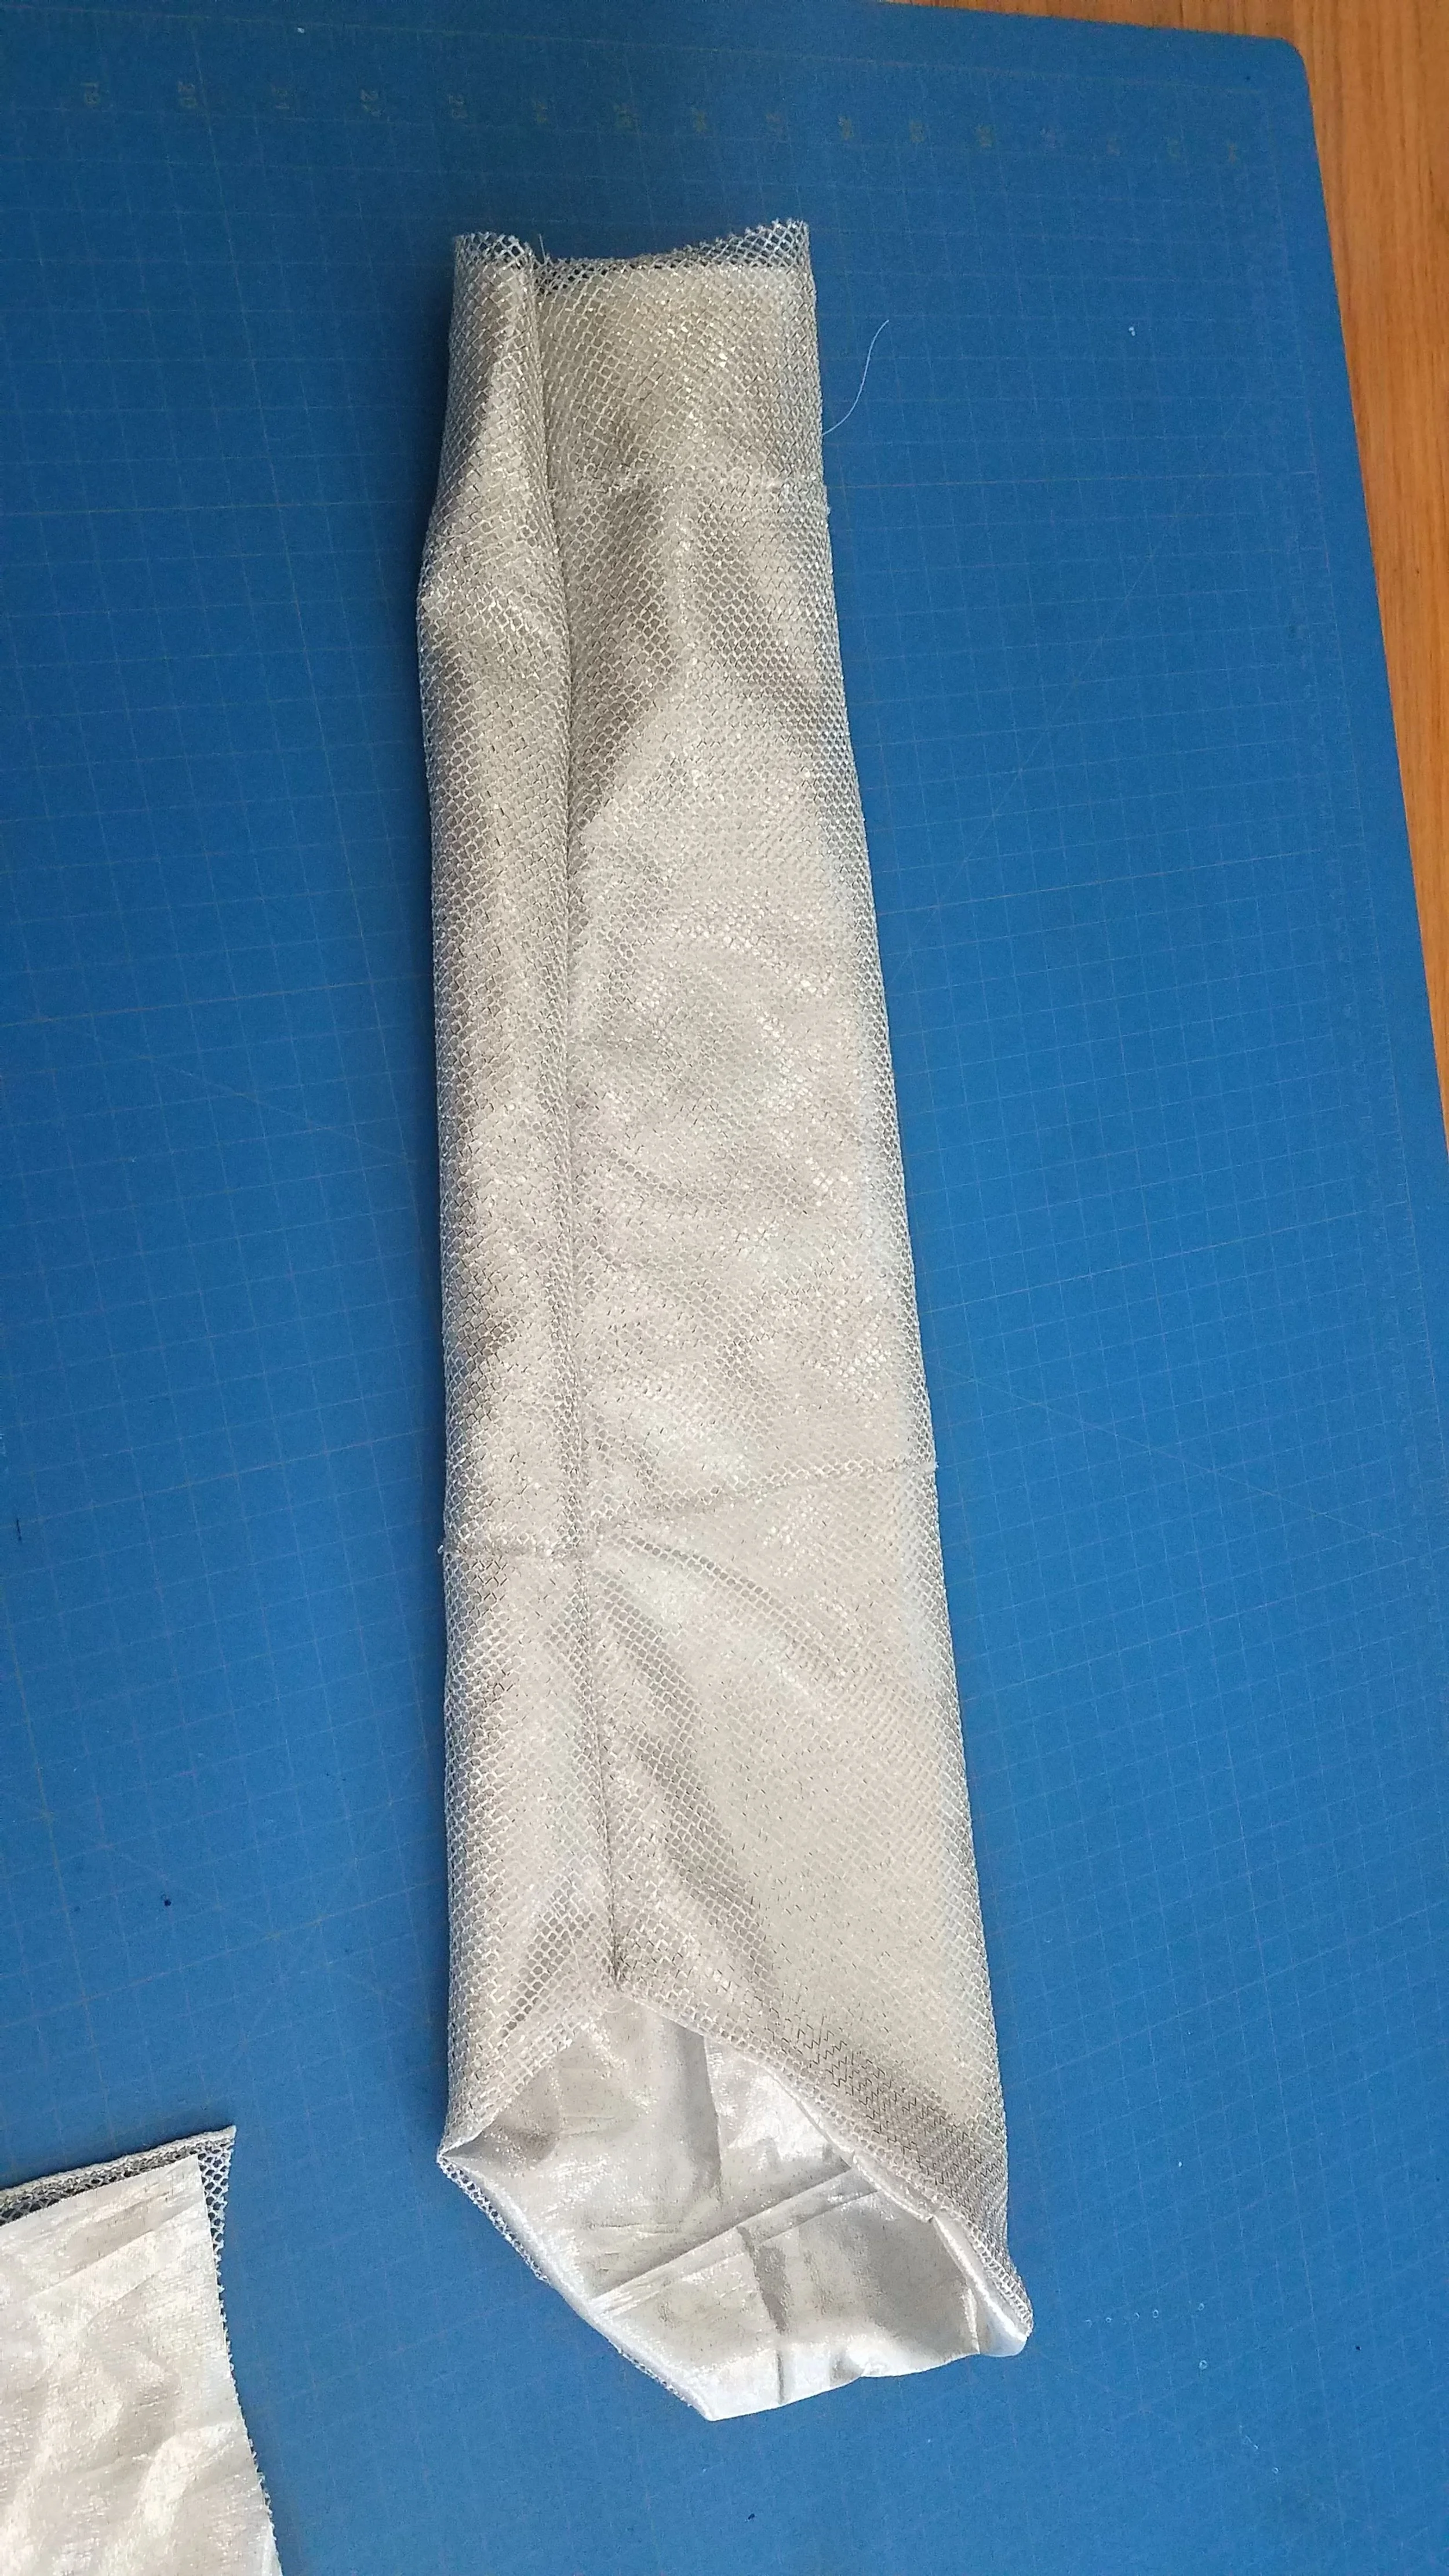
Sleeves are hard to make without a pattern so I searched through our old pattern stash and finally found some “misses” long sleeves I could alter. I cut the pattern piece in half and added a 3 inch strip to make it wide enough for adult arms. I then cut out 4 sleeves in the shiny silver fabric, 2 in the silver chainmail (it required some piecing to make it long enough), and 2 in the black netting. I then sewed just the top seams together so I could flip them right-side-out to make a nice closed top seam. The shiny silver fabric frayed horribly so I covered all the edges with liquid fray check before moving on to the next steps.
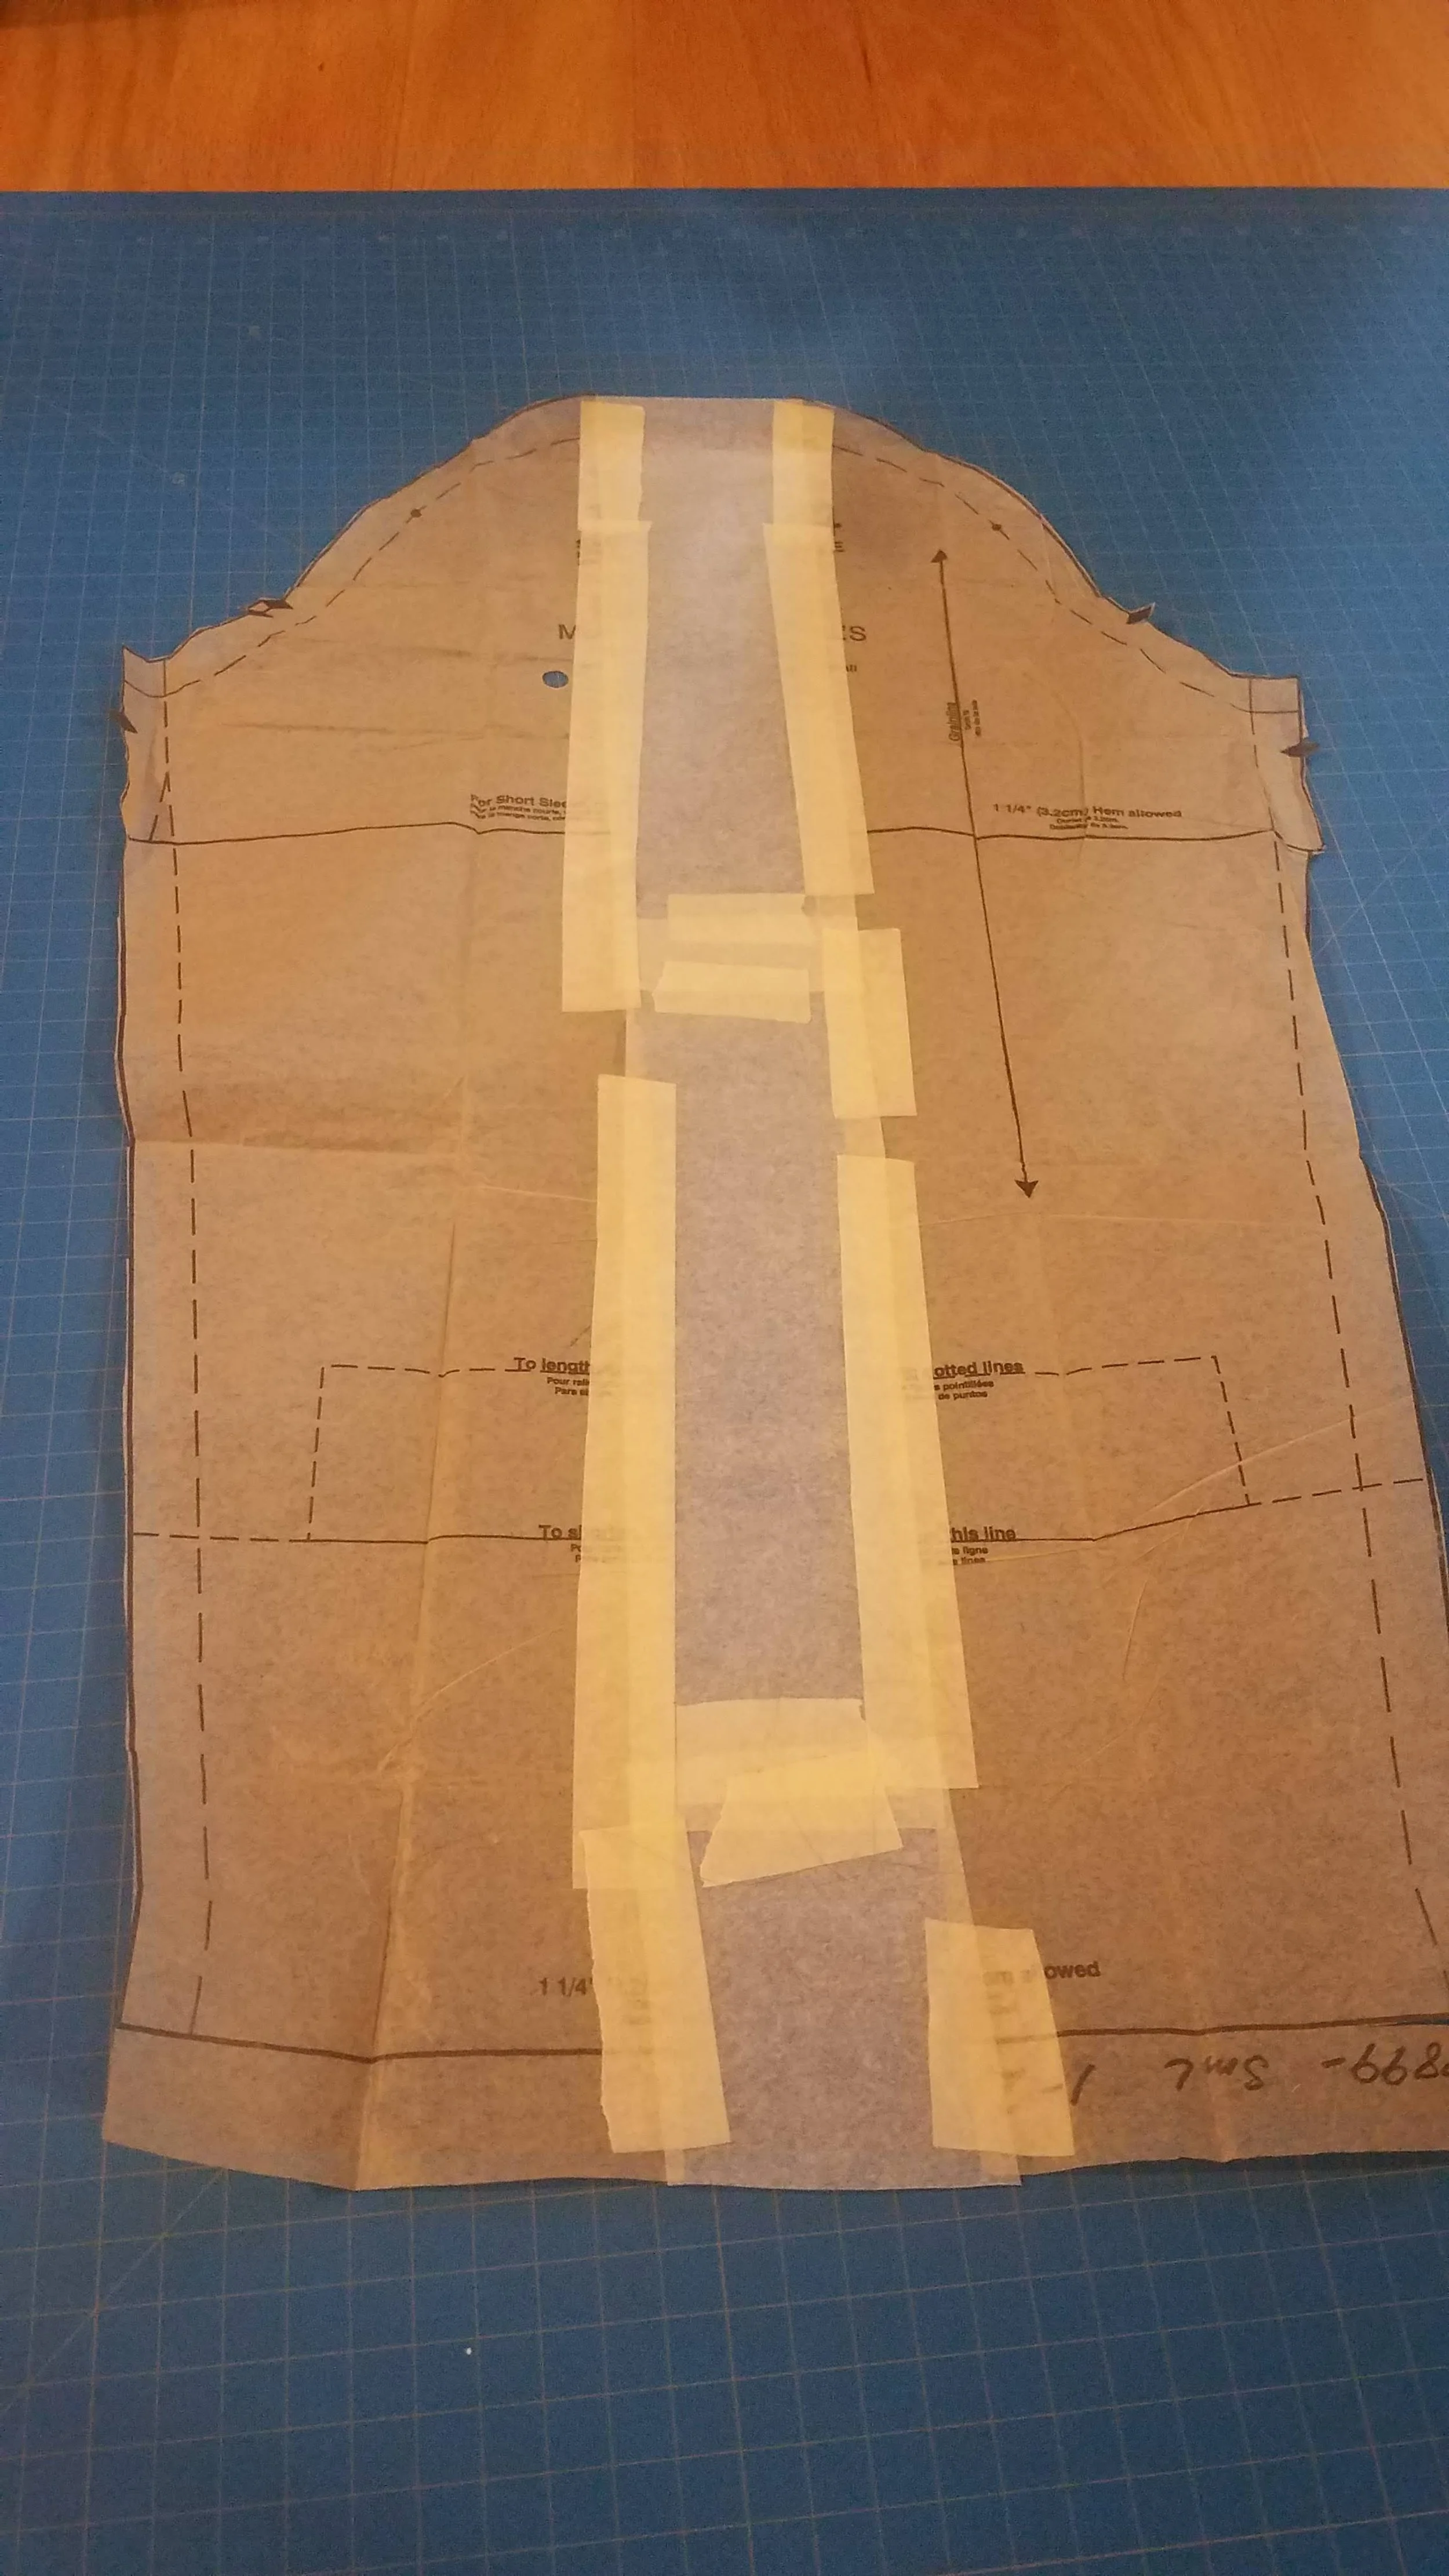
altering the sleeve pattern
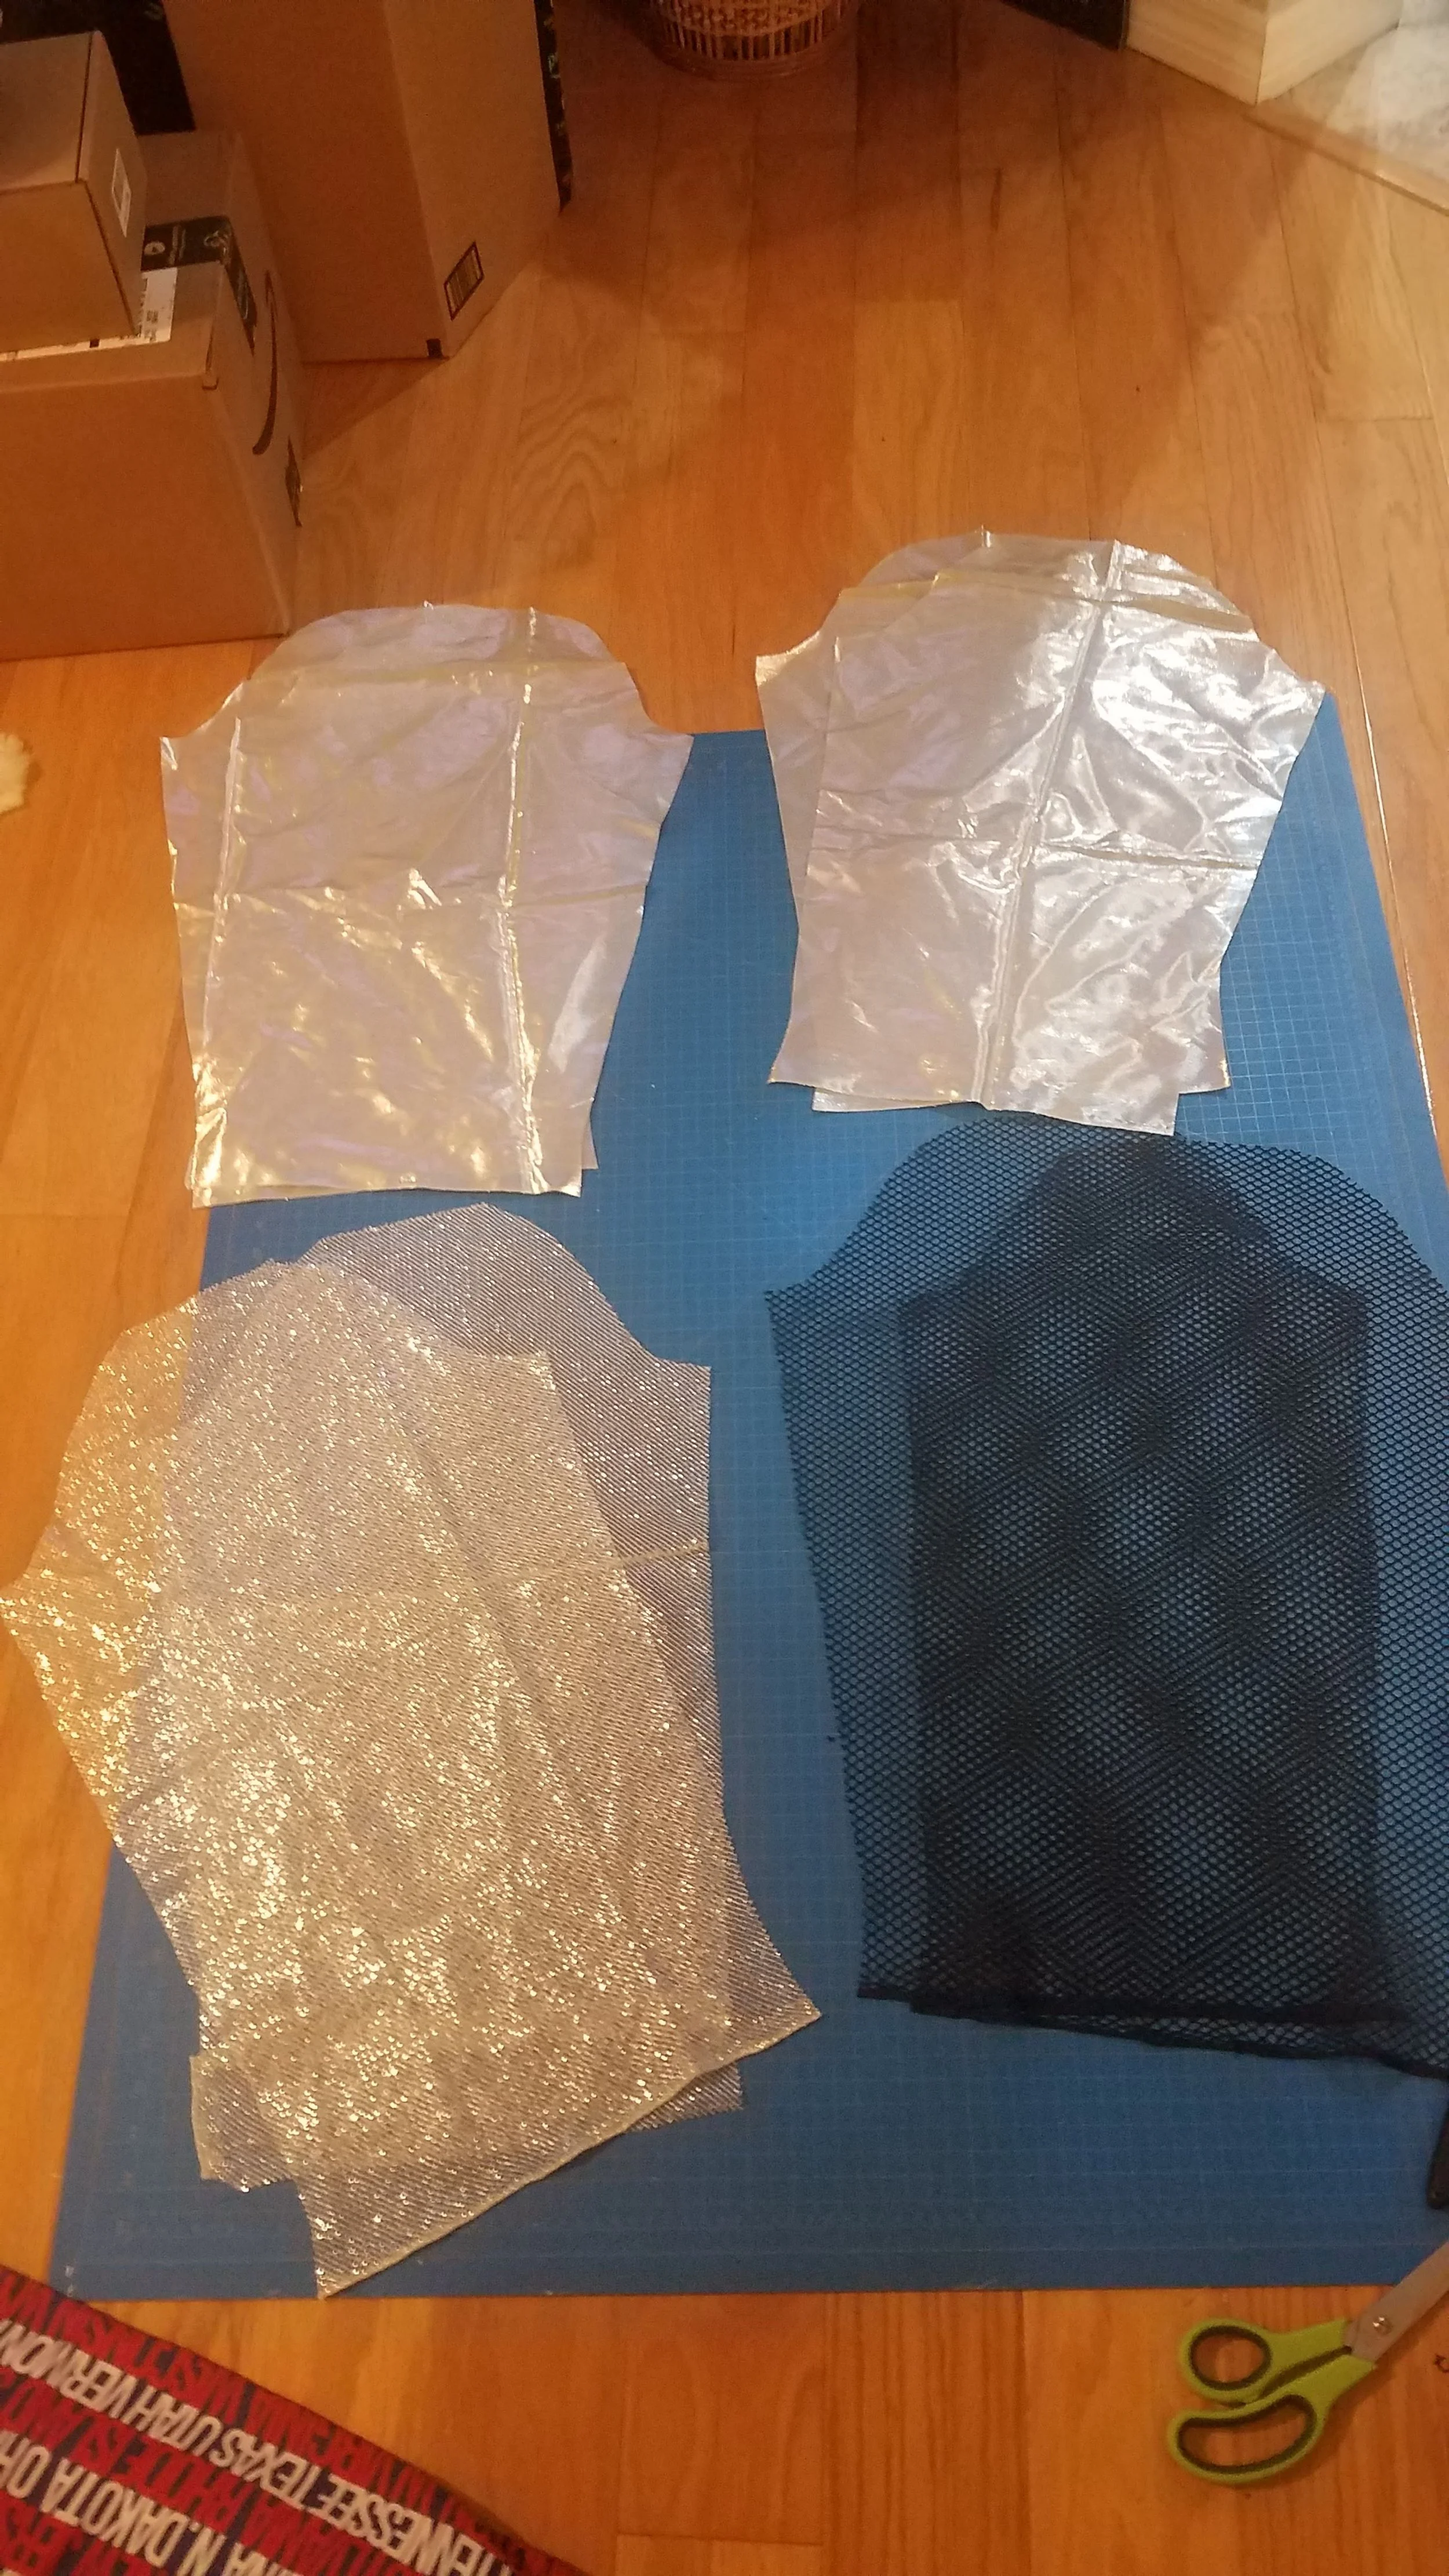
cutting out 8 pieces of fabric for the sleeves
When I tried the gold, glitter, fabric spray paint on the black netting fabric, it did not provide full enough coverage. I decided to return it and went with some regular gold spray paint that I used for my Loki horns last year. I sprayed both sleeves outside and let them dry in the sun while I sewed the silver sleeves. I did 2 coats while moving the netting fabric around to fully cover the silver fabric underneath.

stacking the sleeve materials before sewing (and my sleeping dog being cute)

the gold fabric spray paint was disappointing so I switched to regular spray paint
To sew the sleeves, I pinned the right sides together along the side seams and sewed through all 4 layers of fabric at once which worked well at catching all the netting. When I flipped them right-side-out I was very pleased with the final results and went to do the same thing with the now dry gold sleeves. The gold spray paint made the fabric stiffer but it only made it seem more sturdy like real chainmail. I sewed them the same as the silver ones and flipped them right-side-out.
sewing the sleeves wrong-sides-together
flipping the sleeve right-side-out
At this point, I realized I forgot that King Arthur has a gold hem so I painted the hem with gold acrylic paint and waited for it to dry before turning it over and painting the back hem.

finished the gold sleeves
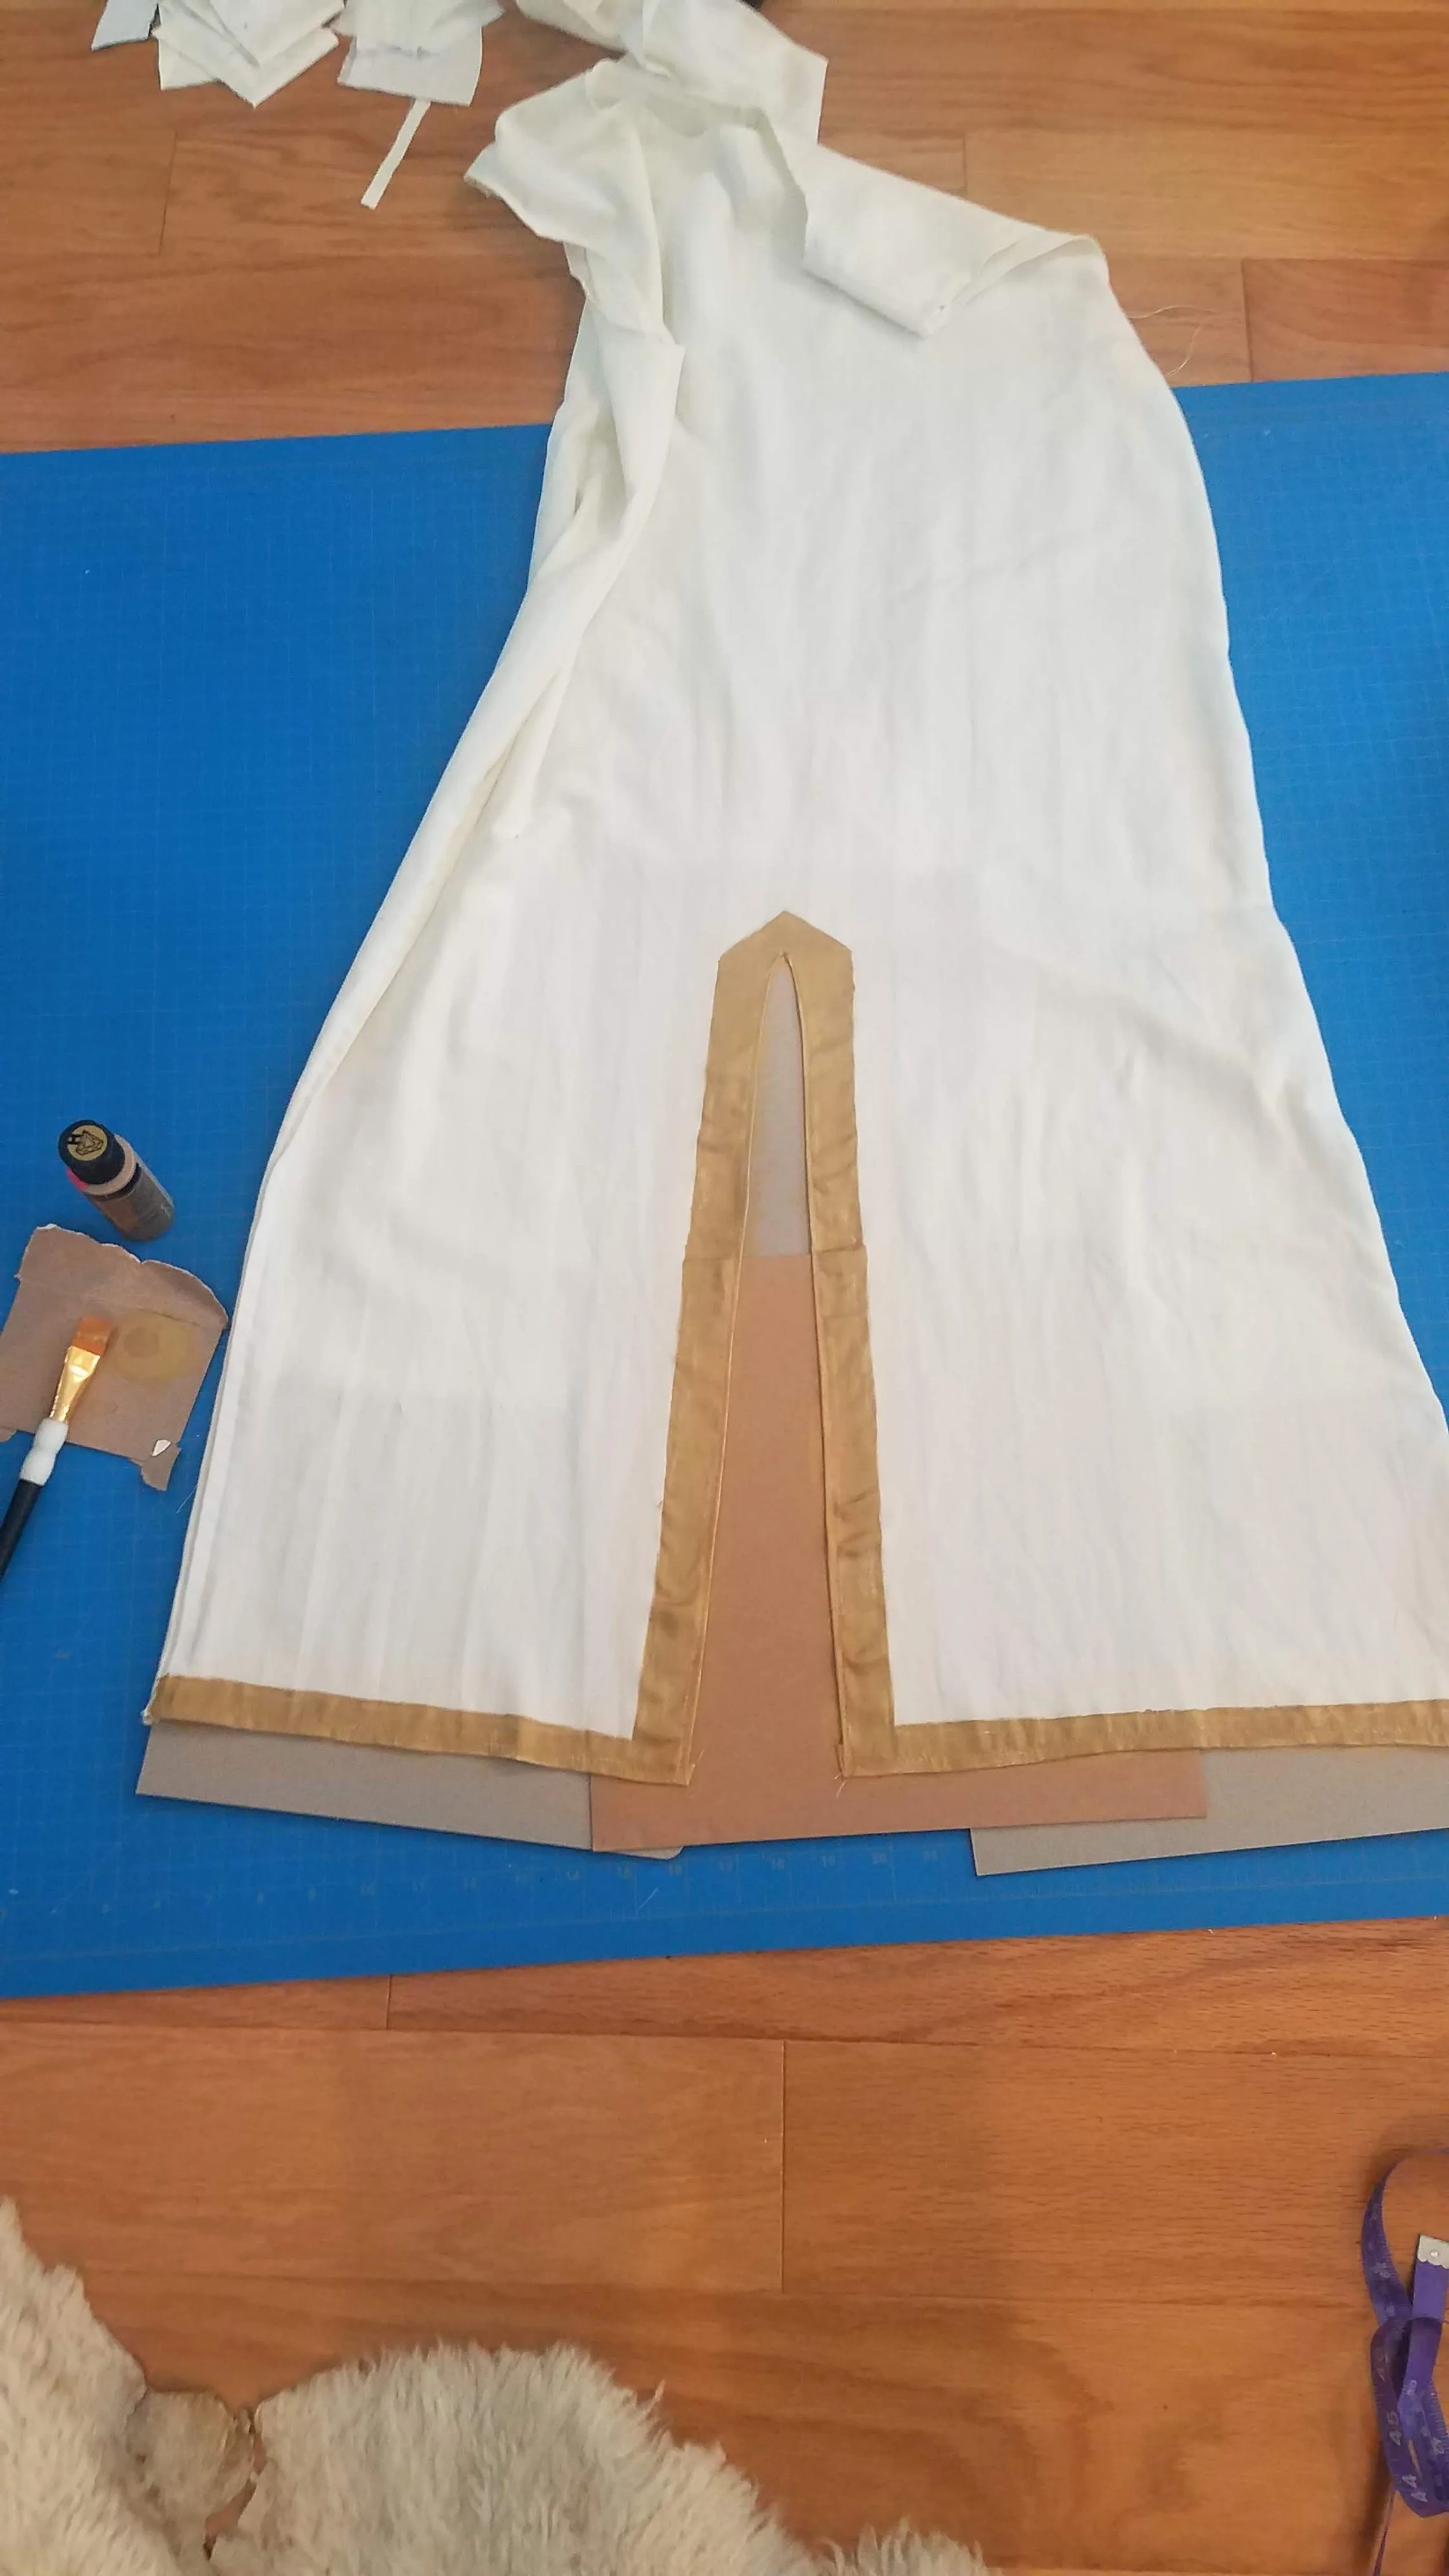
painting the hem gold
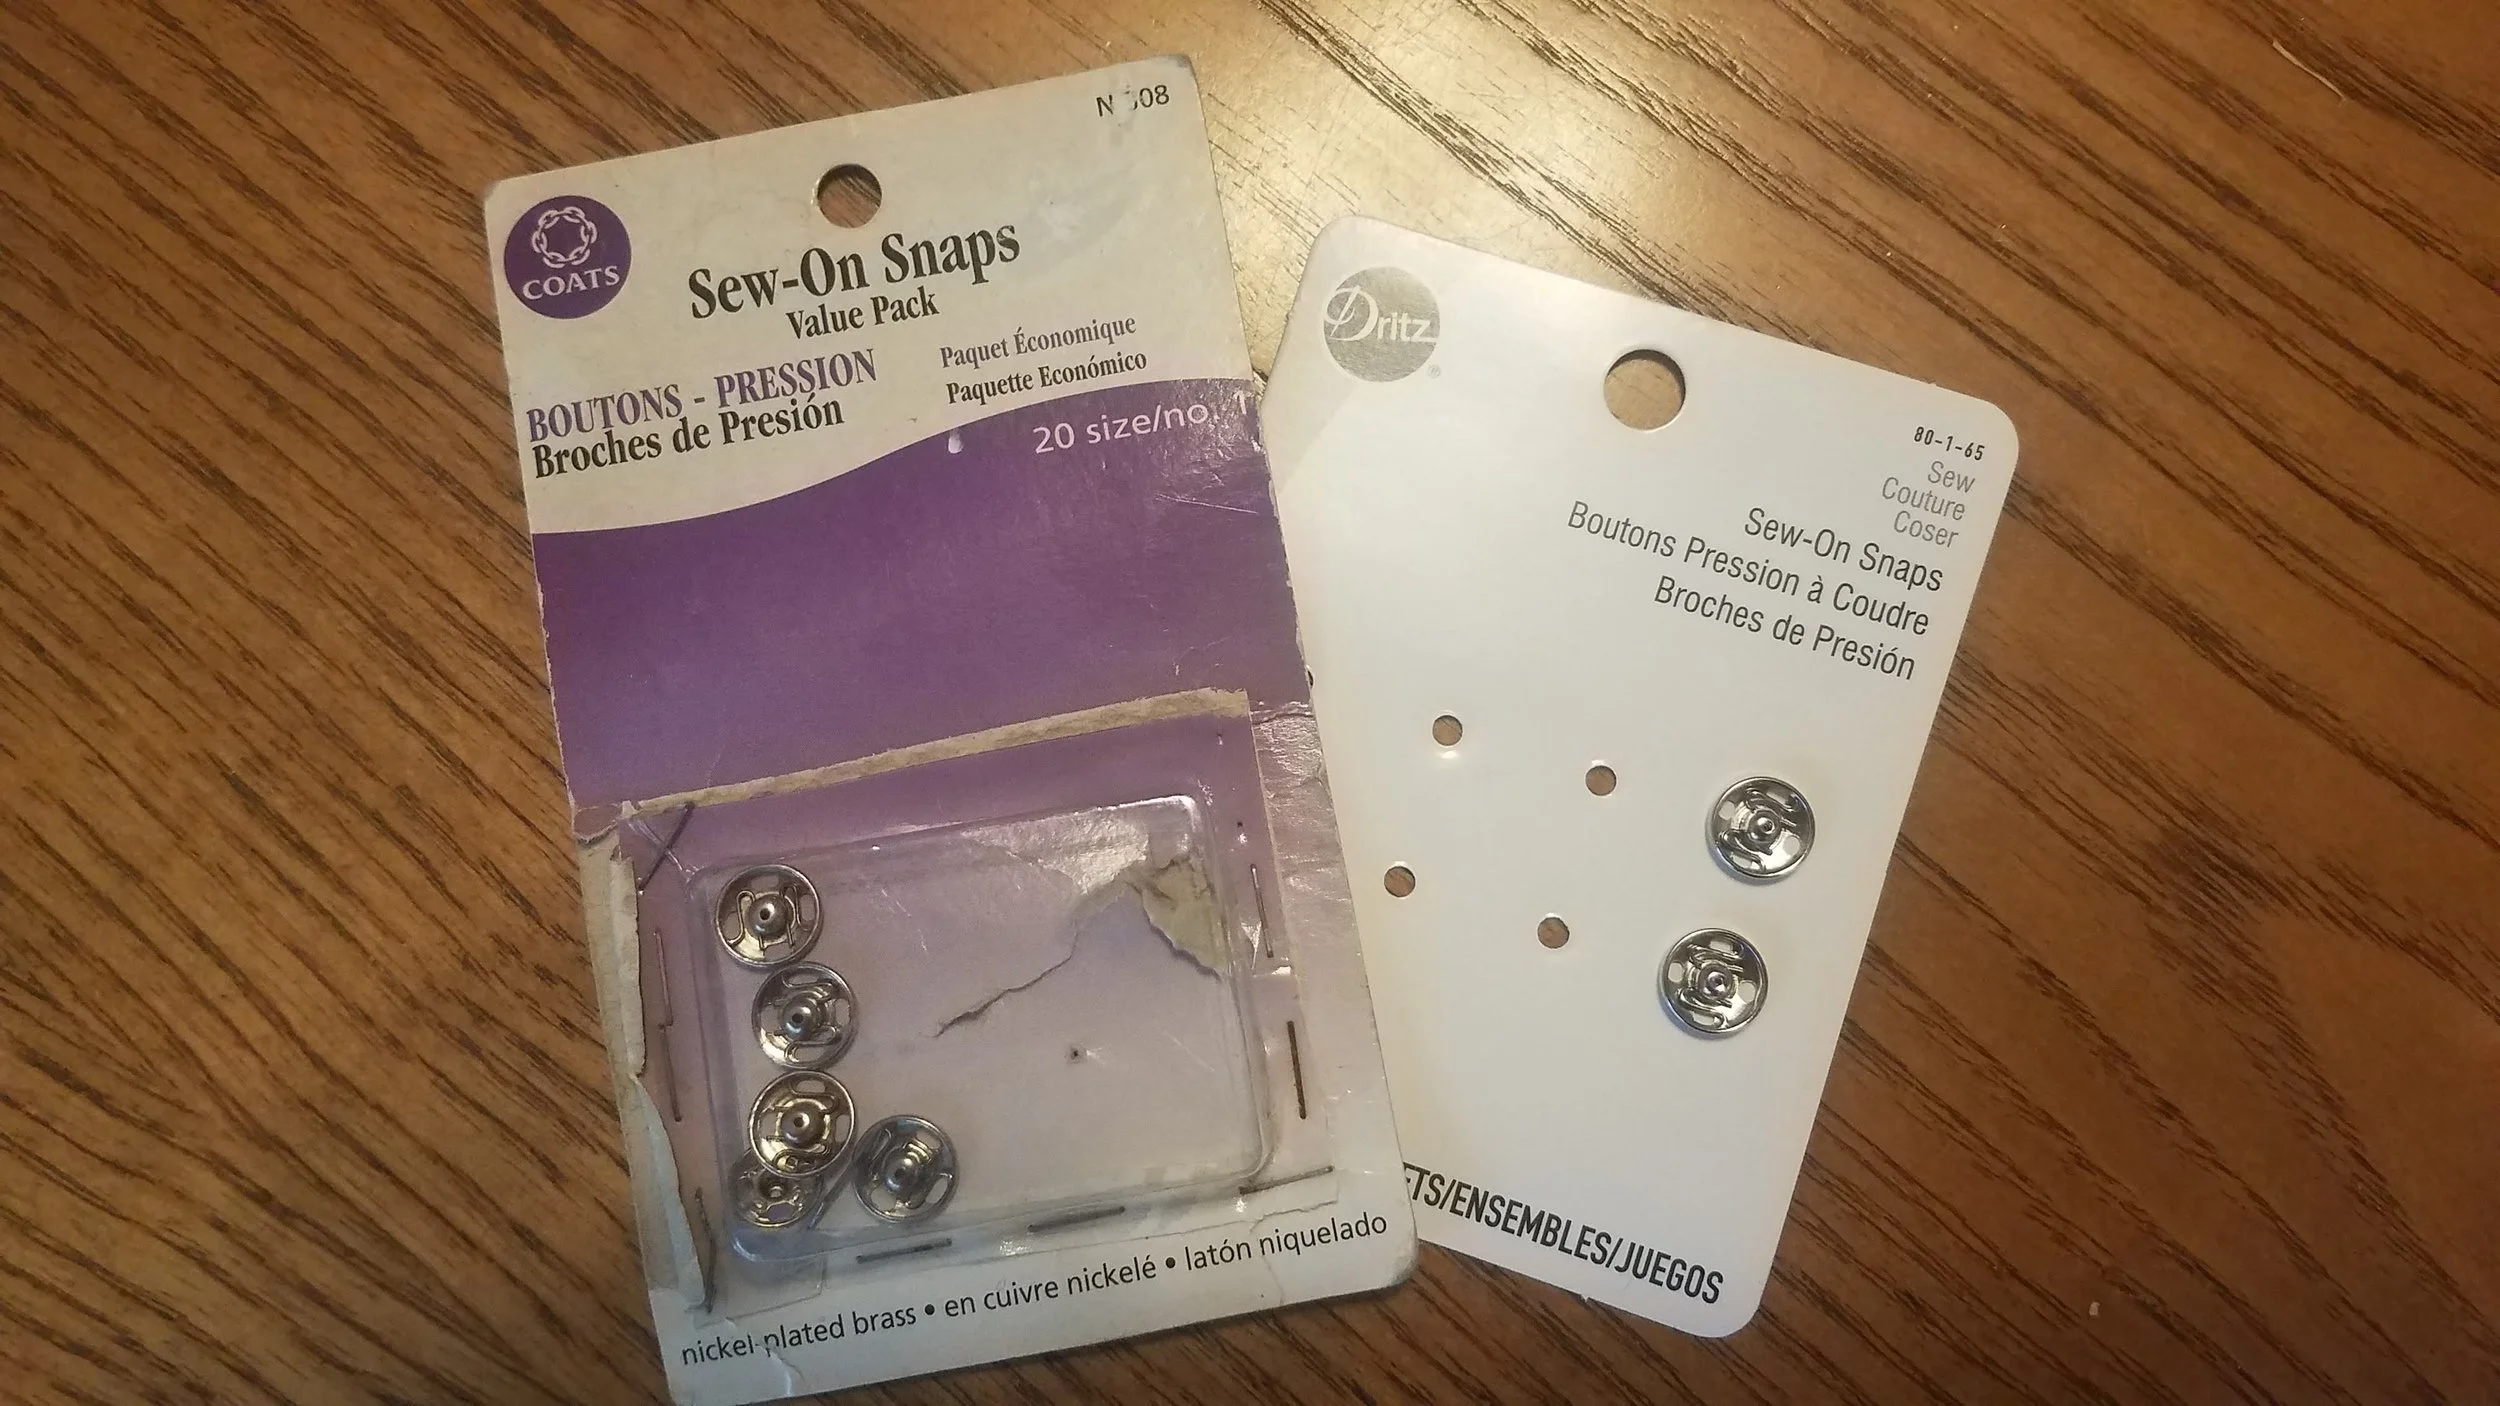
Back to the sleeves, I had already decided I wanted to make them detachable since the fabric was itchy and hard to wash. My solution was to attach them to the tunic using sew on snaps. I realized I didn’t have enough snaps so I went back to Joann’s to buy them and more black netting fabric, and also return the fabric paints I didn’t use.
I asked my mom to measure where to attach the sleeves while I wore the costume and she used color coordinate pins to show where each snap needed to go. I sewed 3 snaps on each sleeve and a matching 3 on the tunic (1 at the top of the shoulder, 1 in the front, and 1 in the back). Hand sewing the snaps took a lot of time, but I was able to do it while listening to some podcasts. I then marked the right and left sleeves so they matched the correct armholes.
sew on snaps
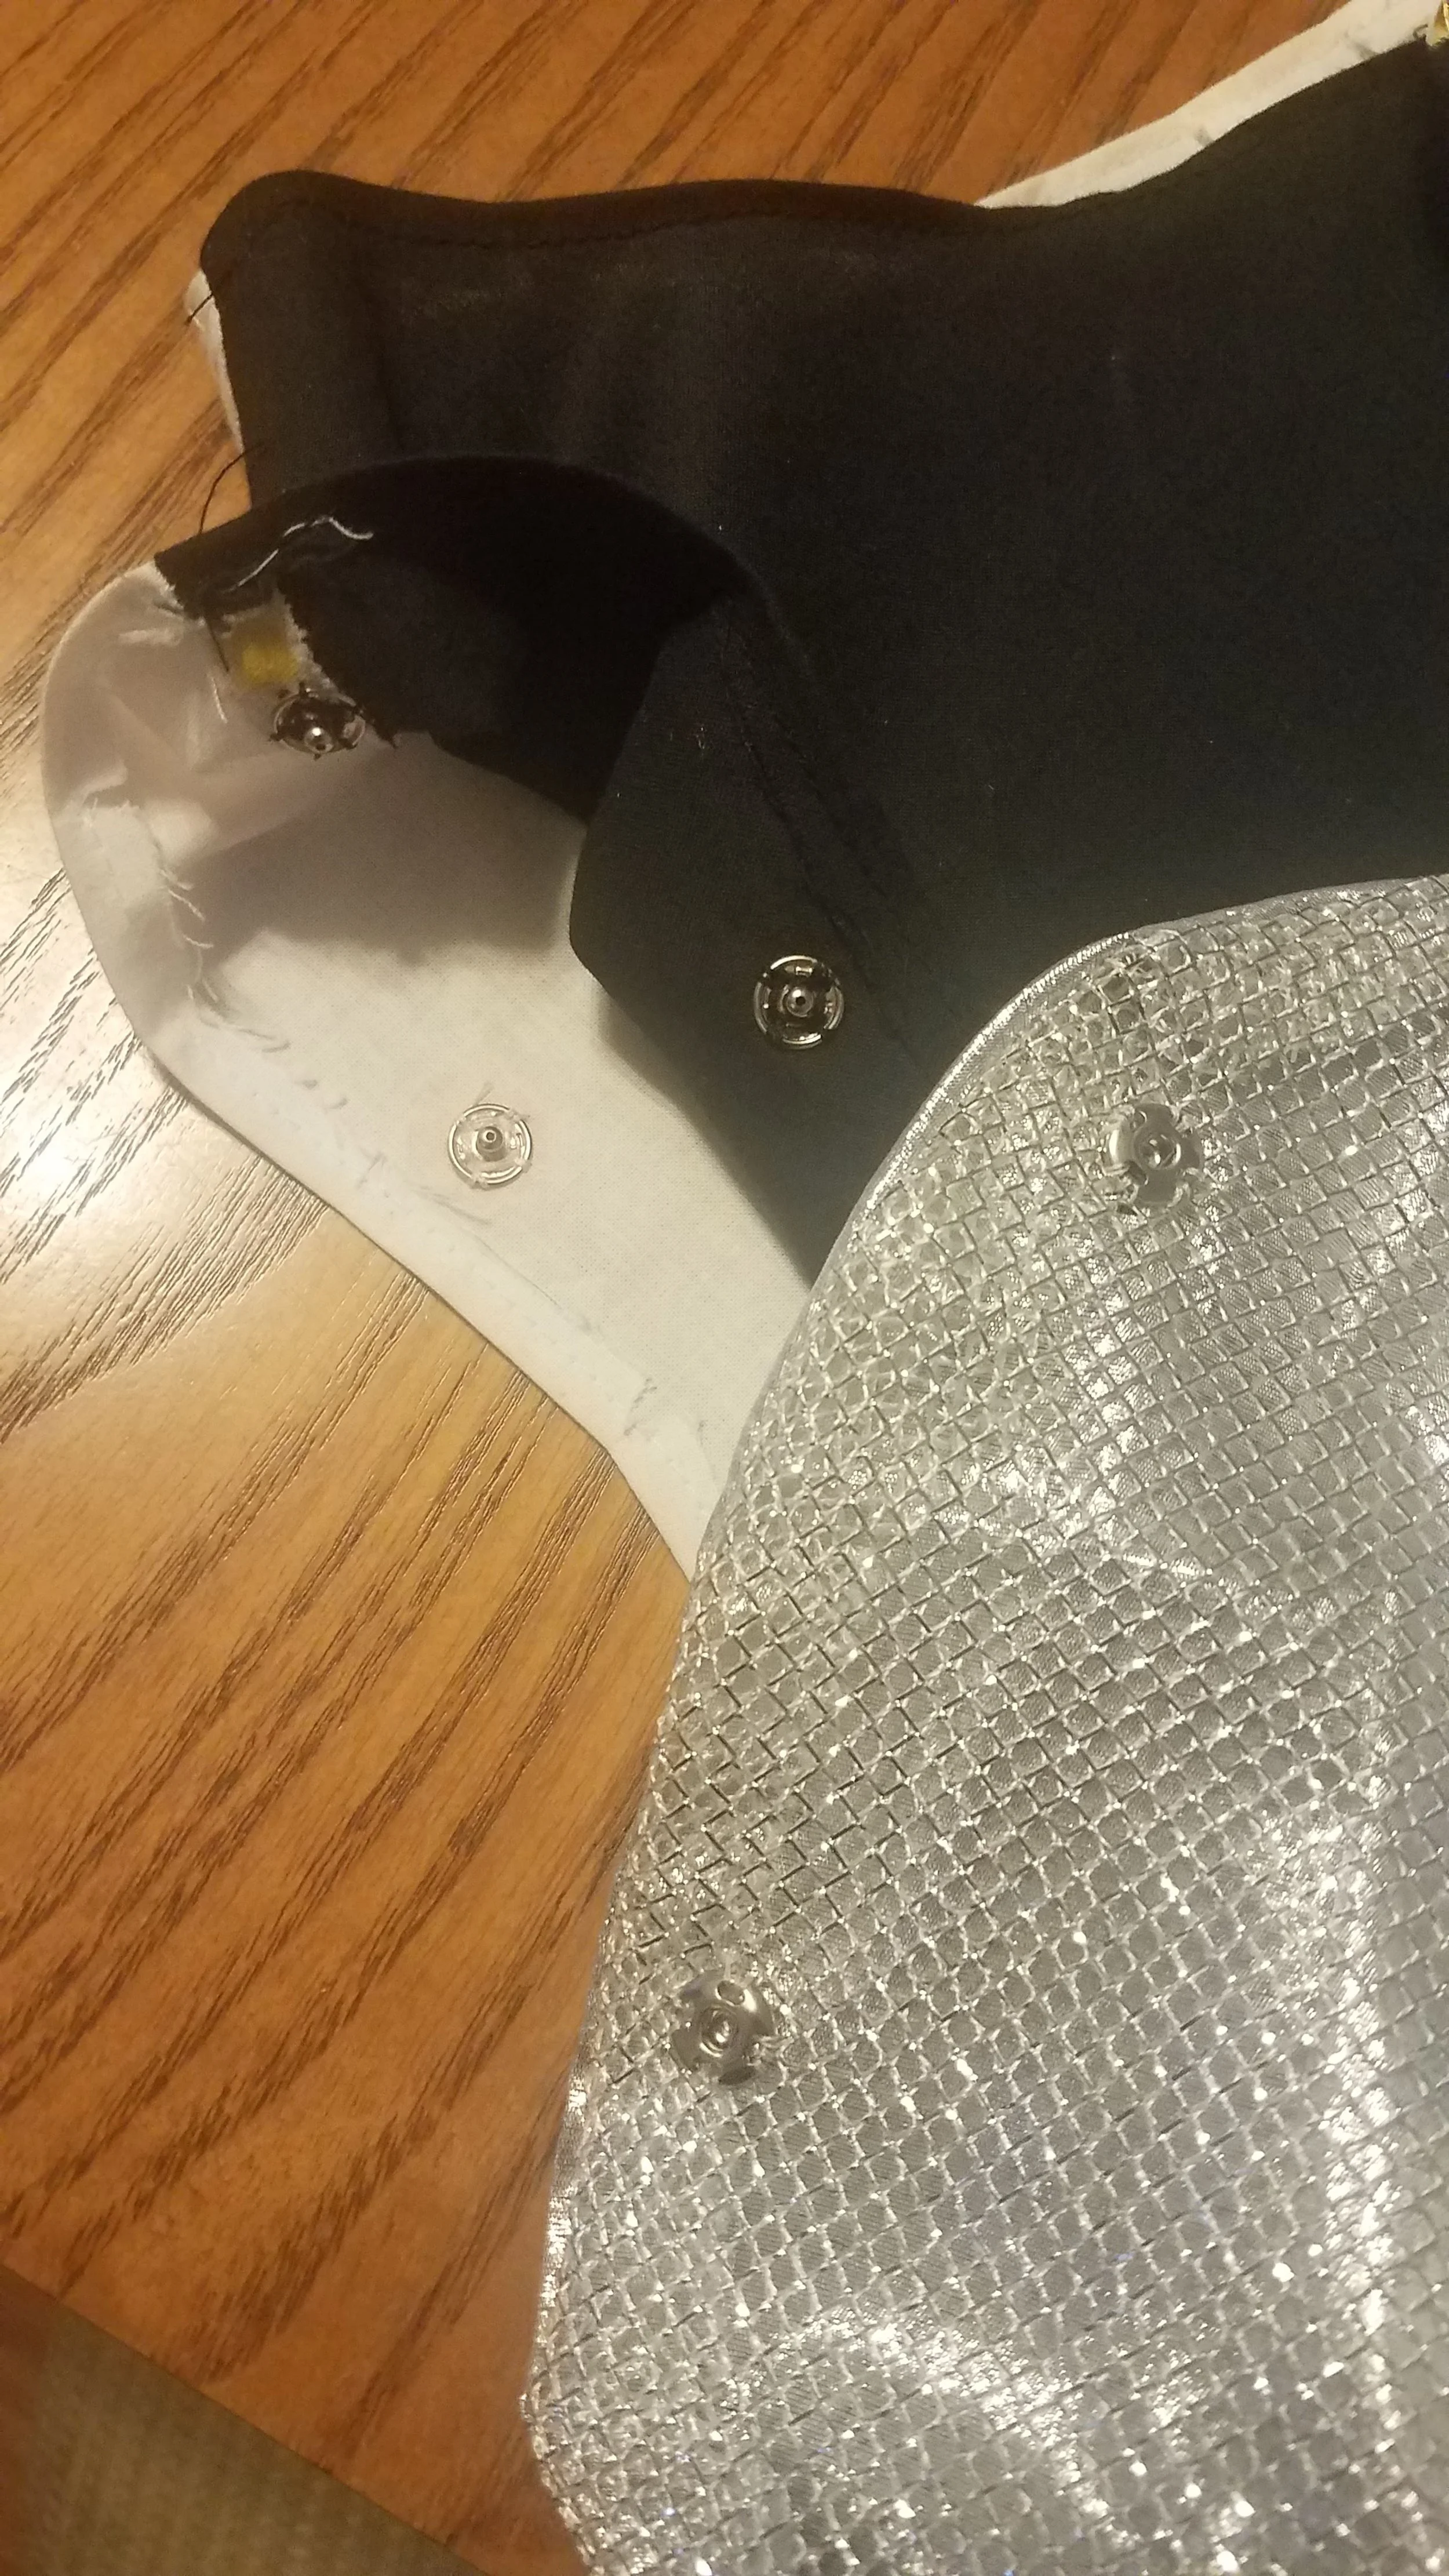
3 on each sleeve attached to 3 on the armholes
Once the sleeves could be attached and detached, it was time to iron on the sigils to the tunics. I ironed all the wrinkles out of the tunics before carefully centering the sigils on the tunics.

Sir Lancelot’s detachable sleeves and “griffin” sigil
King Arthur’s detachable sleeves and sun sigil
The next day, my other friend Meghan (Patsy) came over for a costume fitting. I let her paint the Holy Hand Grenade gold so it was a group effort and we discussed what clothes she needed to wear underneath the costume. After she left, I let my brother paint the second coat of gold paint on the Holy Hand Grenade before I glued on sequins following the pattern from the movie.

Meghan and my brother painted it gold
I added the sequins
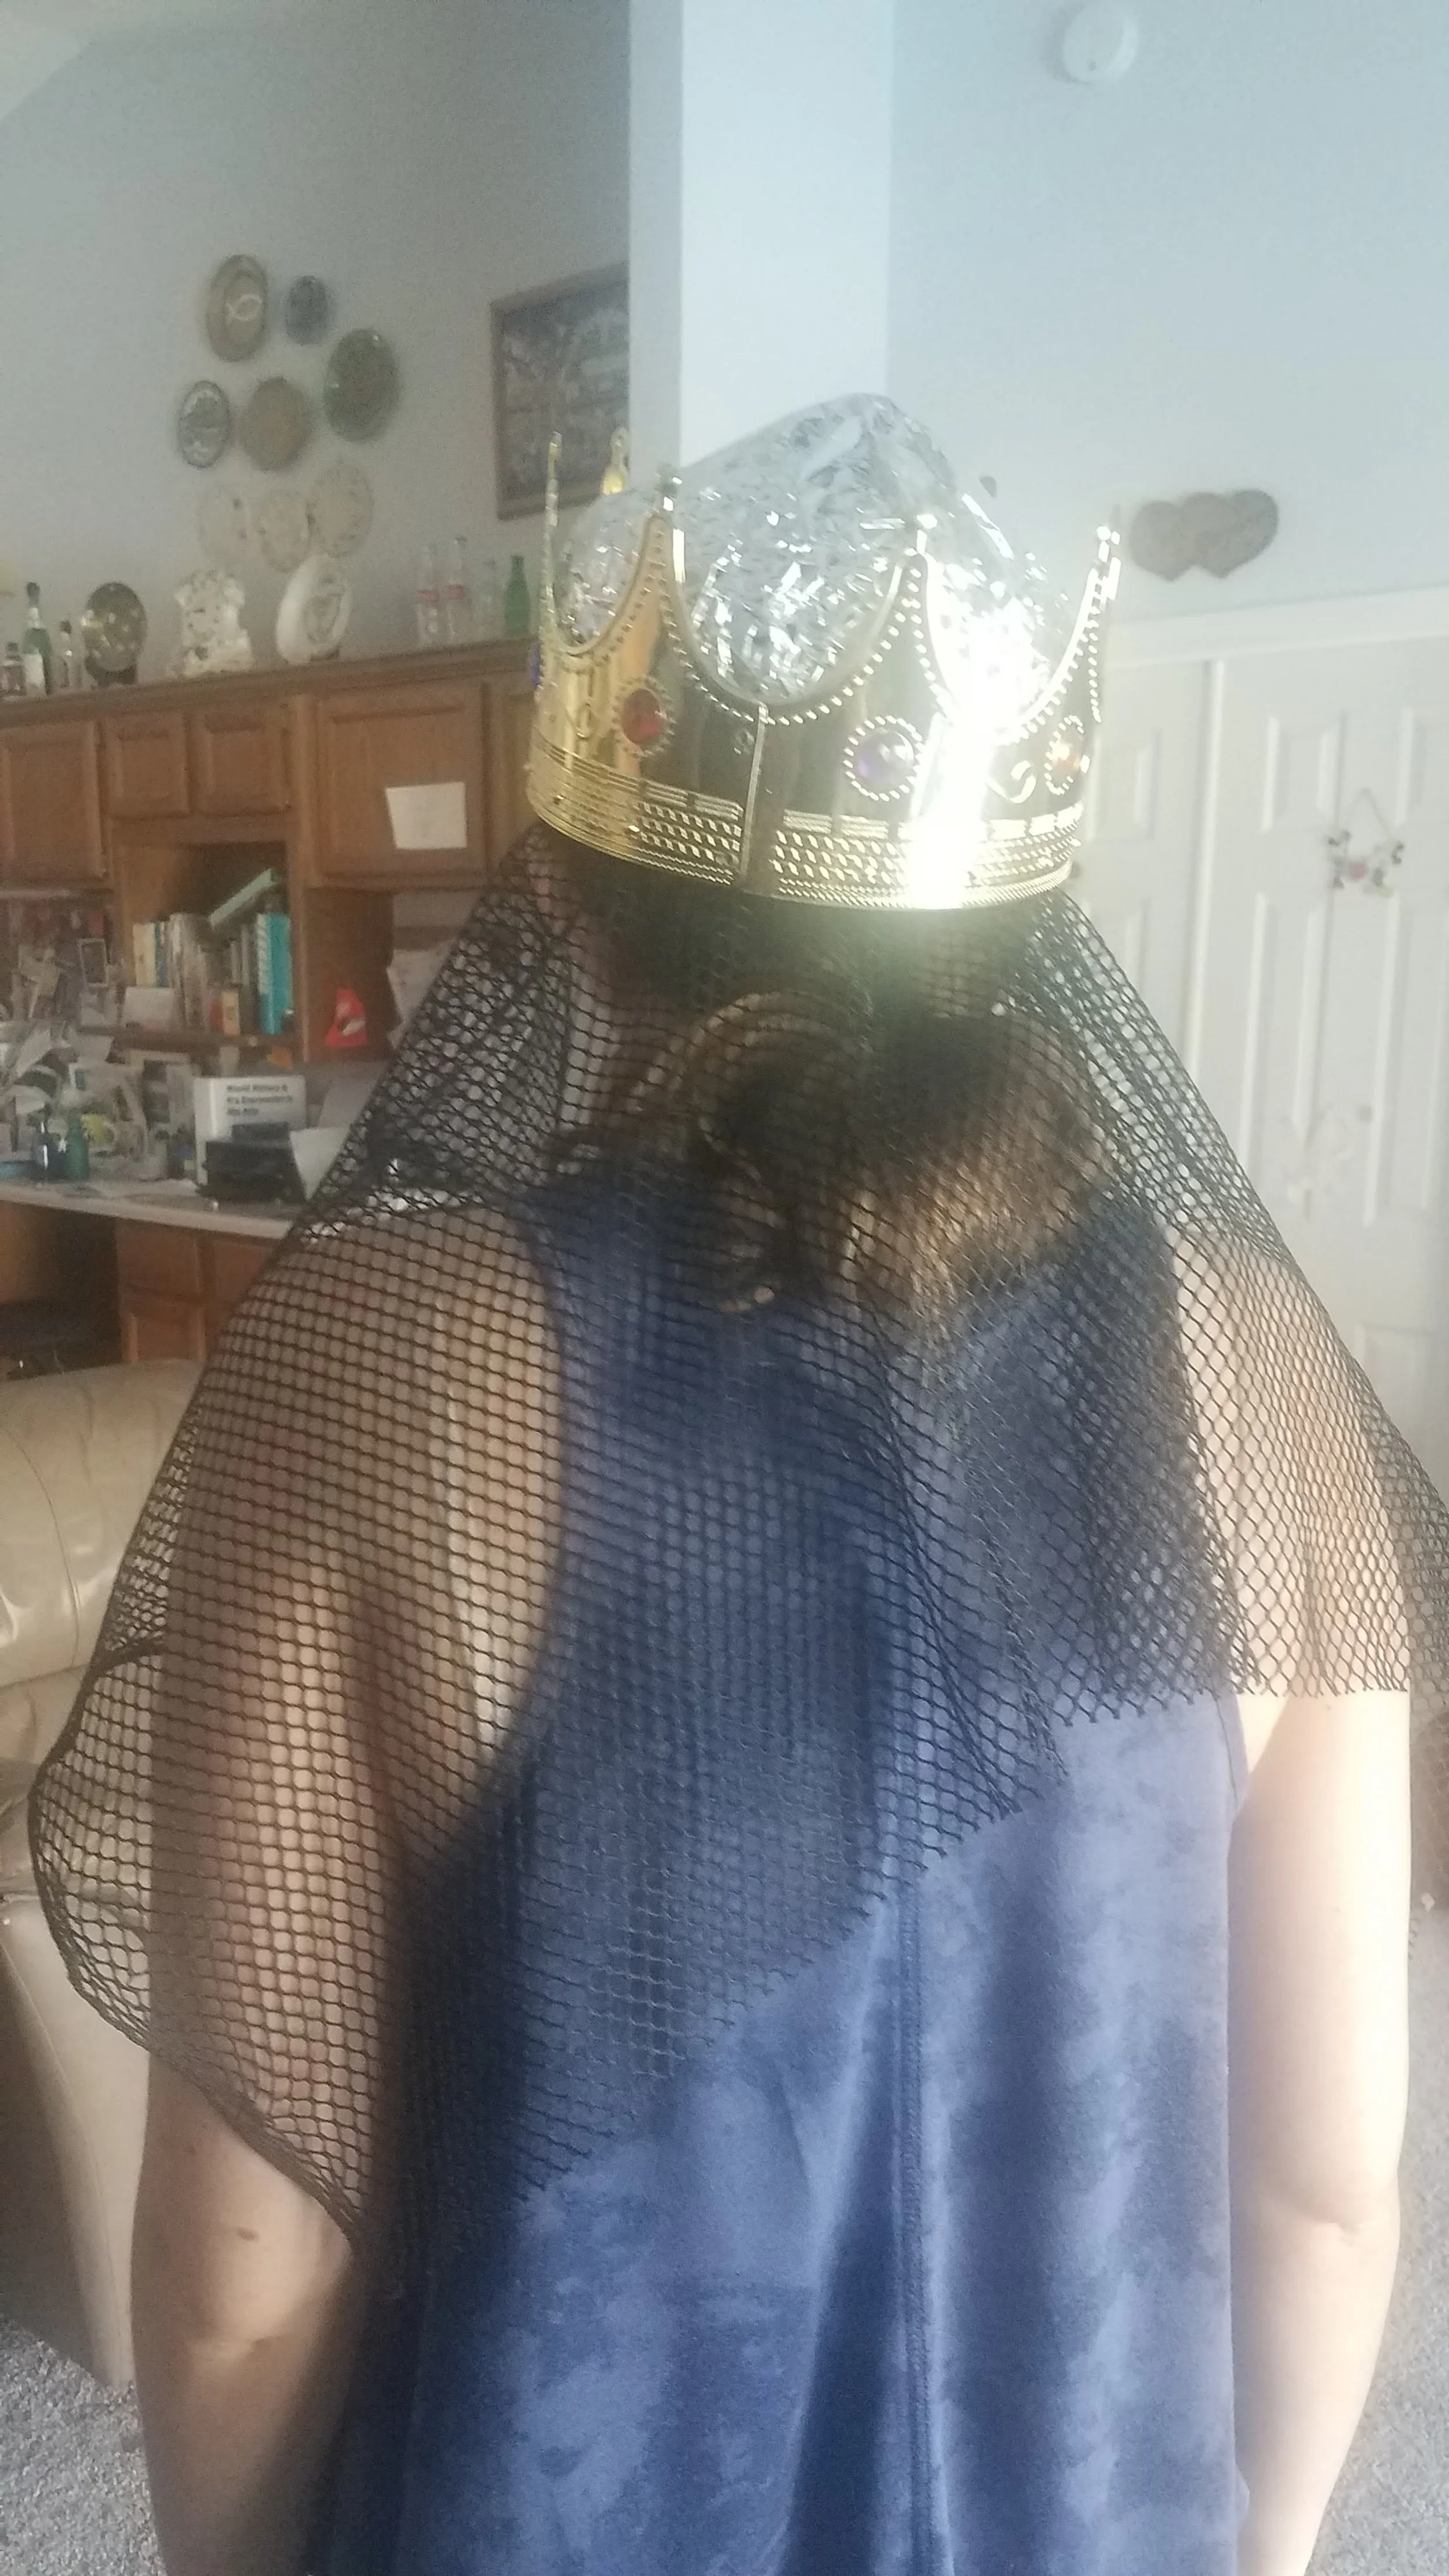
I then took my new scrap of black netting fabric and spray painted it gold to make the chainmail King Arthur wears on his head under his crown. I had barely enough gold spray paint to finish it. To make his silver helmet, I took a traditional hat I got in Oman that had the desired pointy shape and covered it in tin foil before placing it inside the gold plastic crown.
the helmet-crown (before painting the chainmail)
The next to last step was possibly the most important: the coconut “horses”. I bought 2 coconuts and asked my dad to help saw them in half and drill holes in each half so I could string them together. I then tried to scrape the meat out with a grapefruit knife but unfortunately cut my finger badly enough it bled a lot so my dad finished it for me while I tended to my injuries. Eventually, the coconuts were ready and I connected them with twine so they could be looped through a belt.
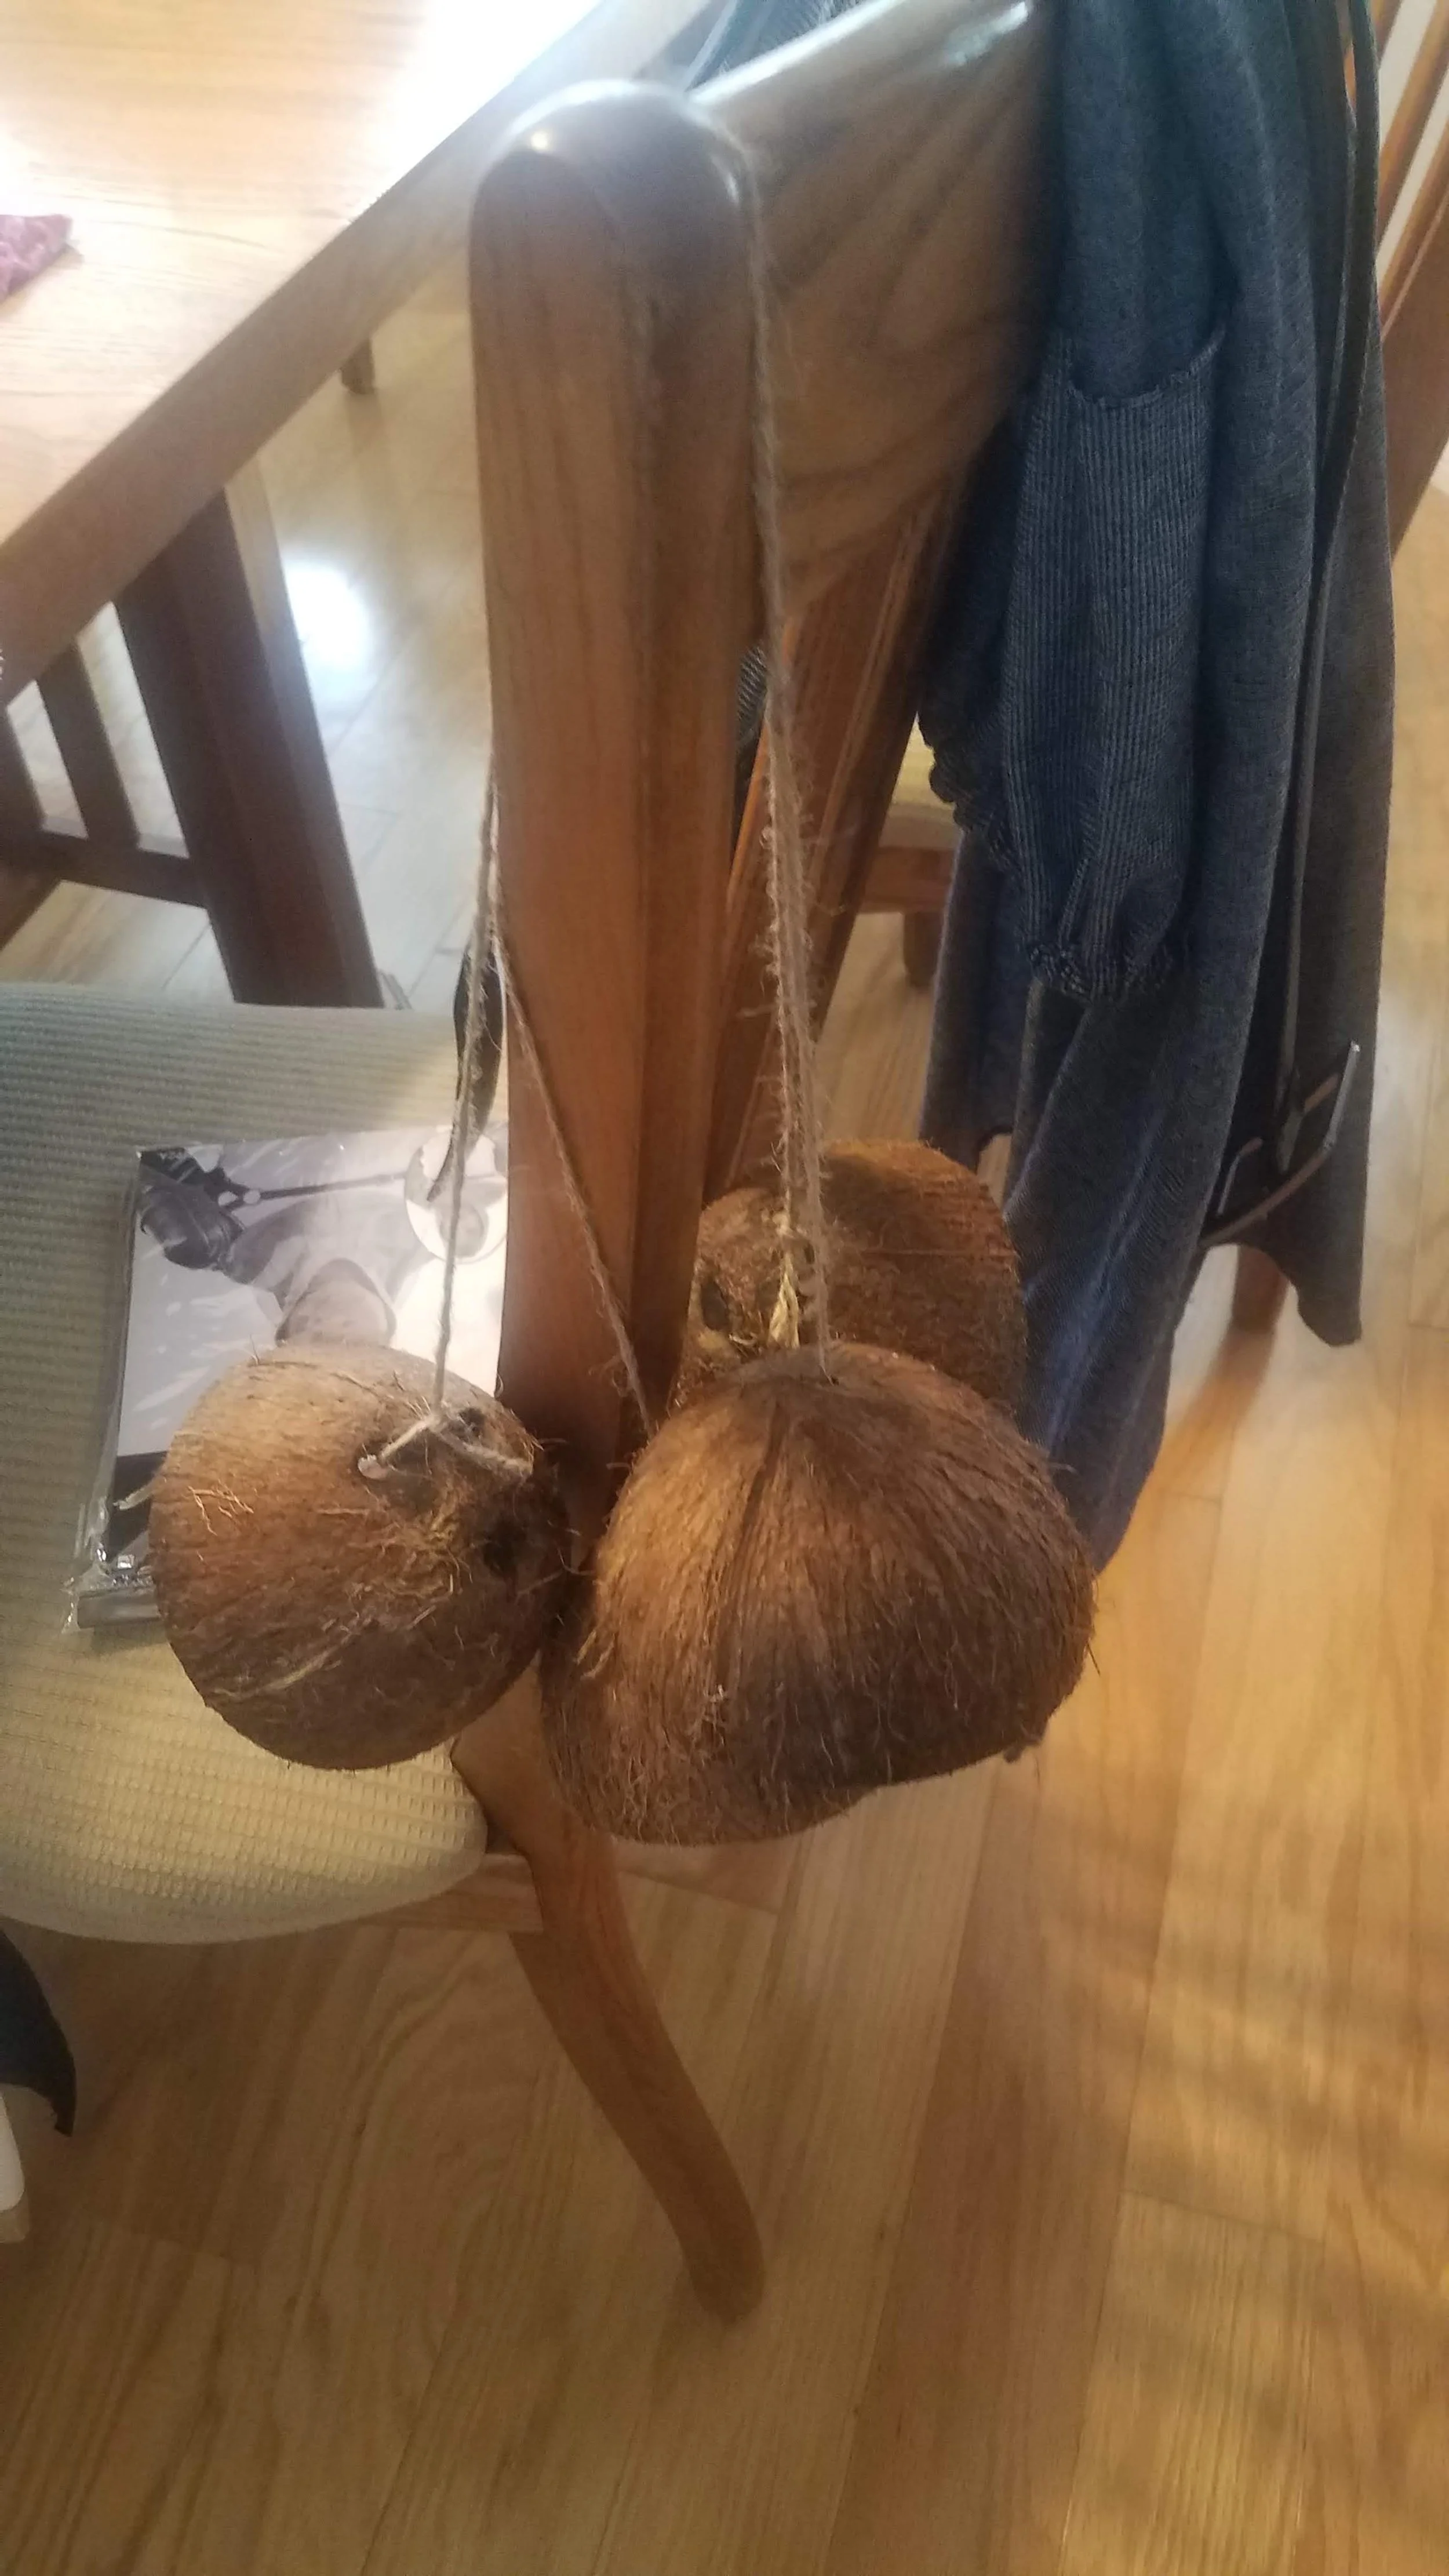
coconuts (that were probably carried by migrating swallows)
The final step in my preparation was to spray paint cardboard boxes for Patsy and Concorde’s packs. After determining how many we needed and the relative size of each I selected several Amazon boxes from our garage. I also had a bag of random leather scraps that I used for straps. I cut holes in the largest box and glued the straps to the inside of the box before taping it shut. I then wrapped the straps in plastic to protect them from the spray paint. I sprayed the boxes in the garage and waited for them to dry before touching up any patches that showed through.

spray painting the boxes
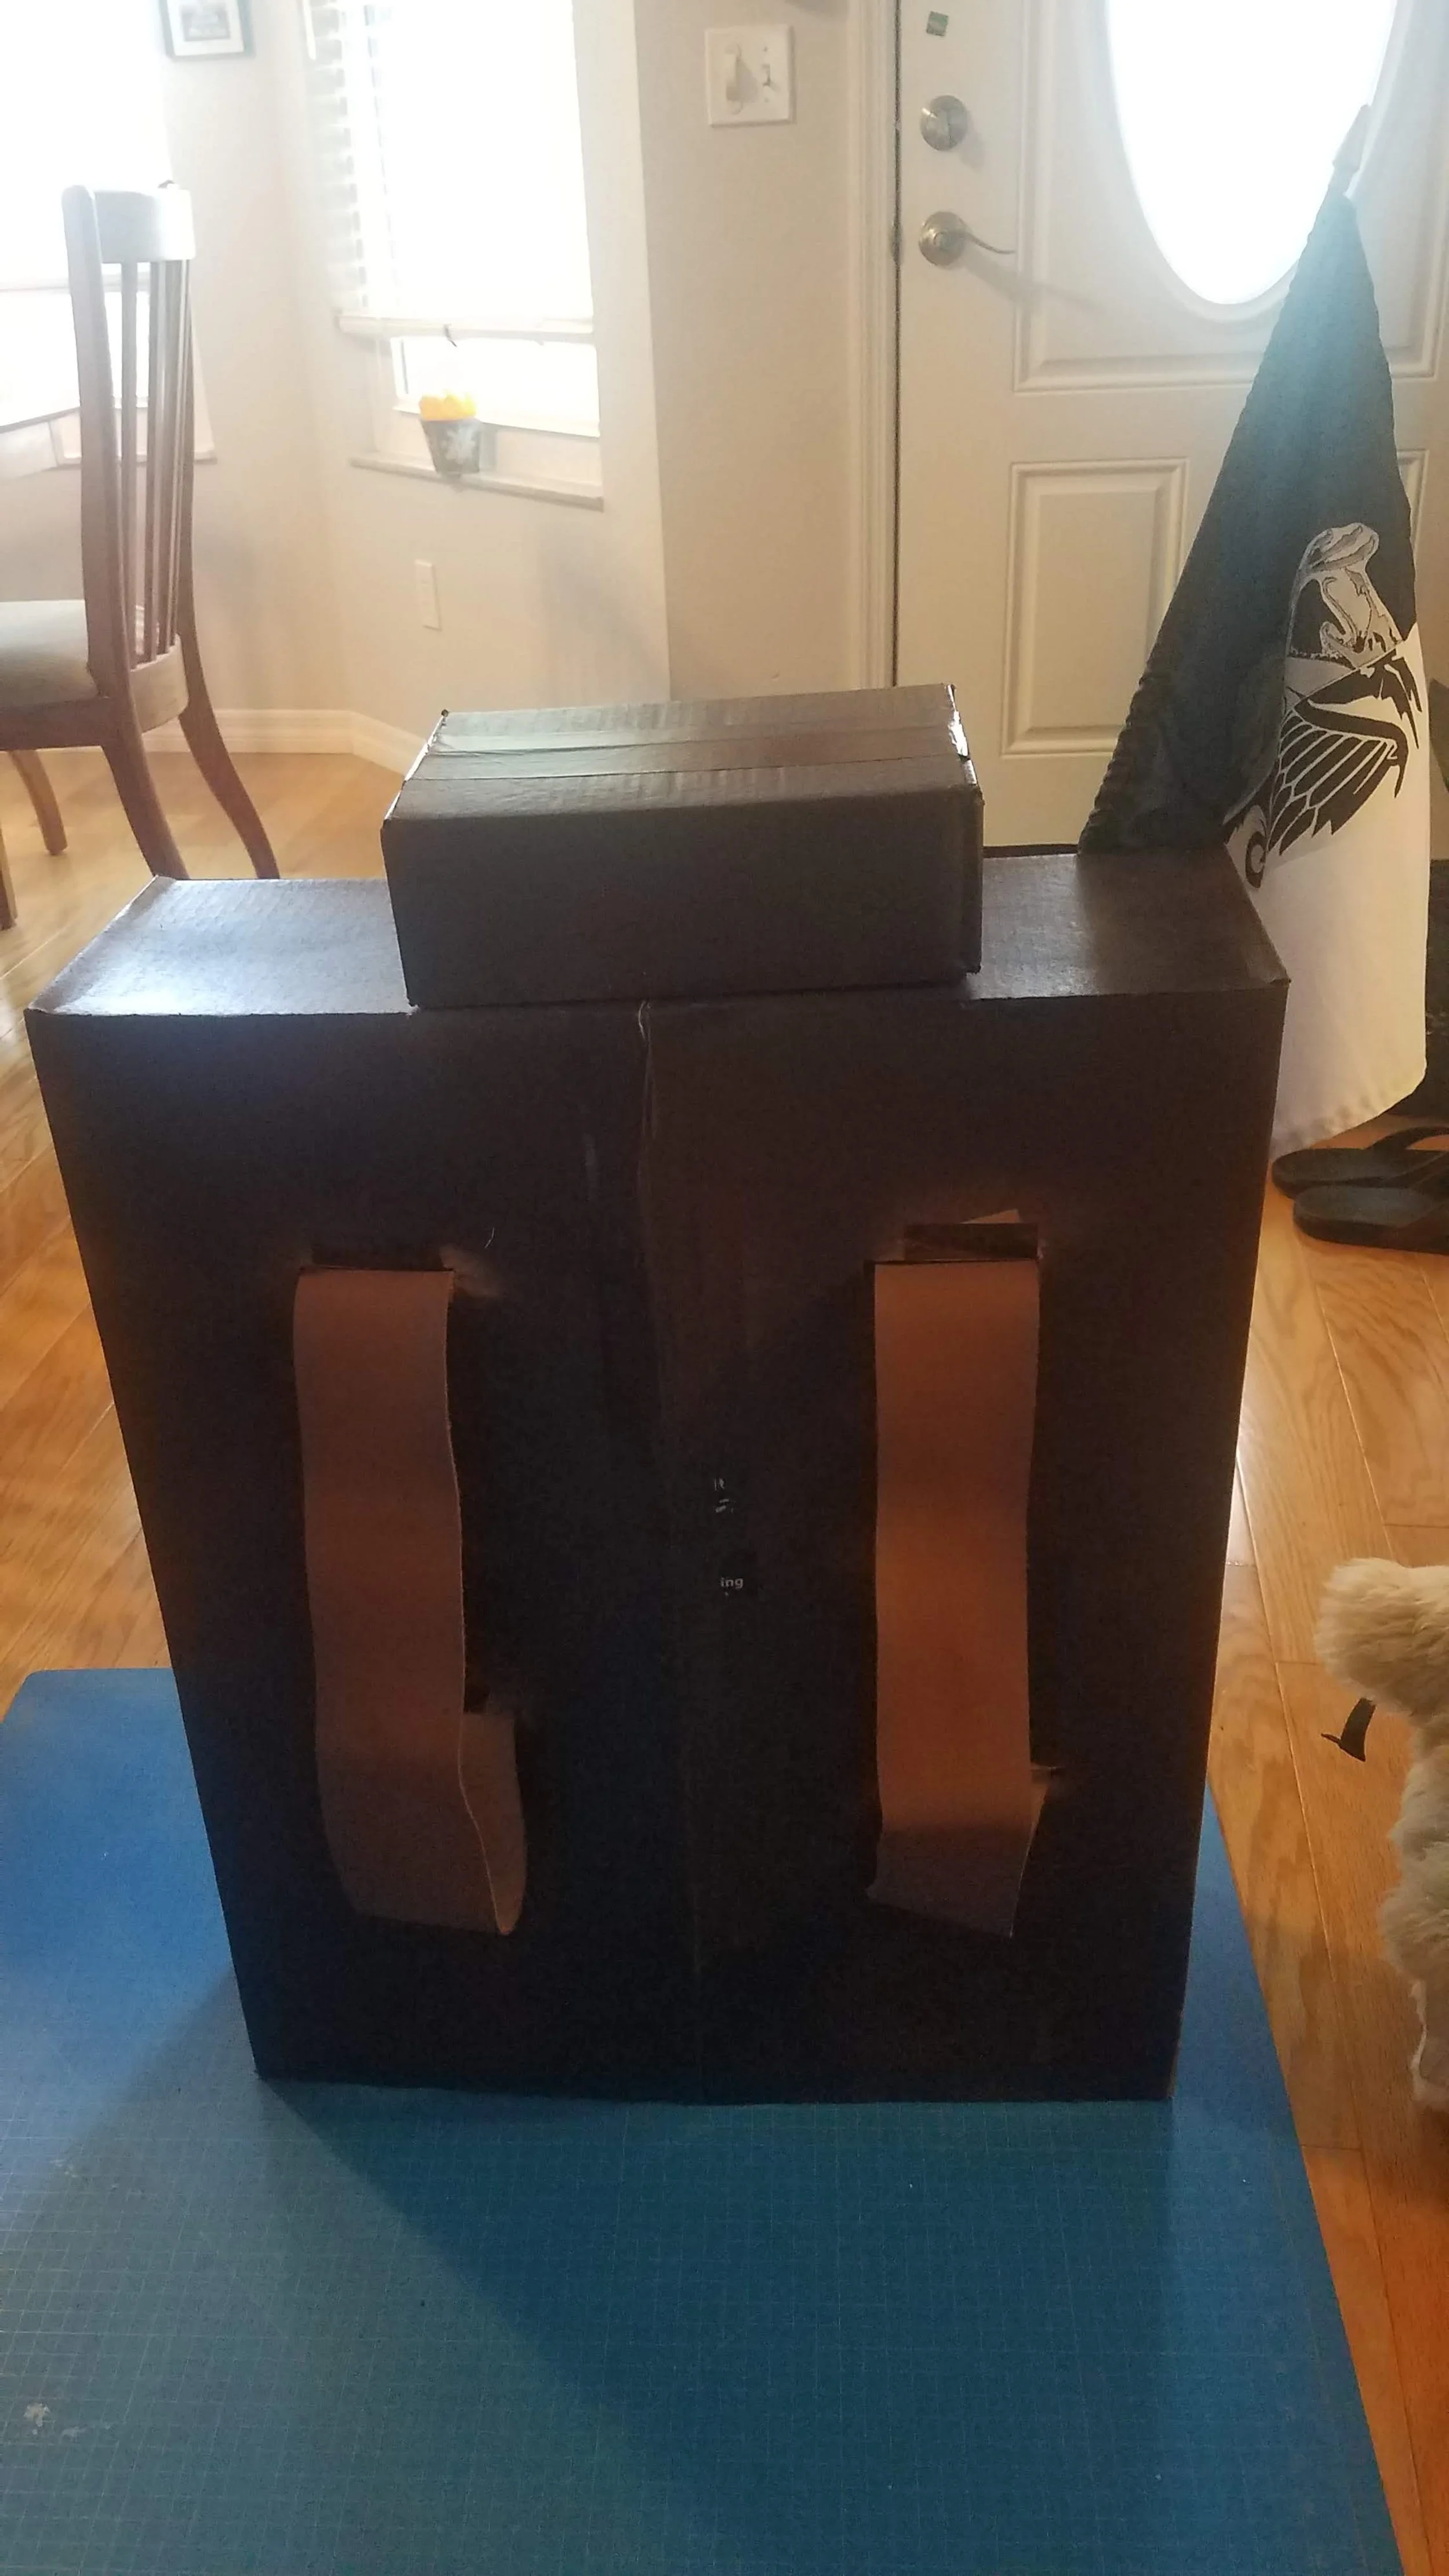
gluing leather straps to the “backpack” box and attaching the flag
Finally, everything was ready for our first Halloween gathering on Saturday October 29. Krista brought over several more belts, a wooden box, and her mom’s olive-green hiking backpack. We first assembled the packs by attaching the flags, boxes, and also rolling up an old sheepskin rug (my dog became obsessed with it ever since I found it in a closet).
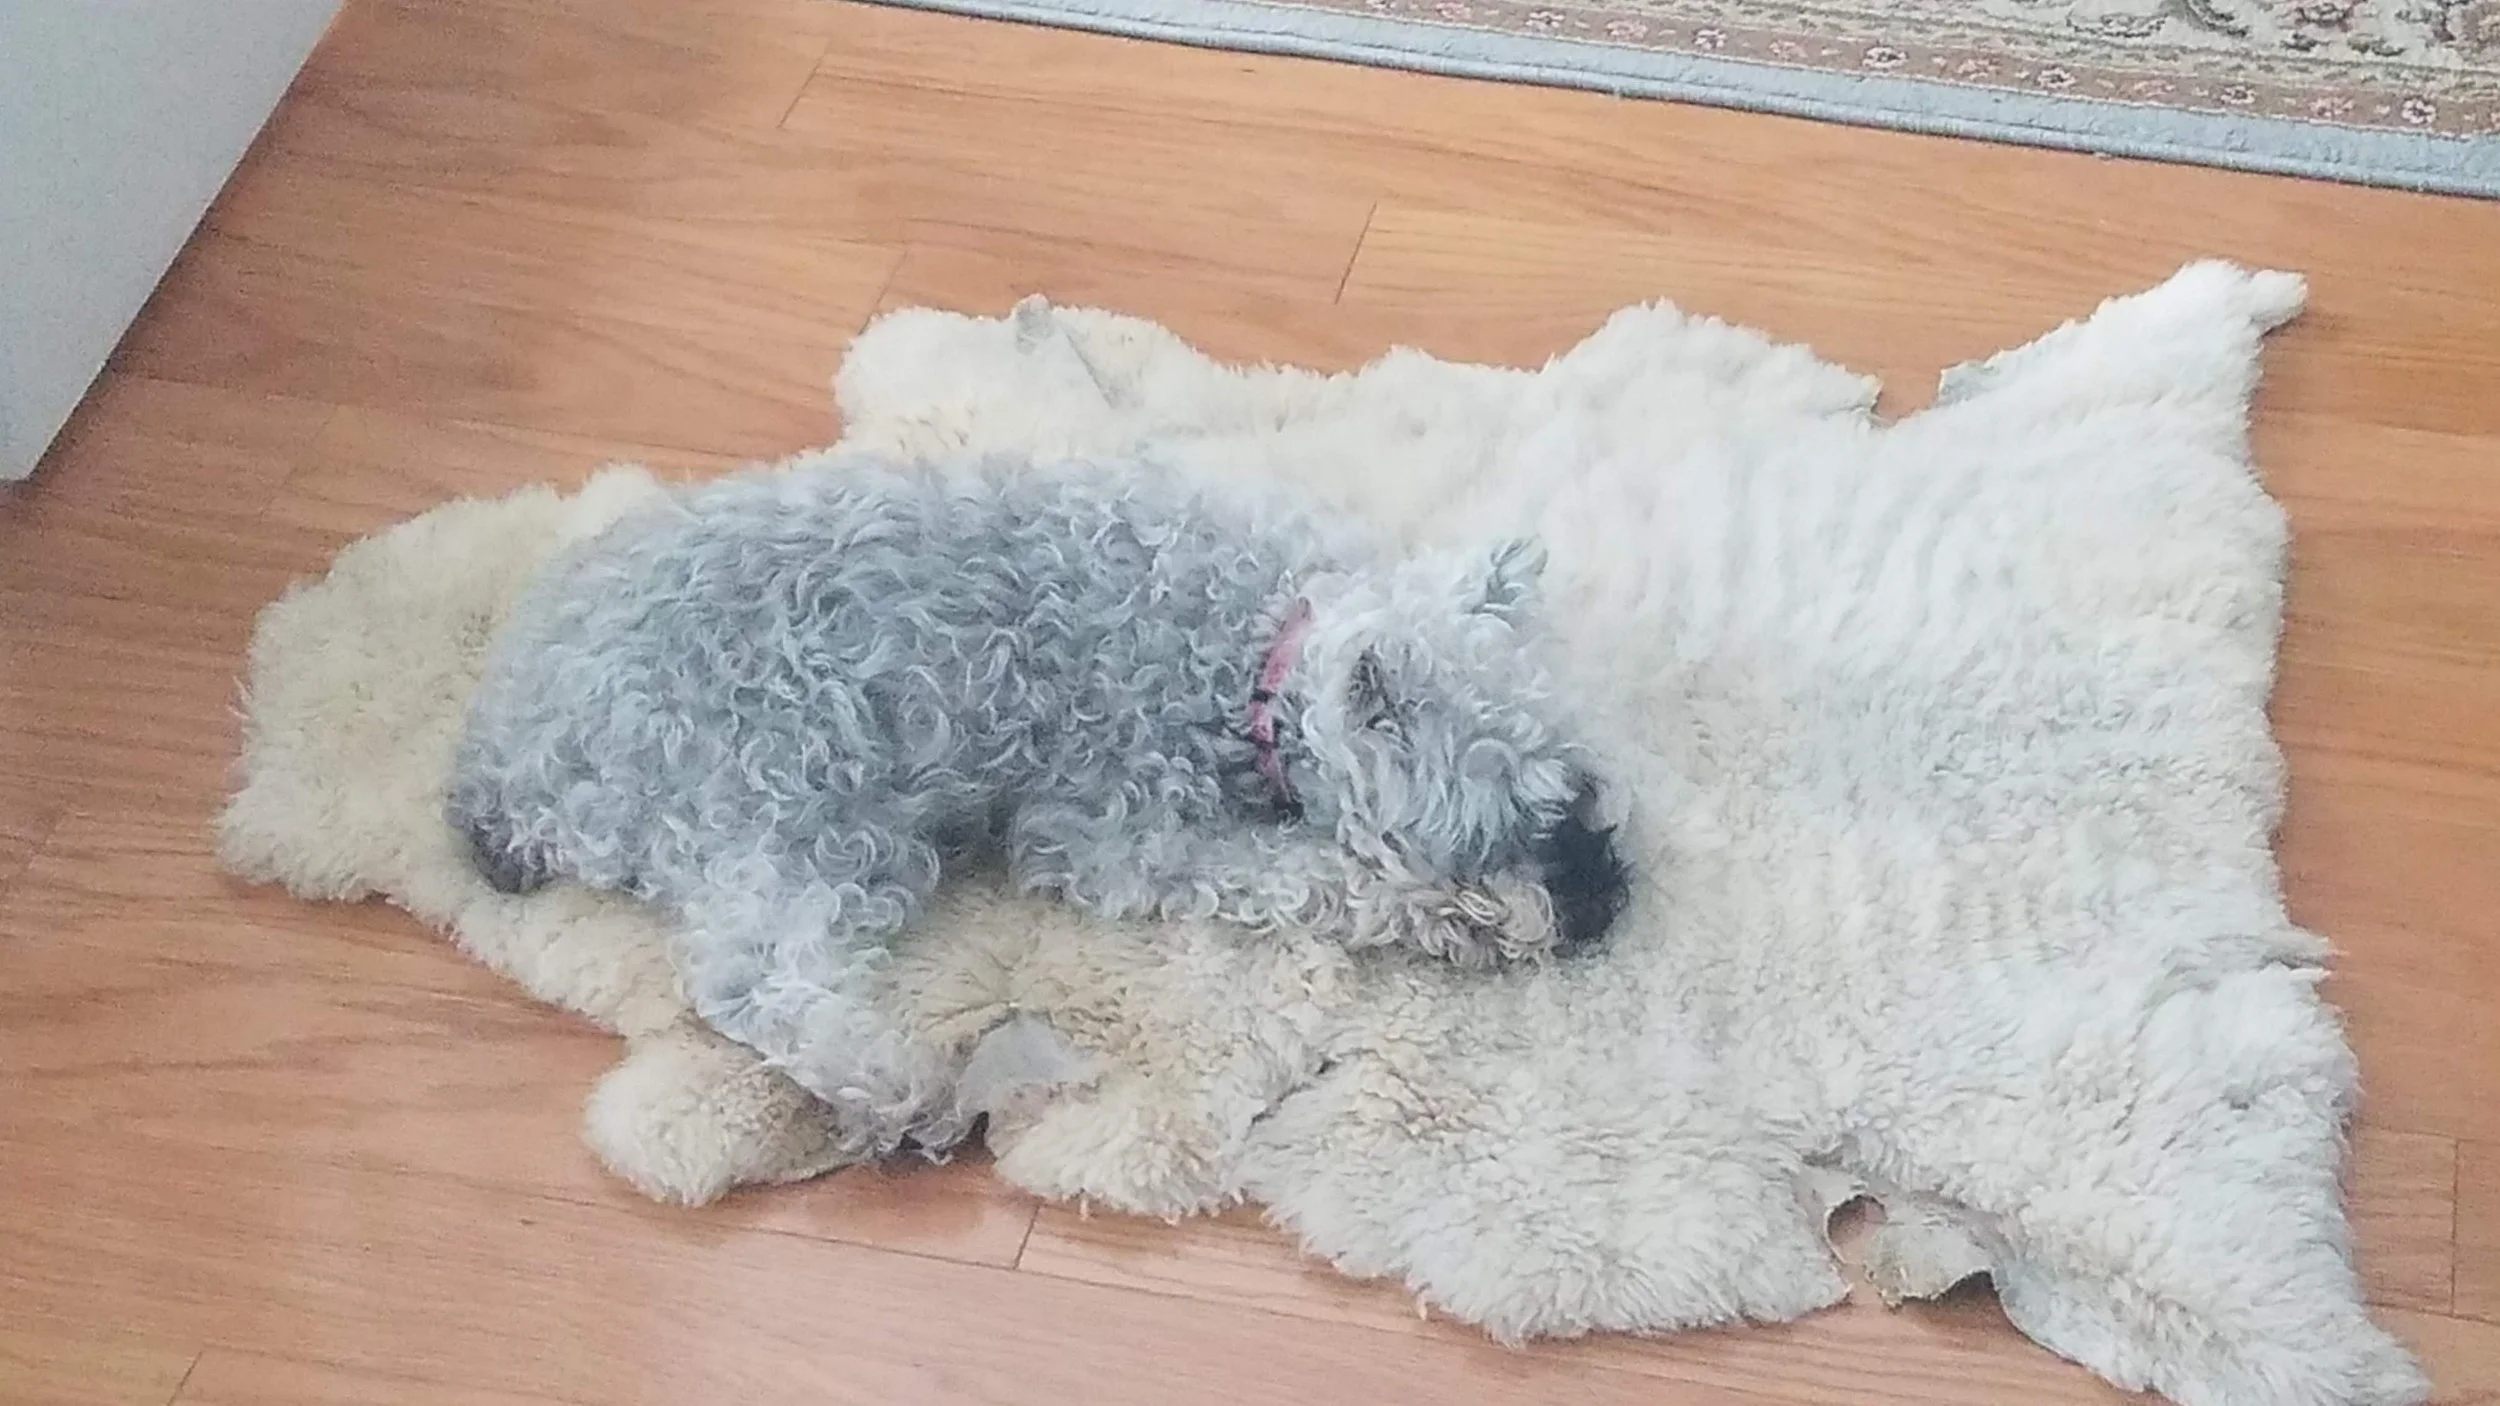
My dog Sanuk loves the sheepskin rug! She kept me company when I sat on the floor to cut fabric
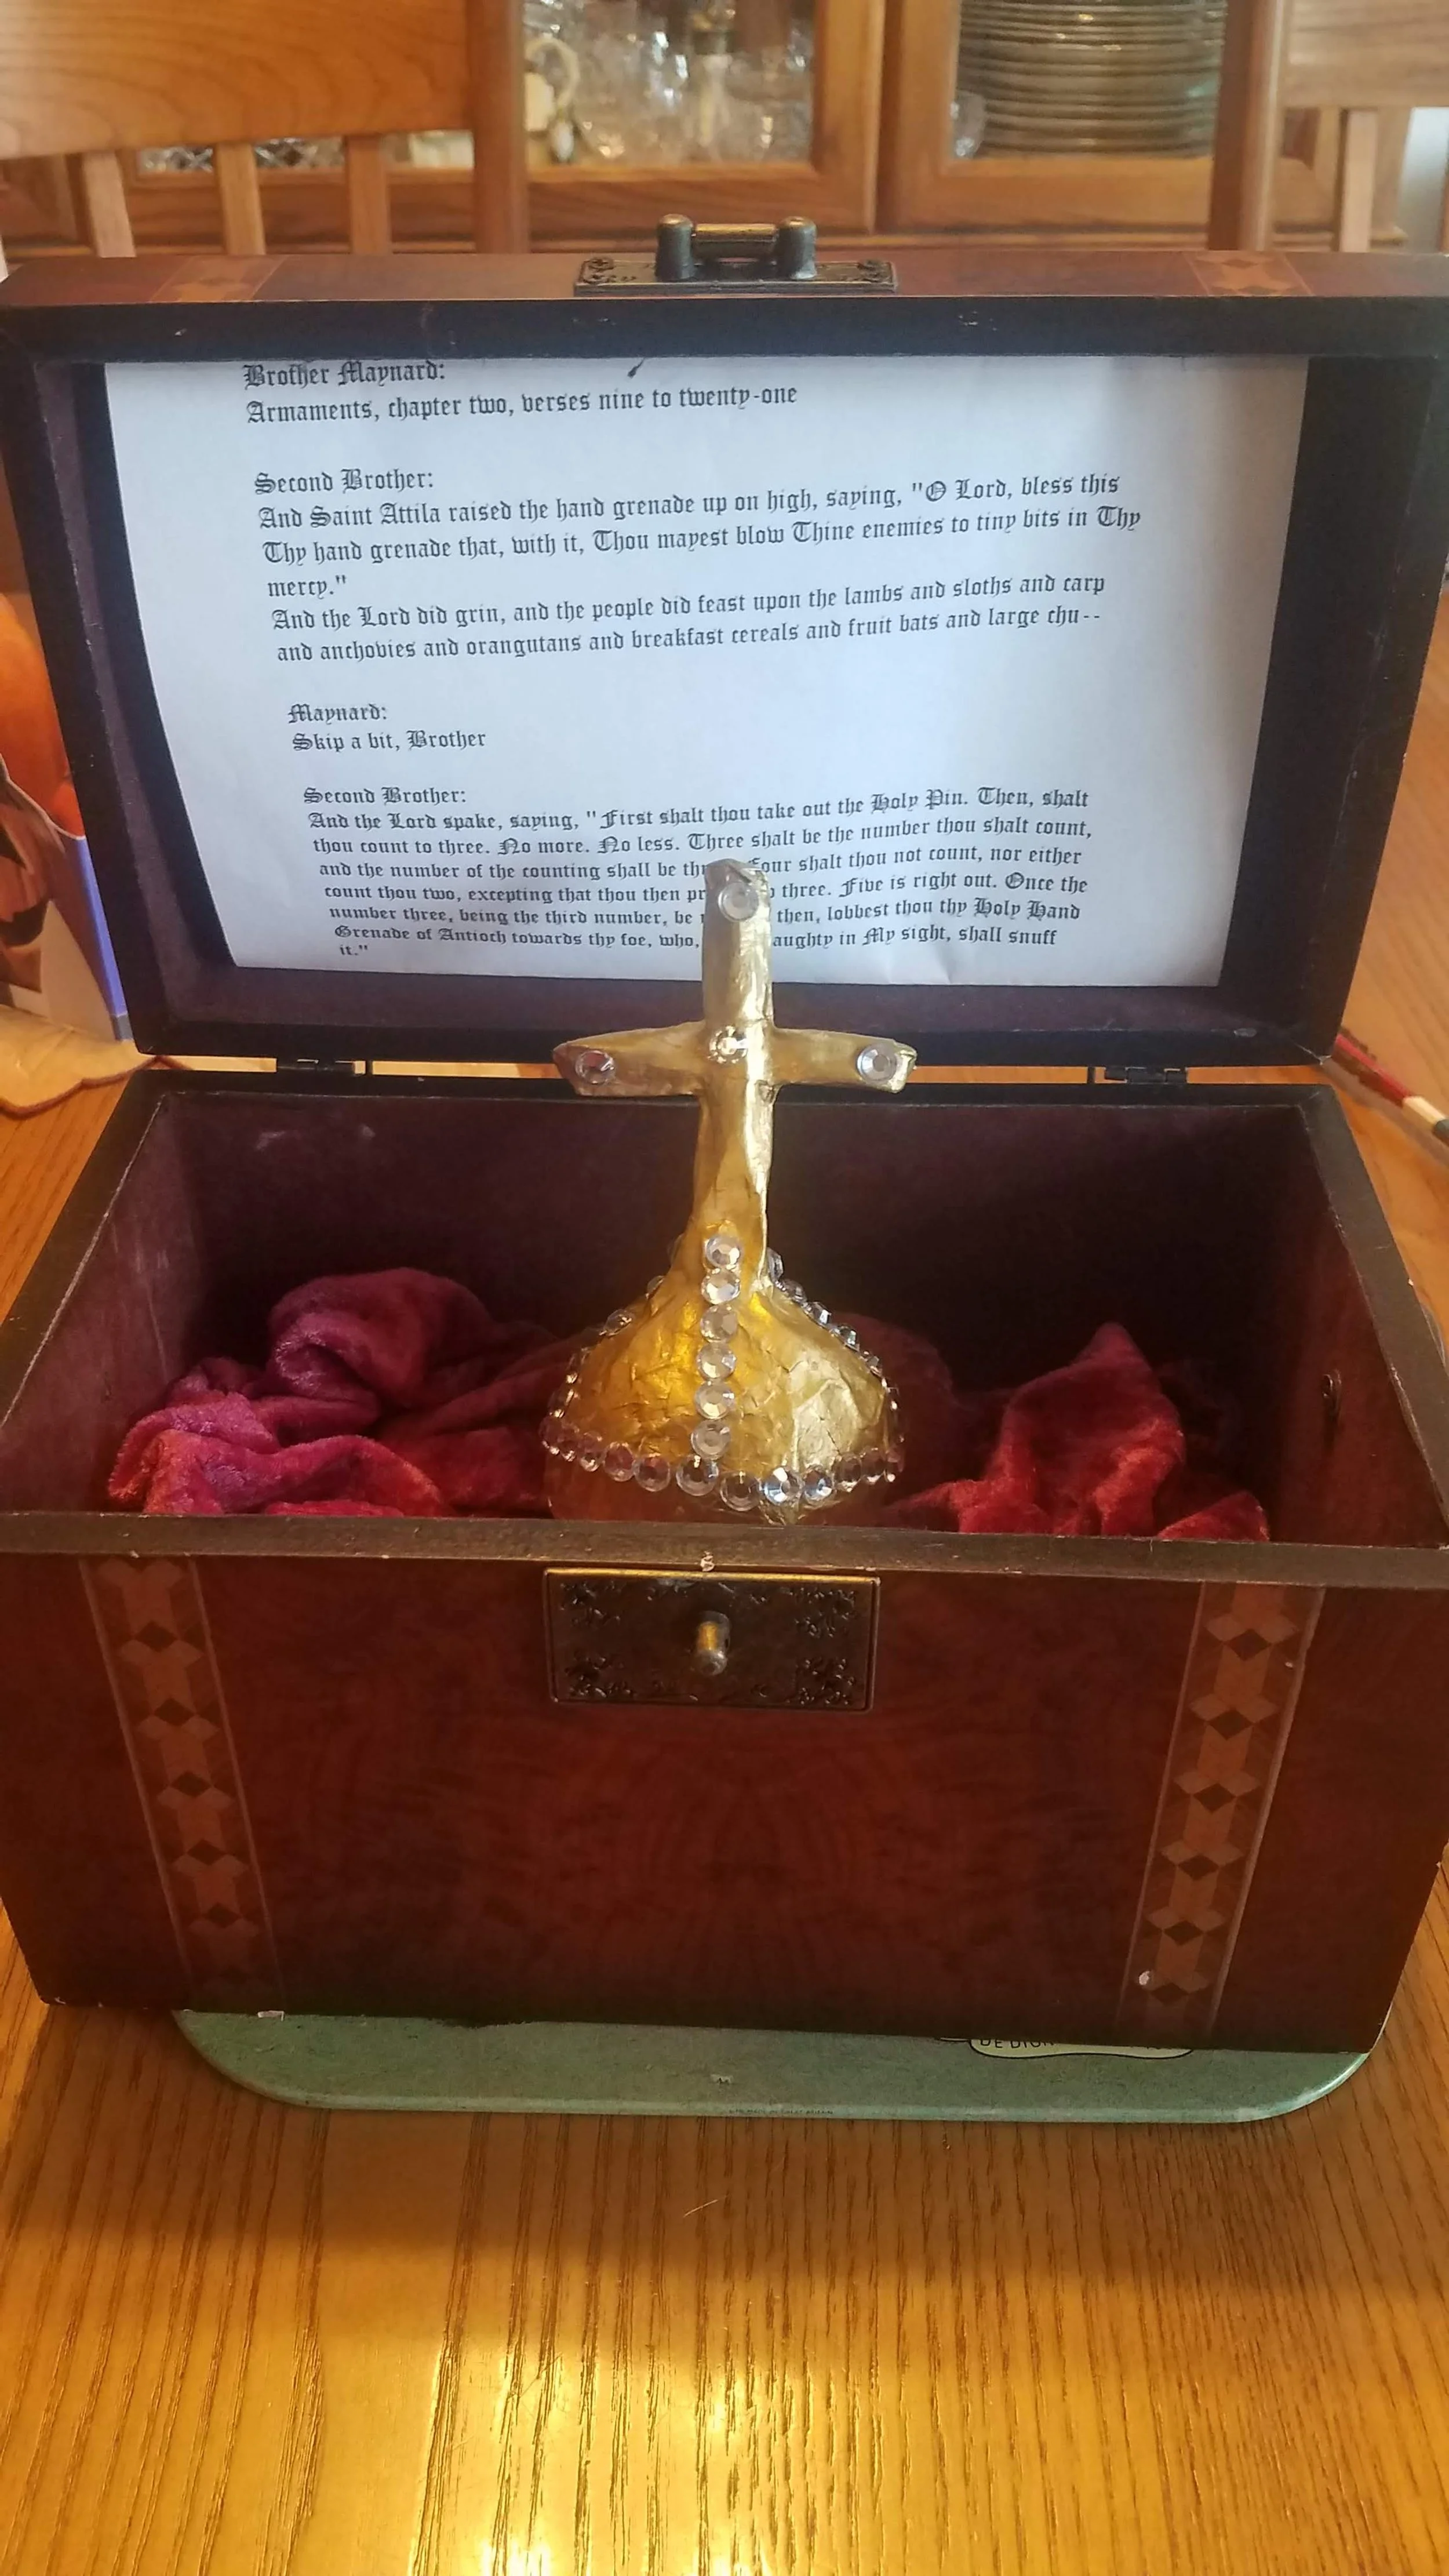
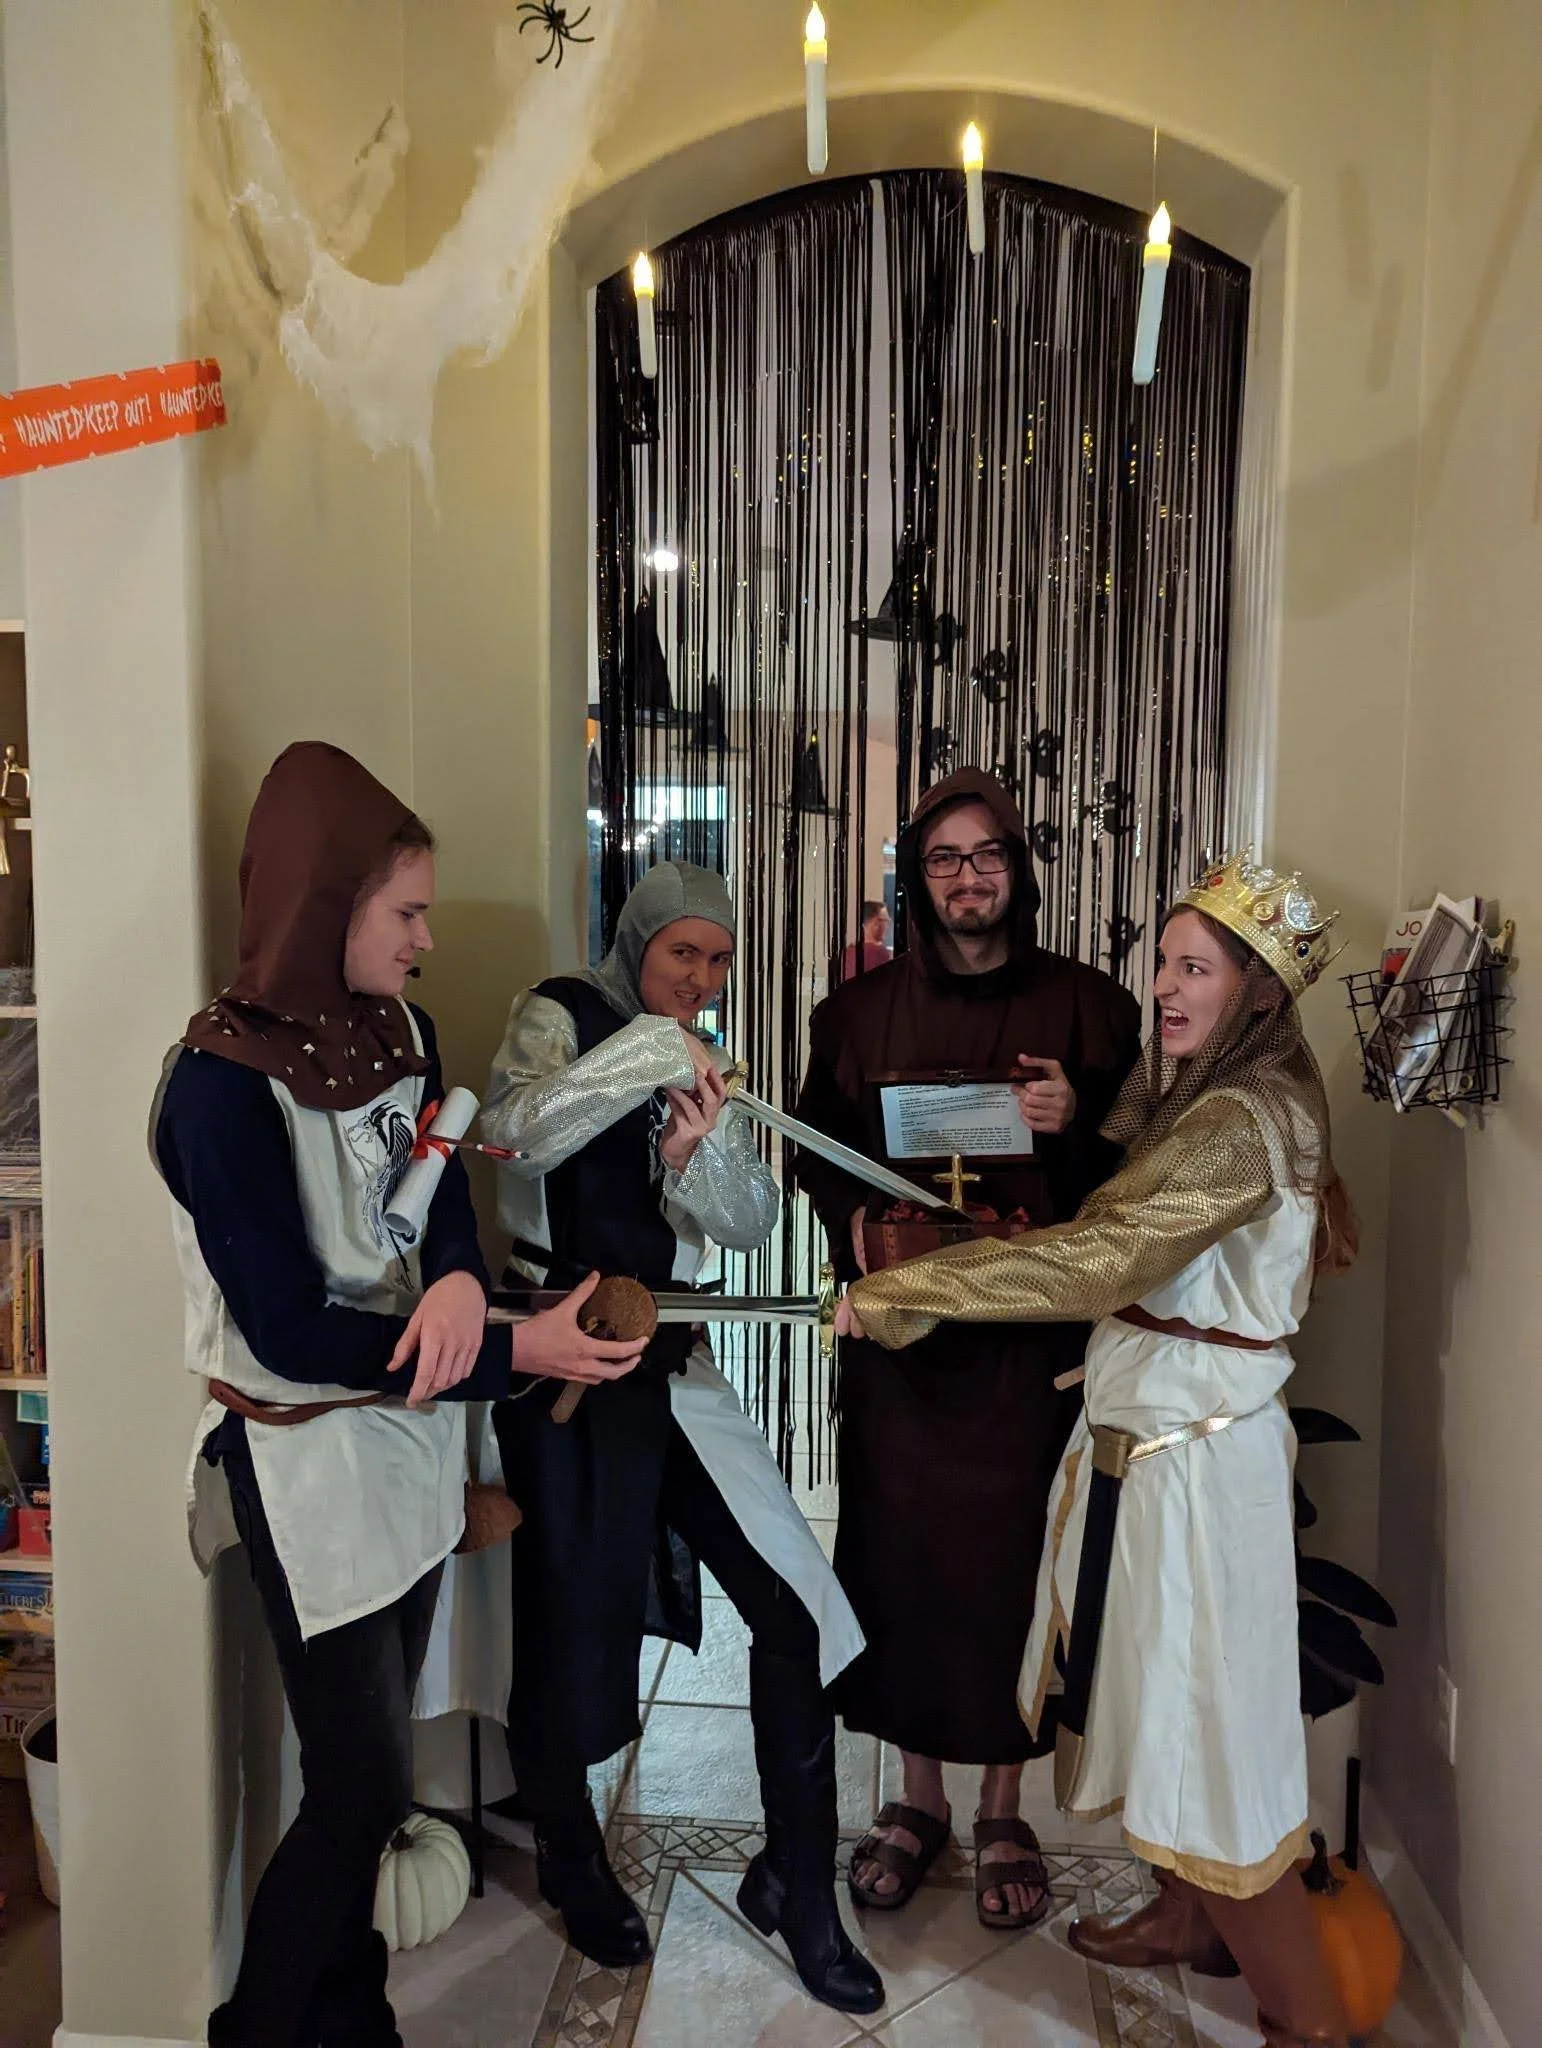
The box for the Holy Hand Grenade (complete with the script for “The Book of Armaments 2:9-21”)
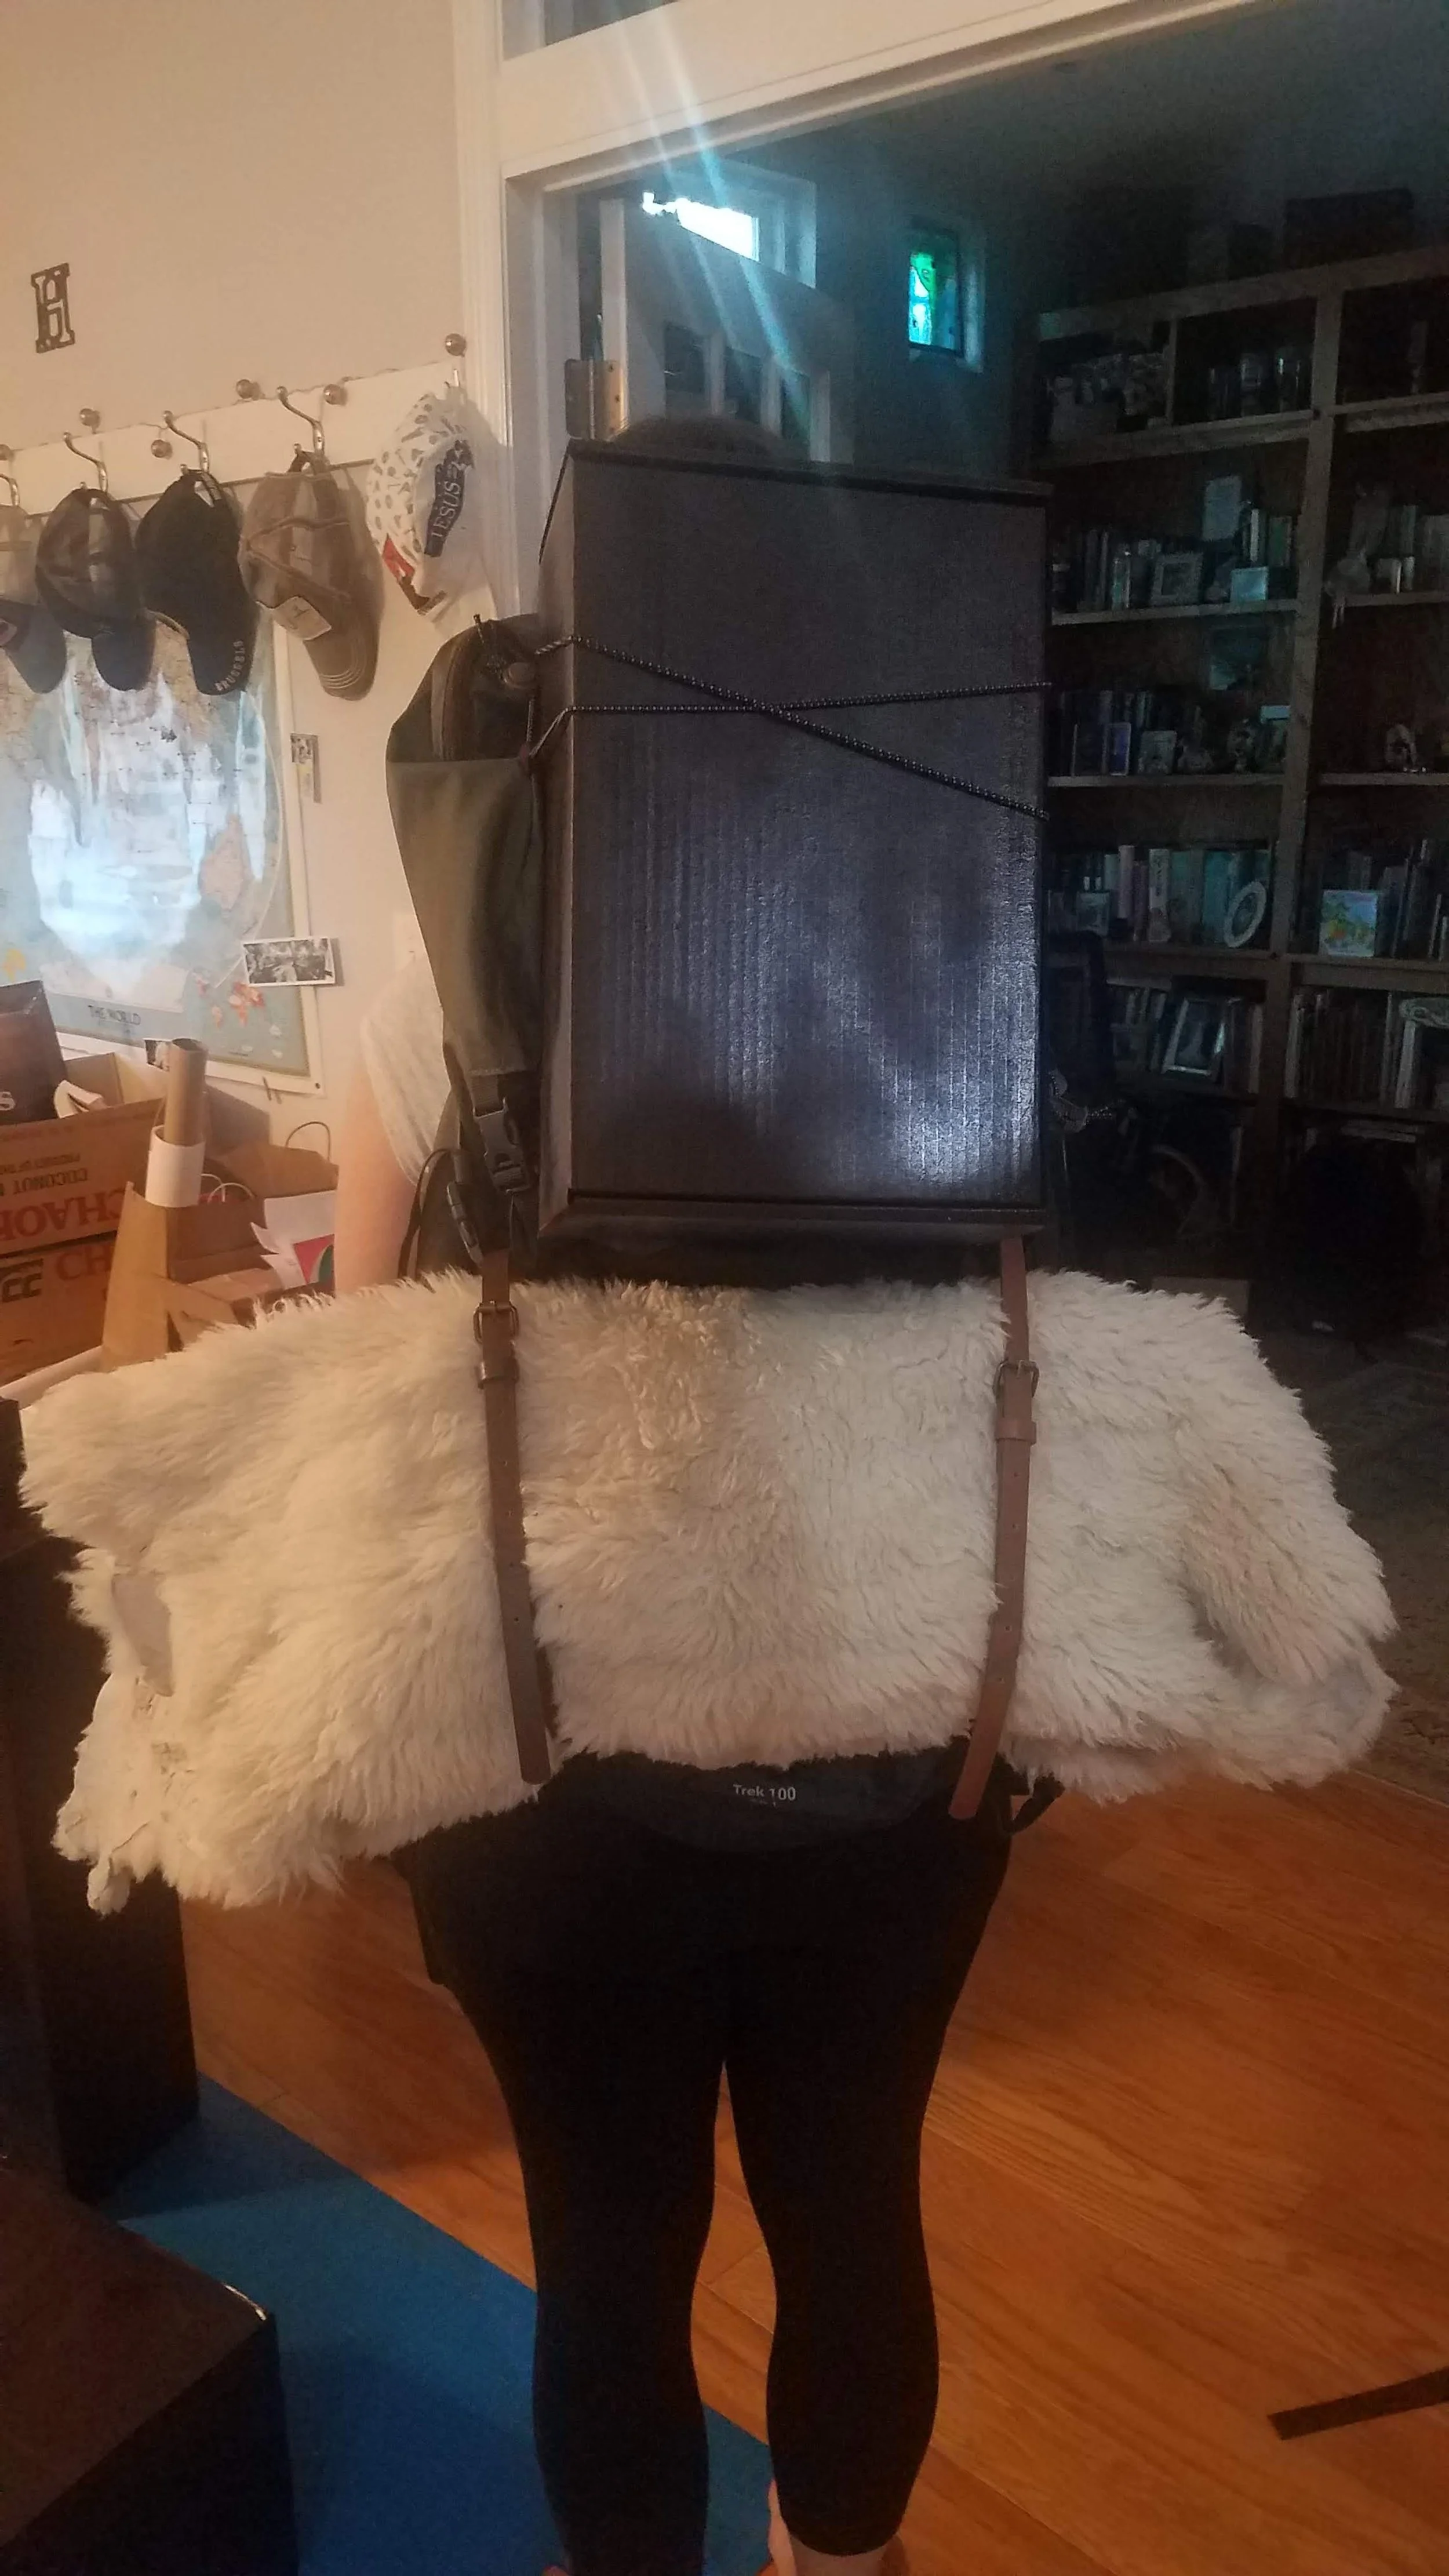
Assembling the other backpack
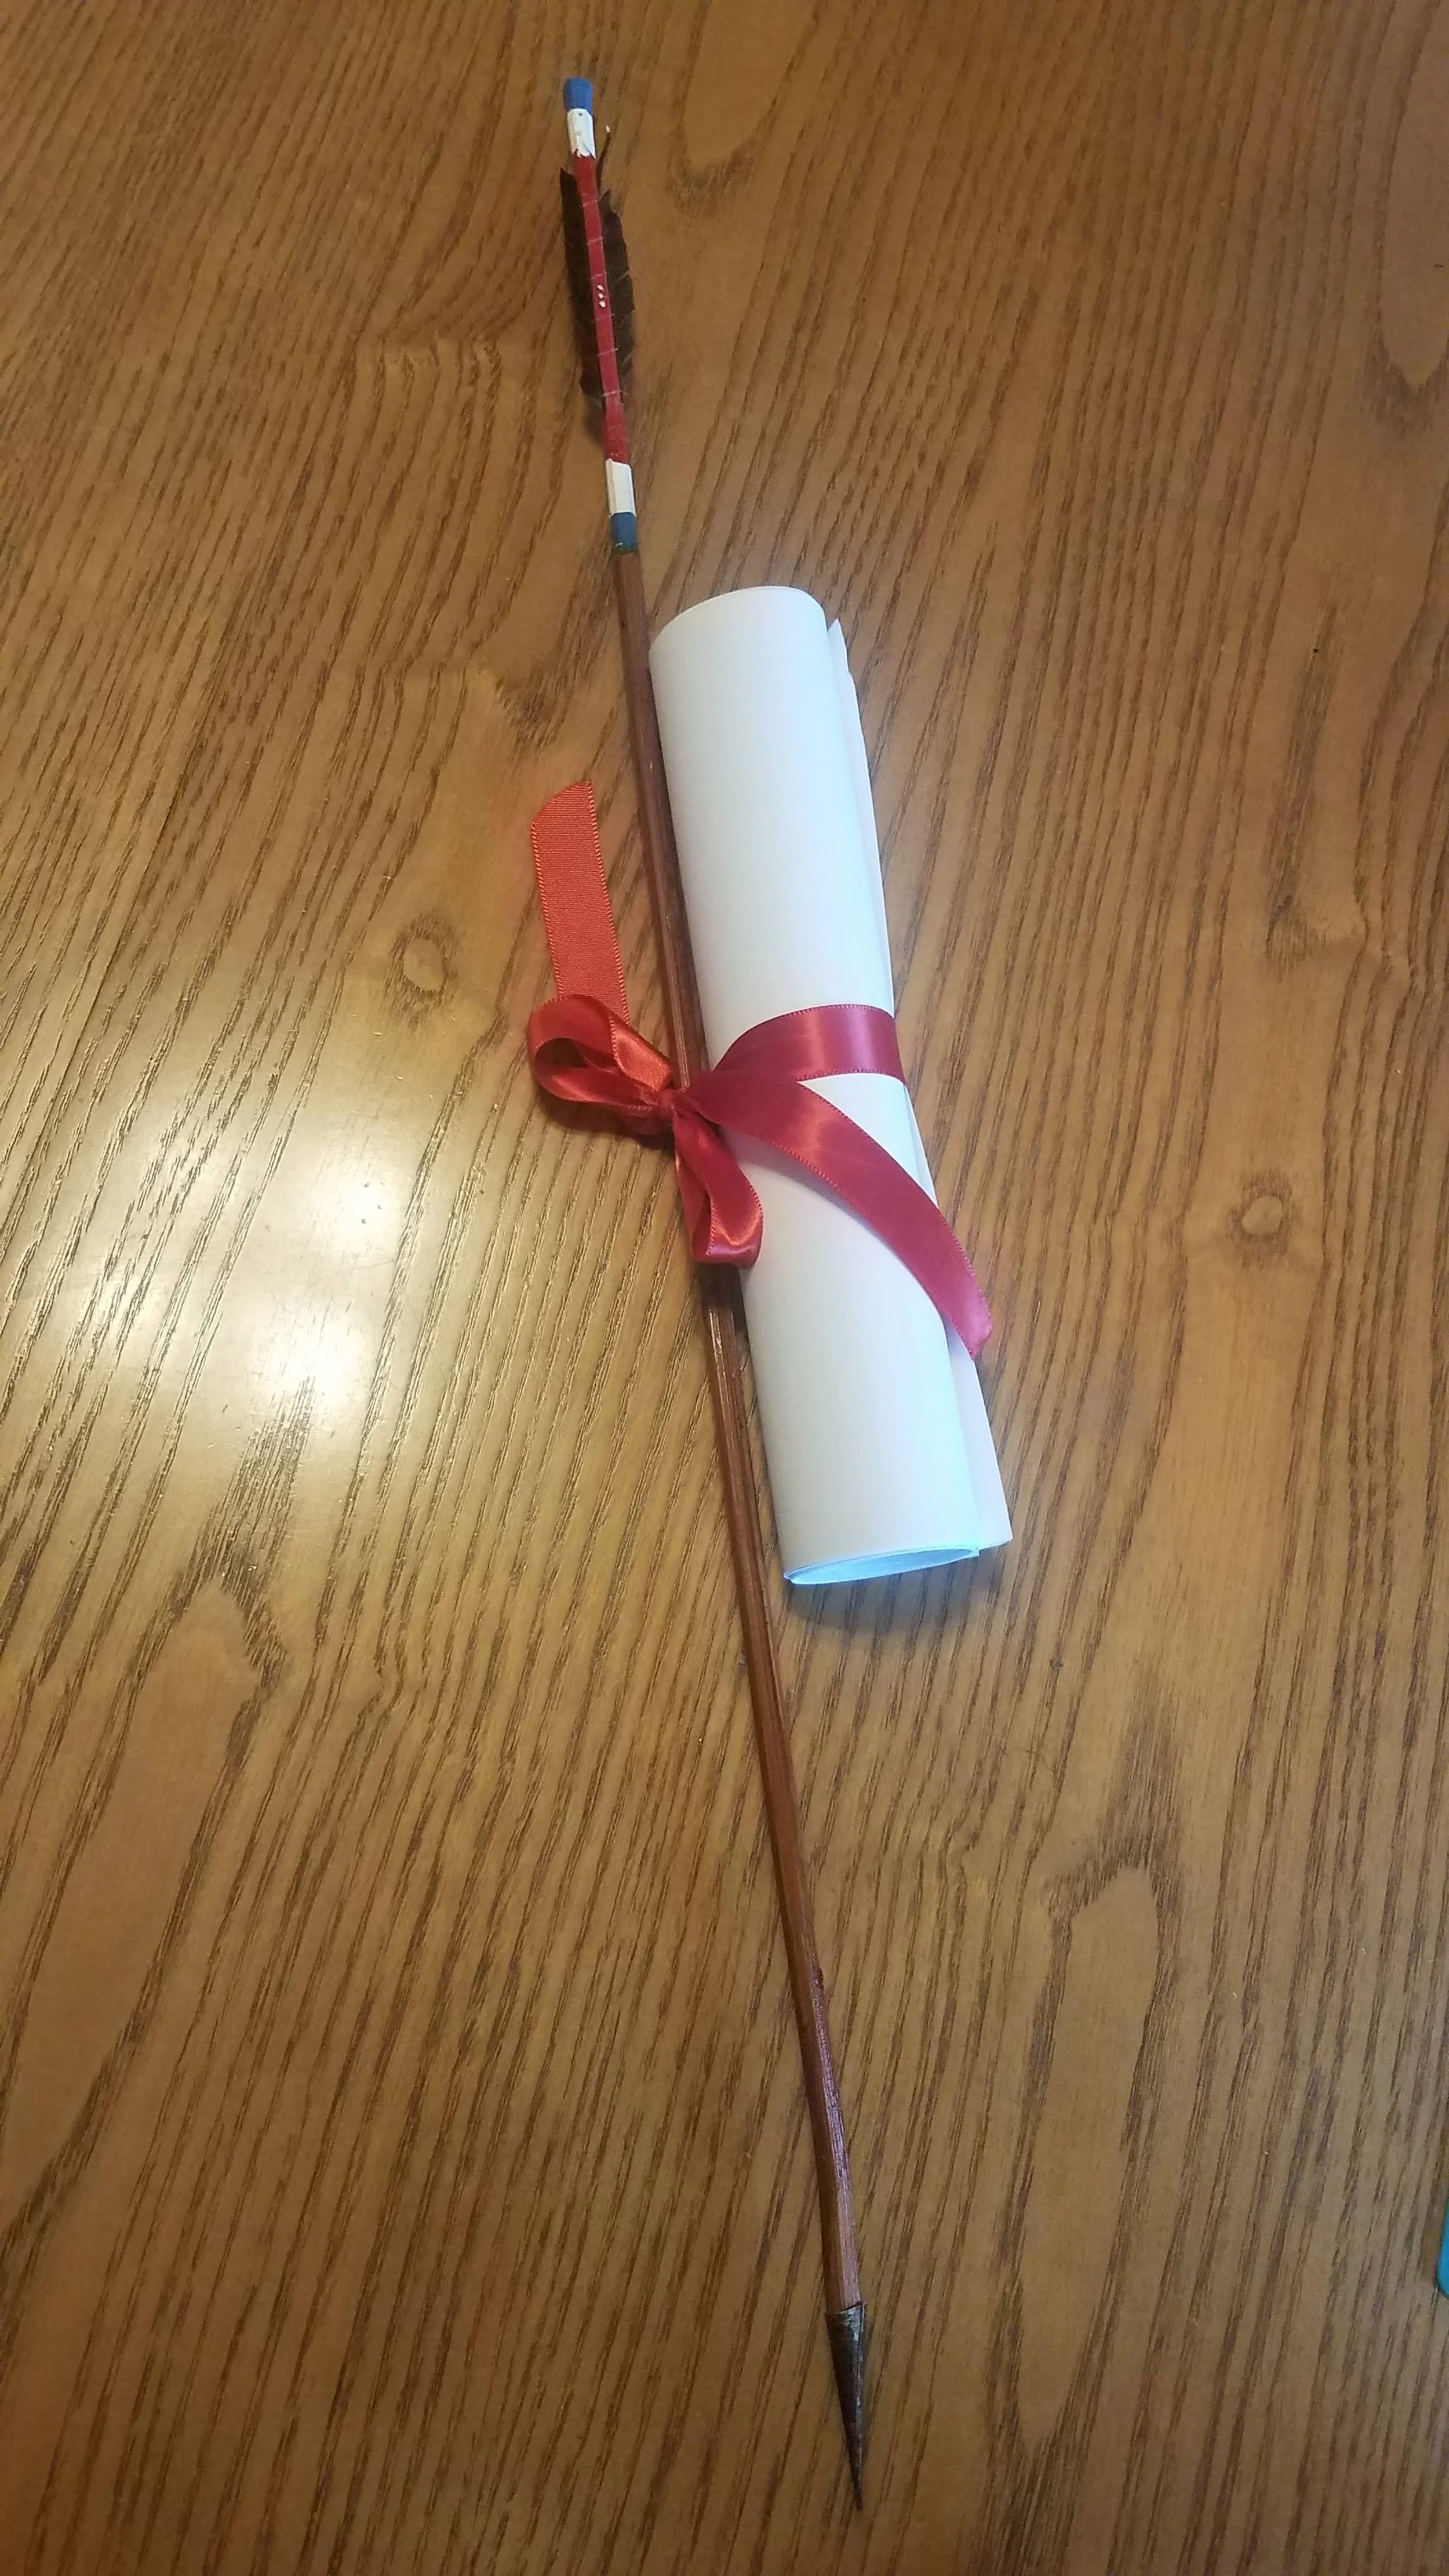
final prop: the message Concorde is shot with (in this case the best quotes from the movie)
Then we all put on our costumes, grabbed all the props and headed off to party #1 at a mutual friend’s house. Meghan, unfortunately worked late so wouldn’t meet us until party #2. However, Krista’s fiancé Ian met us at the first party dressed as a monk and he was tasked with carrying the Holy Hand Grenade. After hanging out at the first party for about an hour, we said our goodbyes and texted Meghan to meet us at the Cloak & Blaster.

L to R: Concorde, Sir Lancelot, Brother Maynard, & King Arthur
Posing “dramatically”

Lots of yummy Halloween treats at the first party
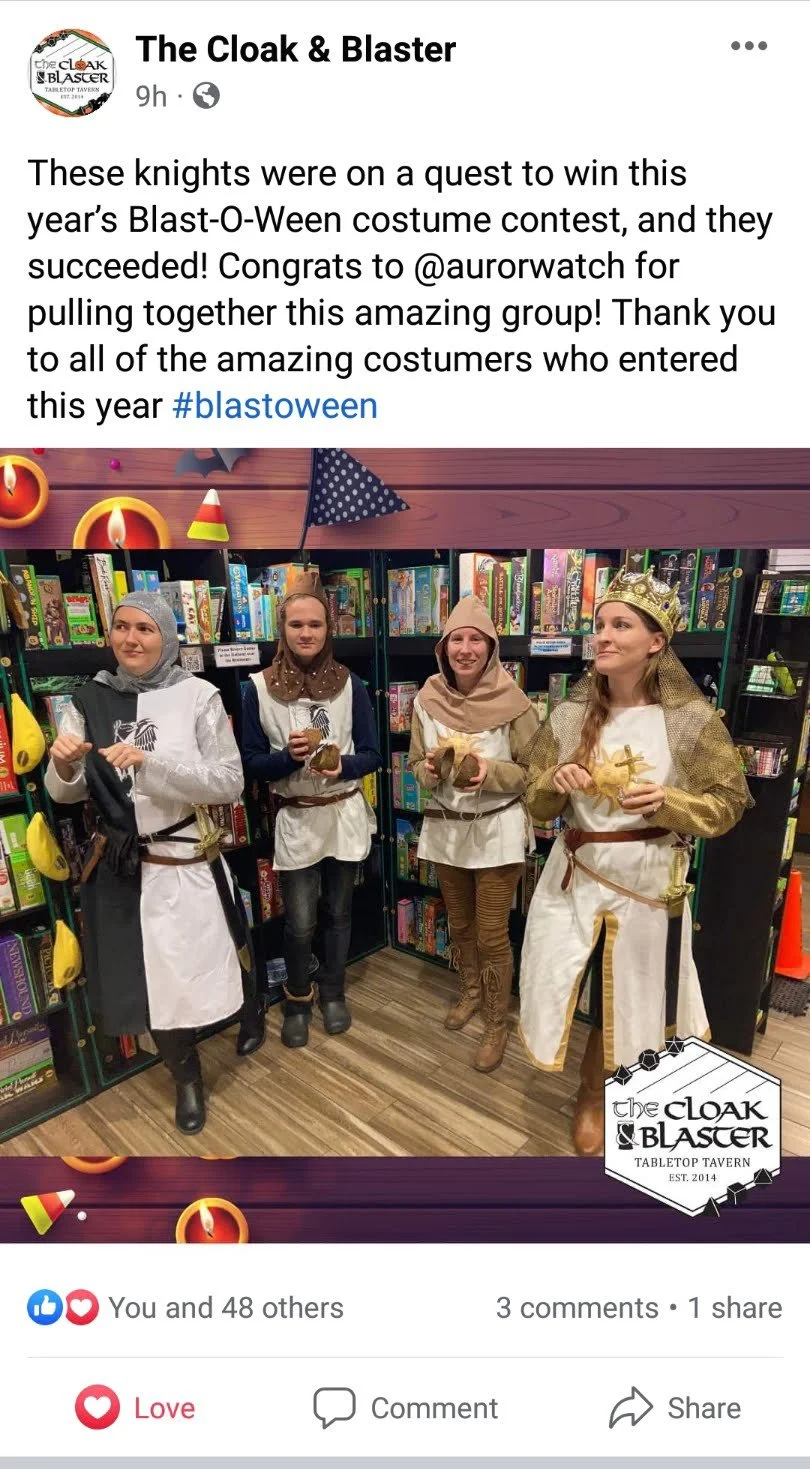
The Cloak & Blaster is a local table-top-gaming tavern that offers great themed food and drink and also board games that tables can rent. They have an annual “Blast-O-Ween” event where lots of people show up in costume and enjoy the spooky atmosphere. We entered their costume contest and then settled into our seats to eat, drink, and play a round or two of the Oregon Trail board game. A fun night was had by all!

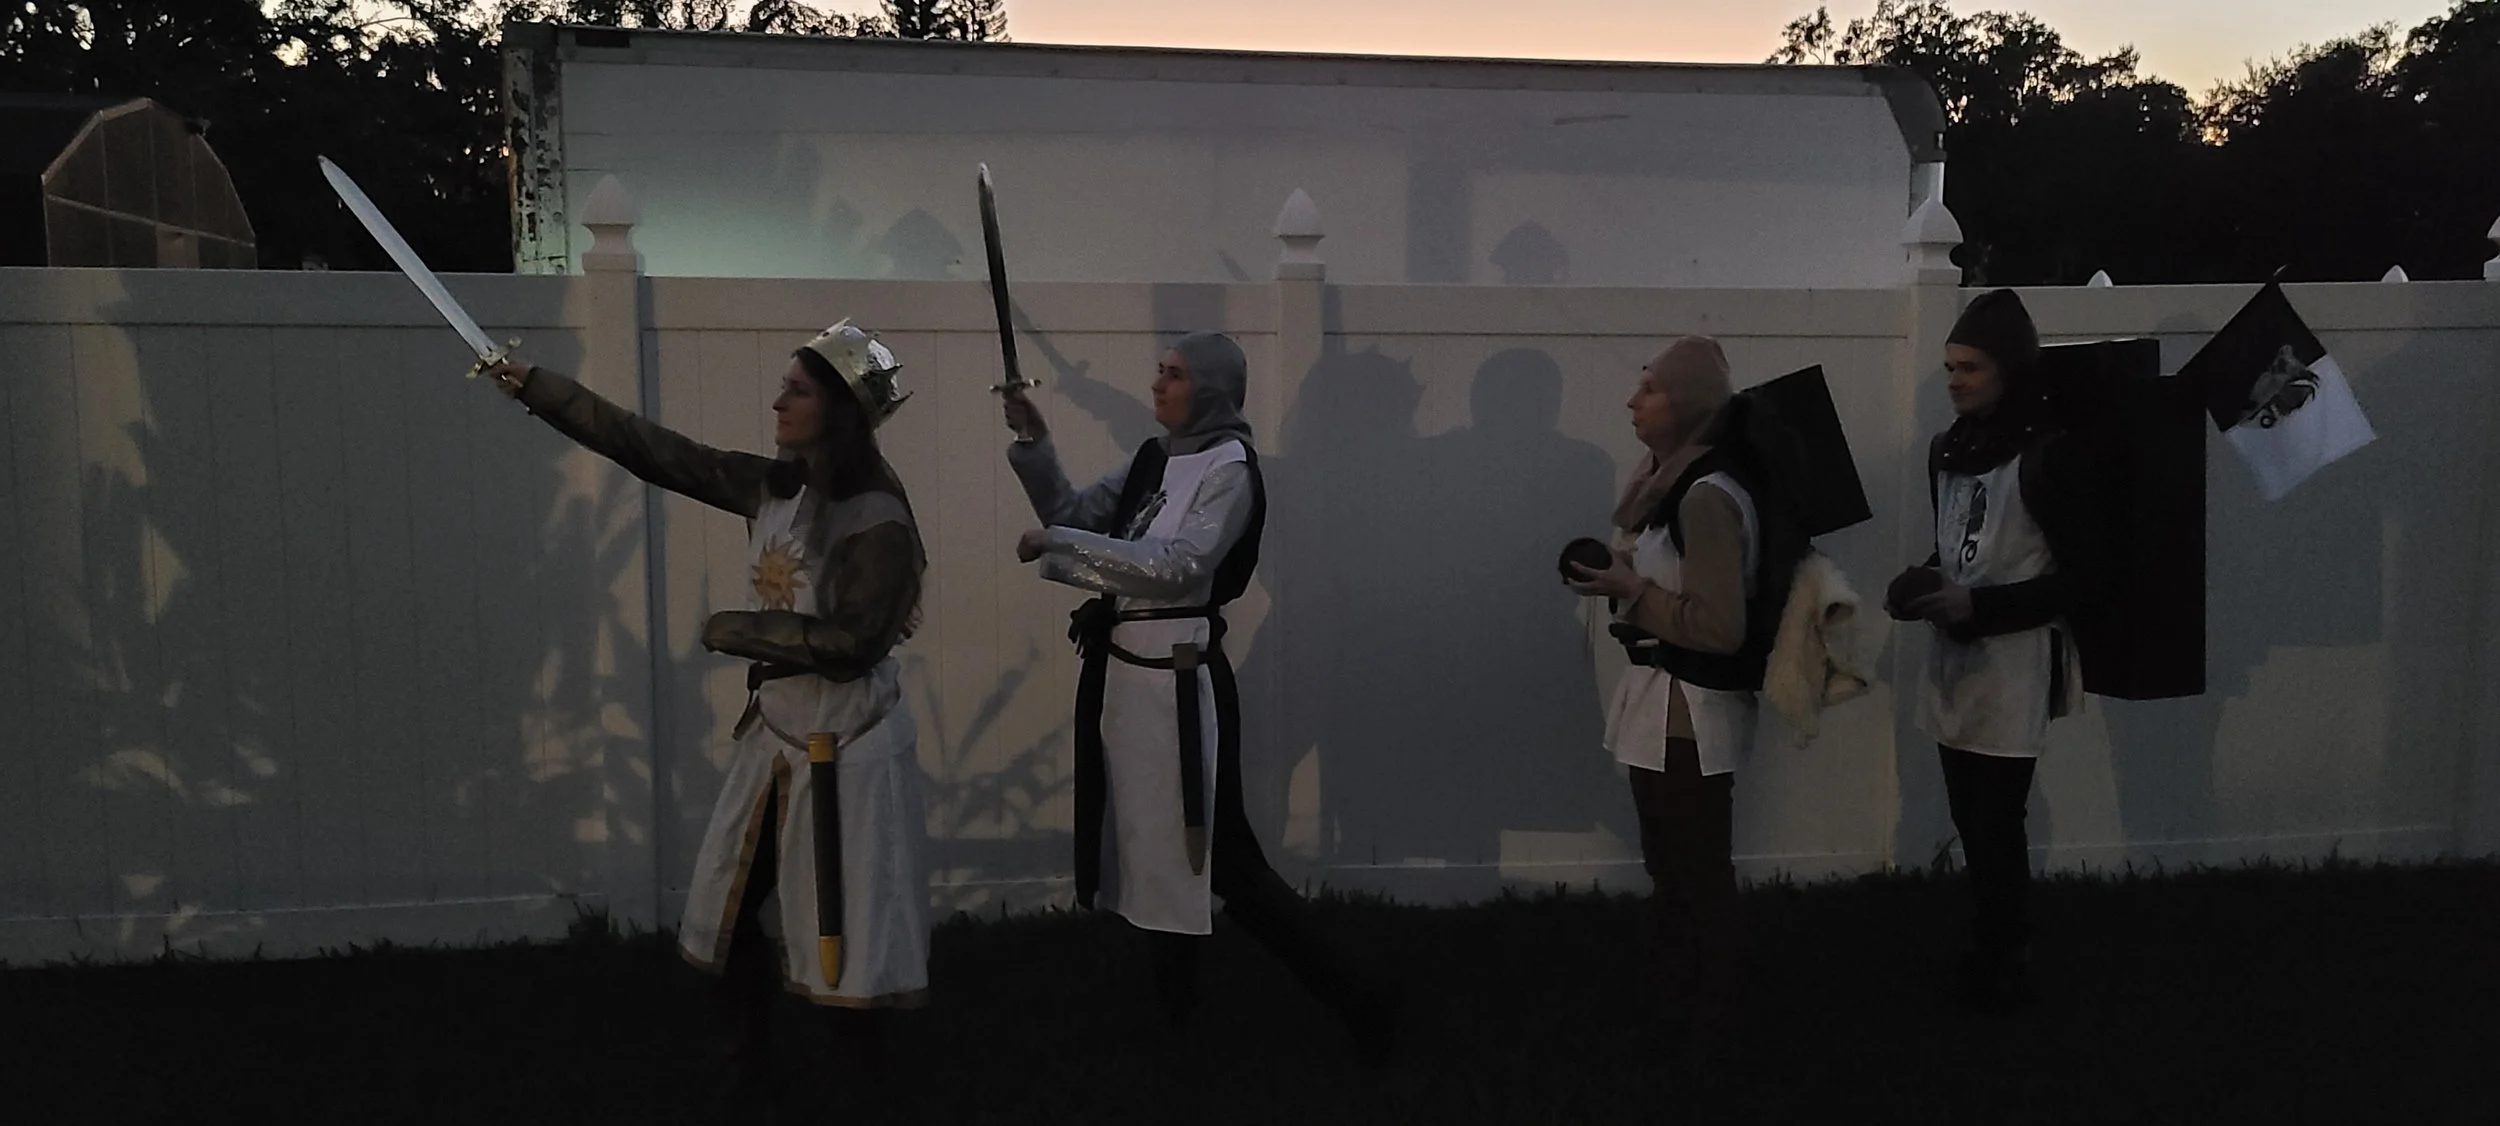
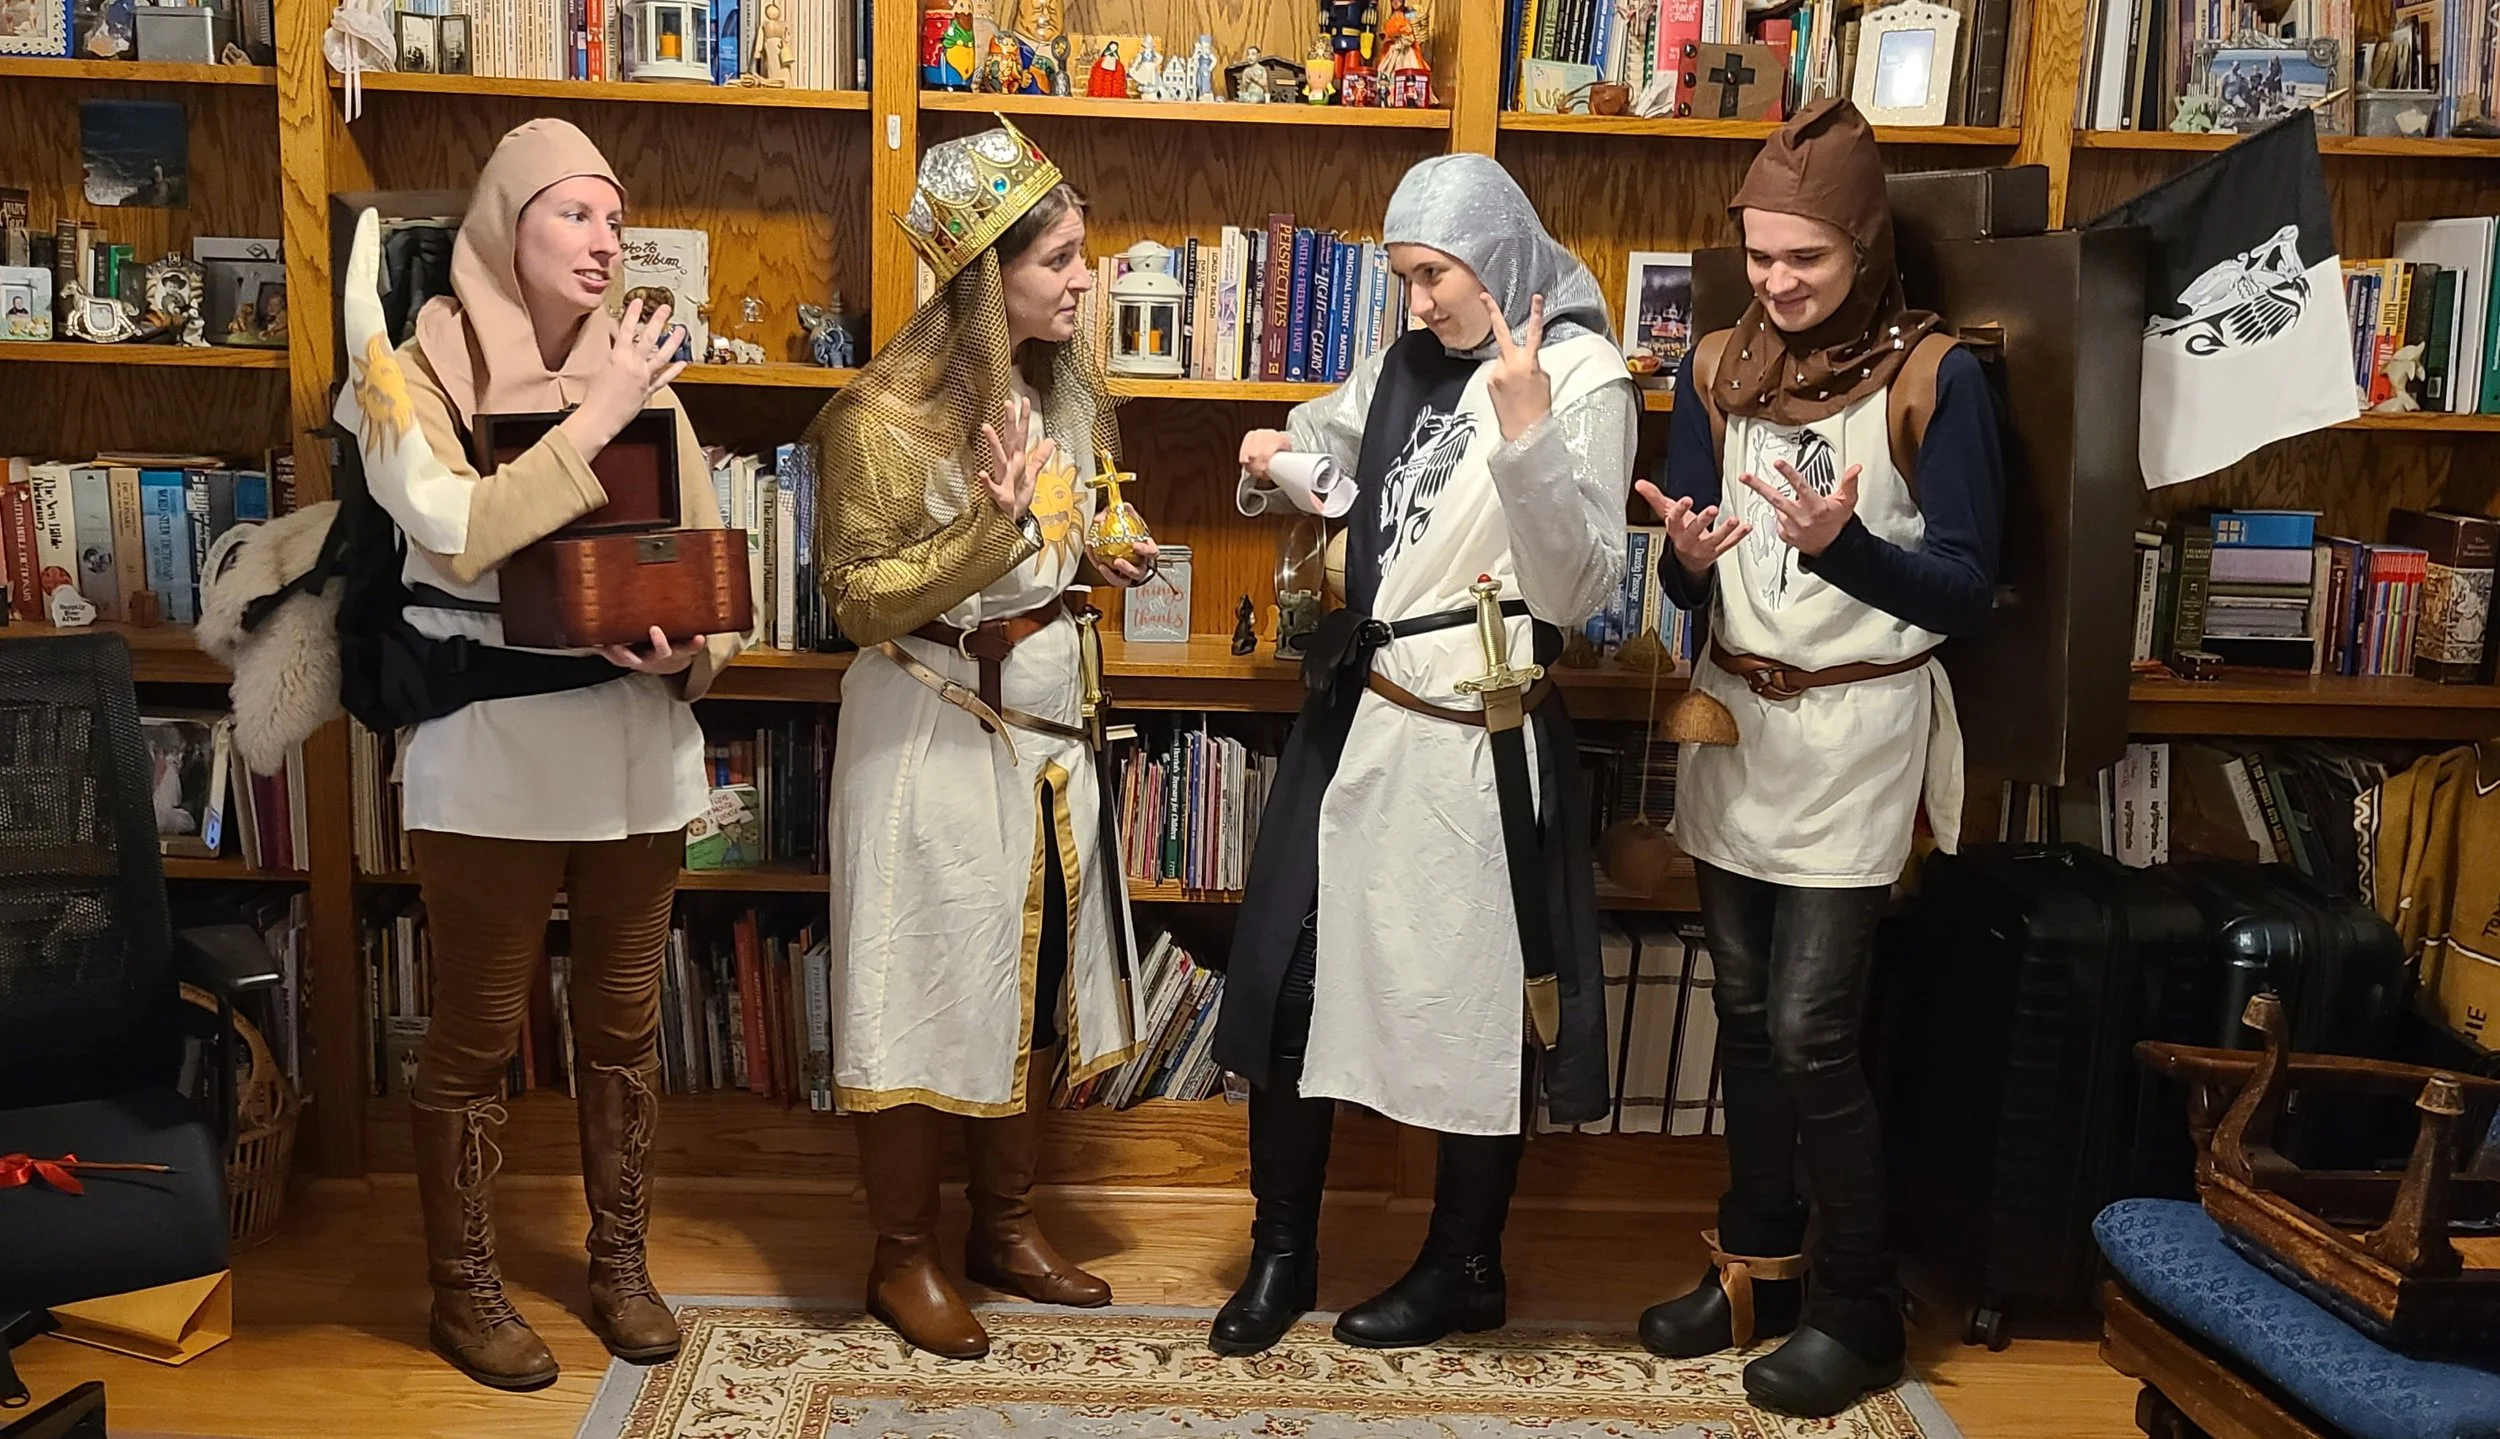
L to R: Sir Lancelot, Concorde, Patsy, & King Arthur posing for our costume contest entry

More delicious food & drinks + board games galore at the Cloak & Blaster
The next event was Monday night, Halloween itself where we gathered to take some photos of our costumes for social media before going “trick-or-treating” at all the local food places that offered free goodies for people in costume. After last year’s trial and error, we determined the best places to go this year were Jeremiah’s Italian Ice and Insomnia Cookies. After collecting our treats, we each returned home with full stomachs.

King Arthur & his loyal servant Patsy
On a quest to seek the Holy Grail
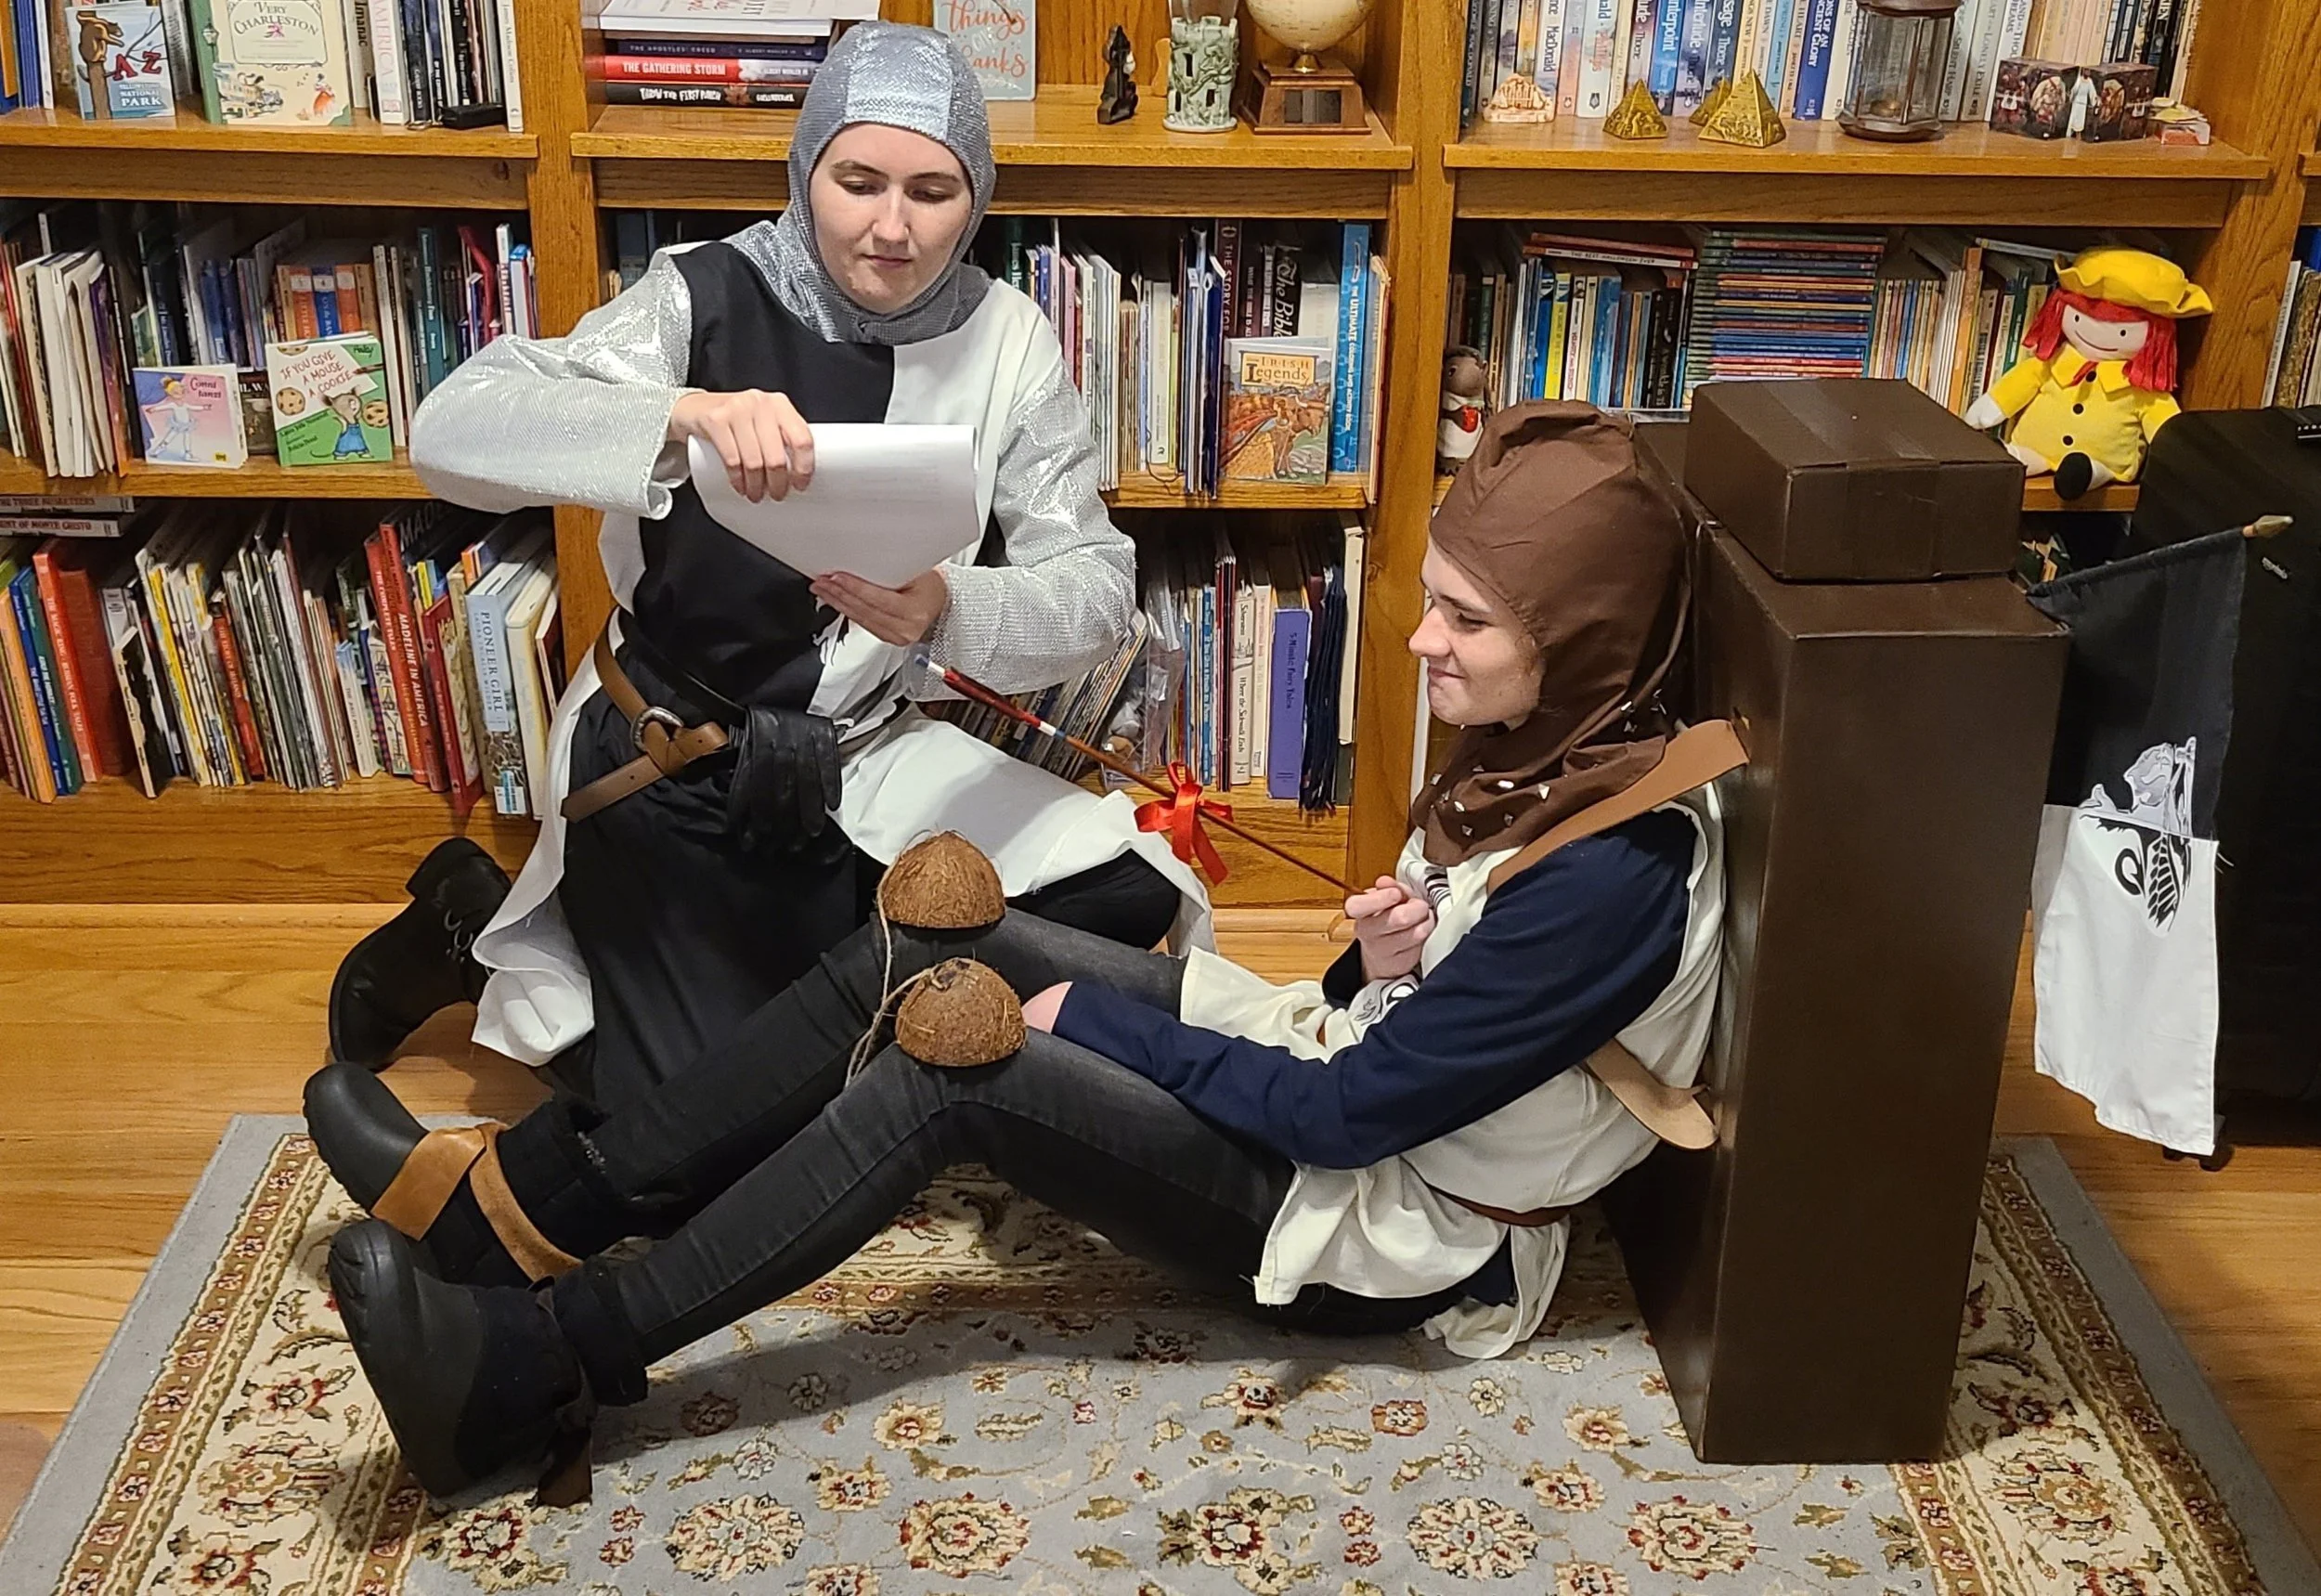
Sir Lancelot reading a message shot from an arrow that “killed” Concorde
Trying to count down the Holy Hand Grenade of Antioch
Overall, this was a very successful Halloween! My sewing skills improve year after year as I continuously learn new techniques for creating costumes. These costumes (like all my previous ones) will most likely get used again at various conventions next year. I’m happy our group finally dressed up as characters from Monty Python & the Quest for the Holy Grail and that they turned out so well! We received tons of compliments and even won the costume contest! Now I can relax for a few months before thinking about what to sew next year.
Happy Halloween! Until next time: “My name is Sir Lancelot, my quest is to seek the Holy Grail, and my favorite color is blue.” “What is the airspeed velocity of an unladen swallow?” “What do you mean, an African or European swallow?”
Charge!
Riding off into the sunset